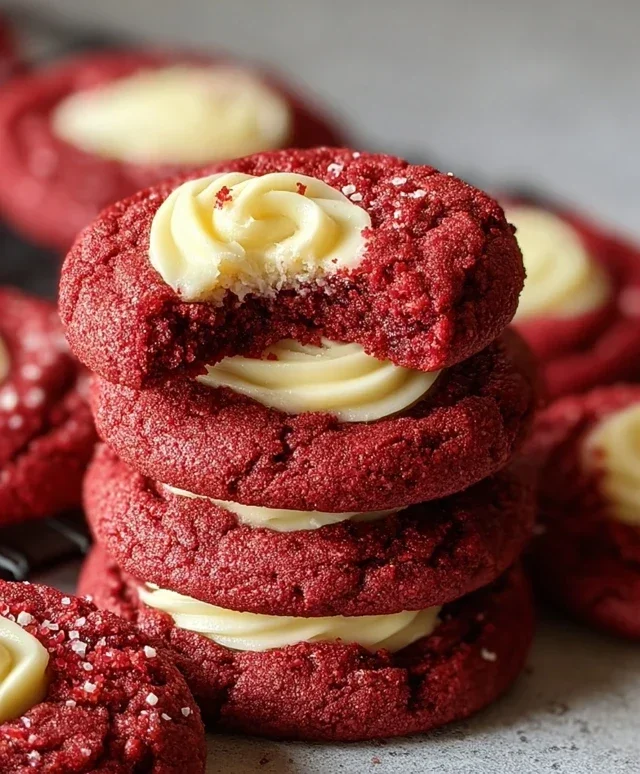
Cream Cheese Red Velvet Cookies-Easy & Delicious
Cream Cheese Red Velvet Cookies are an absolute showstopper, and I’m so excited to share this recipe with you! If you’ve ever fallen for the irresistible allure of red velvet cake, you’re going to adore these cookies. They perfectly capture that beloved deep crimson hue and the distinct, slightly tangy chocolate flavor that makes red velvet so iconic. But what truly sets these apart, and why they’ve become a personal favorite, is the glorious addition of cream cheese. This isn’t just any cookie; it’s a sophisticated treat that balances richness with a delightful tang, making each bite an experience. Imagin extracte a cookie that’s soft, chewy, and bursting with that classic red velvet essence, all elevated by the creamy, dreamy goodness of cream cheese. Get ready to impress yourself and everyone lucky enough to snag one of these delightful Cream Cheese Red Velvet Cookies.
Cream Cheese Red Velvet Cookies
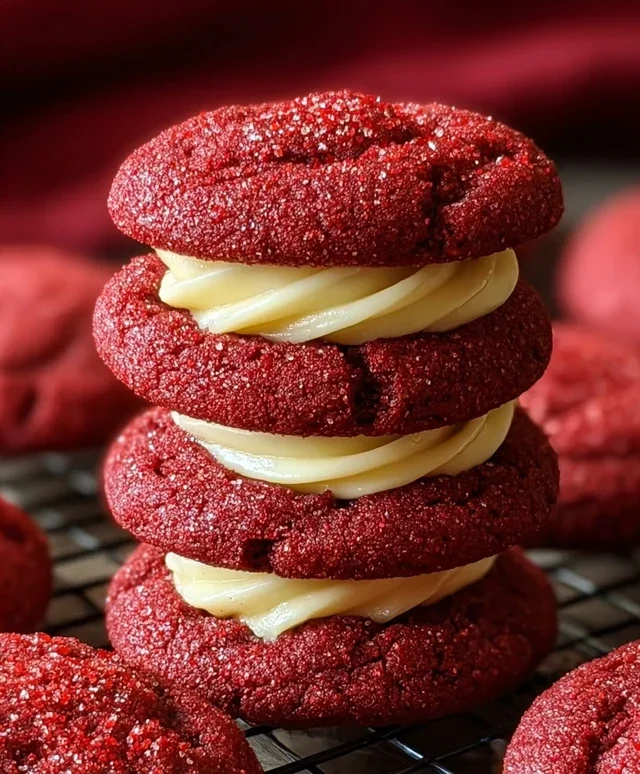
There’s something undeniably magical about red velvet. It’s rich, it’s decadent, and the vibrant color just screams celebration. And when you take those beloved red velvet flavors and transform them into chewy, delightful cookies, well, that’s a party in your mouth! These Cream Cheese Red Velvet Cookies are my absolute go-to for holidays, birthdays, or honestly, just any day that needs a little extra sparkle. The secret to their incredible texture and flavor is a touch of cream cheese swirled right into the cookie dough, creating a wonderfully tender crum extractb and a subtle tang that perfectly balances the sweetness. Get ready to impress yourself and anyone lucky enough to snag one of these beauties.
Ingredients:
Instructions:
1.
Prepare the Dry Ingredients:
In a medium-sized bowl, whisk together the all-purpose flour, unsweetened cocoa powder, baking powder, and salt. Whisking these ingredients ensures they are evenly distributed, which is key for consistent leavening and flavor throughout your cookies. Set this bowl aside. This step might seem simple, but it’s a crucial foundation for perfect cookies. A good whisking prevents pockets of baking powder or cocoa, leading to an even bake and a delightful texture.
2.
Cream the Butter and Sugar, then Add Wet Ingredients:
In a large mixing bowl, using an electric mixer (or a sturdy whisk and some elbow grease!), cream together the softened unsalted butter and granulated sugar until light and fluffy. This process incorporates air into the mixture, which helps with the cookie’s texture. Next, beat in the large egg and 1 teaspoon of vanilla extract until well combined. Now comes the vibrant part! Add the 1 tablespoon of red food coloring. Mix thoroughly until the batter is a uniform, brilliant red. Be sure to scrape down the sides of the bowl as needed to ensure all the ingredients are fully incorporated. For an intense red, I highly recommend using gel food coloring, as liquid food coloring can sometimes dilute the batter too much.
3.
Incorporate the Cream Cheese Swirl:
In a separate small bowl, beat the softened cream cheese with the powdered sugar and the remaining 1/2 teaspoon of vanilla extract until smooth and creamy. This will be our luscious cream cheese swirl. You want it to be well combined and free of lumps. Once your red velvet dough is ready (we’ll combine the dry and wet in the next step), we’ll gently swirl this cream cheese mixture in. This isn’t about fully blending it, but rather creating beautiful ribbons of cream cheese goodness throughout the red velvet cookie.
4.
Combine and Swirl the Doughs:
Gradually add the dry ingredient mixture from step 1 to the wet ingredients from step 2, mixing on low speed until just combined. Be careful not to overmix the dough, as this can lead to tough cookies. Overmixing develops the gluten in the flour too much. Now, gently dollop spoonfuls of the cream cheese mixture over the red velvet dough. Using a butter knife or a skewer, gently swirl the cream cheese into the red velvet dough. Aim for marbled streaks rather than a completely blended mixture. This is where the visual magic happens, creating those beautiful creamy pockets in every bite.
5.
Chill, Scoop, and Bake:
Cover the bowl with plastic wrap and refrigerate the dough for at least 30 minutes. This chilling step is essential! It firms up the butter, which prevents the cookies from spreading too much in the oven, ensuring they maintain a nice, thick shape. Once chilled, preheat your oven to 350°F (175°C) and line baking sheets with parchment paper. Scoop rounded tablespoons of the dough onto the prepared baking sheets, leaving about 2 inches between cookies. Bake for 9-12 minutes, or until the edges are set but the centers still look slightly soft. They will continue to set up as they cool. Let the cookies cool on the baking sheets for a few minutes before transferring them to a wire rack to cool completely. Enjoy these delightful treats!
Conclusion:
These Cream Cheese Red Velvet Cookies are a true showstopper, perfect for holidays, special occasions, or just when you’re craving a decadent treat. The delightful combination of tangy cream cheese and rich, moist red velvet cake creates a flavor profile that’s both comforting and sophisticated. They’re incredibly easy to make, promising a delightful baking experience and even more delightful results. The beautiful crimson hue makes them visually stunning, and the soft, chewy texture with a hint of tang from the cream cheese is utterly irresistible. I truly hope you’ll give these a try – they’re guaranteed to become a new favorite!
Serving Suggestions: These cookies are fantastic on their own, but they truly shine when served with a glass of cold milk. They also make a wonderful addition to any dessert platter or cookie exchange. For an extra touch of indulgence, consider sandwiching two cookies together with a dollop of extra cream cheese frosting or a swirl of whipped cream.
Variations: Feel free to experiment with these cookies! You can add white chocolate chips for a sweet contrast, chopped pecans or walnuts for added crunch, or even a sprinkle of festive edible glitter on top. A touch of almond extract can also add a lovely depth of flavor.
Frequently Asked Questions:
Why are my red velvet cookies not red enough?
The vibrancy of red velvet can vary depending on the brand of food coloring you use and the cocoa powder. For a more intense red, ensure you’re using a good quality gel food coloring, as liquid versions can dilute the color. You might also need to use a bit more than the recipe suggests, adding it gradually until you achieve your desired shade.
Can I make these Cream Cheese Red Velvet Cookies ahead of time?
Absolutely! These cookies store beautifully. Once completely cooled, place them in an airtight container at room temperature for up to 3 days. For longer storage, you can freeze them in a single layer on a baking sheet until firm, then transfer them to a freezer-safe bag or container for up to 2 months. Thaw at room temperature before serving.
Cream Cheese Red Velvet Cookies
Deliciously soft and chewy red velvet cookies with a creamy cream cheese swirl, perfect for any occasion.
Ingredients
-
1 1/4 cups all-purpose flour
-
1/4 cup cocoa powder
-
1 tsp baking powder
-
1/4 tsp salt
-
1/2 cup unsalted butter, softened
-
3/4 cup granulated sugar
-
1 large egg
-
1 tsp vanilla extract
-
1 tbsp red food coloring
-
4 oz cream cheese, softened
-
1/4 cup powdered sugar
-
1/2 tsp vanilla extract
Instructions
-
Step 1
In a medium bowl, whisk together the flour, cocoa powder, baking powder, and salt. Set aside. -
Step 2
In a large bowl, cream together the softened butter and granulated sugar until light and fluffy. Beat in the egg and 1 tsp vanilla extract. -
Step 3
Add the red food coloring to the butter mixture and mix until well combined. Gradually add the dry ingredients to the wet ingredients, mixing until just combined. -
Step 4
In a separate small bowl, beat together the softened cream cheese, powdered sugar, and 1/2 tsp vanilla extract until smooth. -
Step 5
Drop rounded tablespoons of red velvet cookie dough onto a baking sheet lined with parchment paper. Dollop small amounts of the cream cheese mixture onto each cookie dough ball and swirl gently with a toothpick. -
Step 6
Bake for 10-12 minutes, or until the edges are set and the centers are still slightly soft. Let cool on the baking sheet for a few minutes before transferring to a wire rack to cool completely.
Important Information
Nutrition Facts (Per Serving)
It is important to consider this information as approximate and not to use it as definitive health advice.
Allergy Information
Please check ingredients for potential allergens and consult a health professional if in doubt.