Zero Carb Yogurt Bread – Smart Low Carb Recipe
Zero carb yogurt bread recipe: Smart bread is here to revolutionize your low-carb kitchen! If you’ve been missing the comforting embrace of a freshly baked slice of bread, but feel held back by carb counts, then prepare to be amazed. This zero carb yogurt bread recipe is the ultimate solution, offering that satisfying chew and delightful aroma without derailing your dietary goals. Imagin extracte spreading your favorite butter or topping it with avocado, knowing you’re indulgin extractg in something truly guilt-free. What makes this smart bread so special is its incredible simplicity and the magical way yogurt transforms humble ingredients into a tender, flavorful loaf. It’s proof that delicious, satisfying bread can indeed exist in a zero carb world.
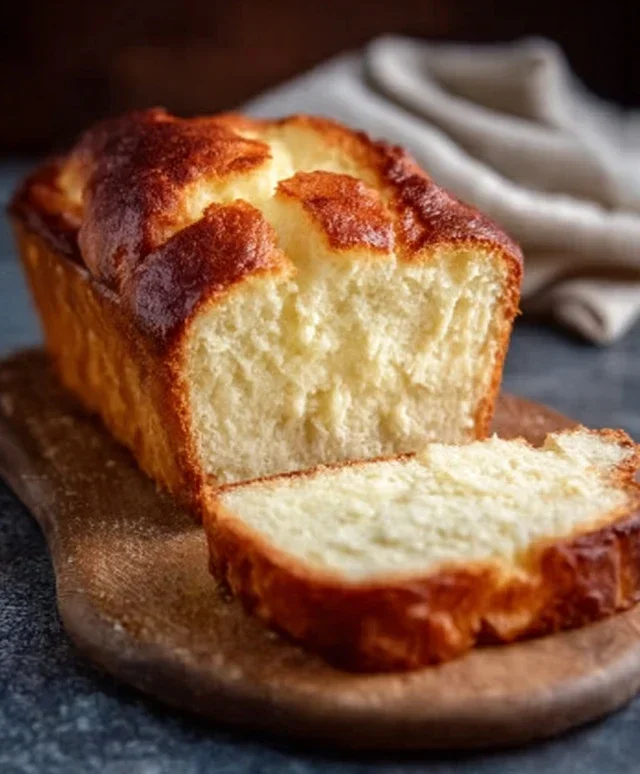
Zero Carb Yogurt Bread Recipe : Smart Bread
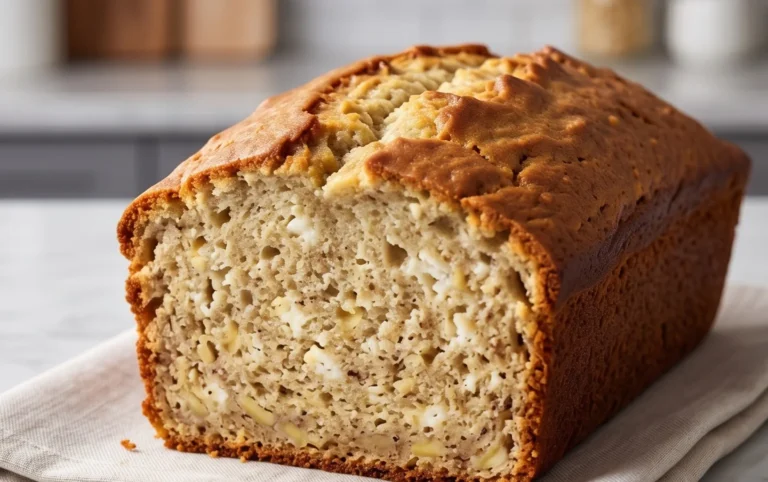
Welcome to a revolutionary way to enjoy bread on a zero-carb journey! This “Smart Bread” recipe is not just about being carb-free; it’s about delivering a surprisingly satisfying, fluffy, and delicious loaf that you can feel truly good about. Forget the dense, crum extractbly textures often associated with low-carb baking. This recipe leverages the power of simple, whole ingredients to create a versatile bread that’s perfect for toasting, sandwiches, or simply enjoying on its own. I’ve been experimenting with various zero-carb bread recipes, and this one has truly become a staple in my kitchen. It’s incredibly easy to make, requiring no fancy techniques or equipment, and the results are consistently impressive. Let’s dive into creating this guilt-free delight!
Ingredients:
Cooking Instructions:
This bread comes together quickly, making it ideal for those busy days when you crave something comforting and delicious without the carb guilt. The key to its success lies in the combination of eggs for structure and richness, Greek yogurt for moisture and a subtle tang, and a touch of leavening for that essential lift.
Preparation: Getting Started
The first step is to preheat your oven to 350°F (175°C). This ensures that your bread bakes evenly from the moment it hits the oven. Next, prepare your baking vessel. I find a standard loaf pan (approximately 8.5 x 4.5 inches) works best for this recipe. You can grease it generously with butter or coconut oil, or line it with parchment paper. Using parchment paper makes removing the bread from the pan a breeze and simplifies cleanup, which is always a win in my book. If you’re using parchment, allow some overhang on the sides to create a natural sling, making it even easier to lift the baked bread out.
Step 1: Whisking the Wet Ingredients
In a large mixing bowl, crack all 6 of your large eggs. We’re going to whisk these eggs thoroughly. You want them to be well combined and slightly frothy, which will help incorporate air into the batter. This aeration is crucial for a lighter texture. Once the eggs are well whisked, add the ½ cup of full-fat, unsweetened, plain Greek yogurt. The yogurt adds moisture, a pleasingly subtle tang, and contributes to the bread’s tender crum extractb. It’s important to use full-fat yogurt for the best texture and flavor; lighter versions might affect the outcome. Gently fold the yogurt into the eggs until it’s just combined. Overmixing at this stage isn’t necessary and can sometimes lead to a tougher bread.
Step 2: Incorporating the Fat and Seasoning
Now, it’s time to add the ¼ cup of melted butter or coconut oil. I often opt for butter for its rich flavor, but coconut oil is a fantastic dairy-free alternative that also works beautifully. Ensure your butter or oil is melted but not hot, as you don’t want to cook the eggs prematurely. Pour it into the egg and yogurt mixture. At this point, also add the ¼ teaspoon of salt. Salt is not just for flavor; it also plays a role in strengthening the structure of baked goods and enhancing other flavors. Stir these wet ingredients together until everything is smoothly incorporated.
Step 3: Adding the Dry Ingredients and Thickeners
This is where the magic of texture comes in. Add the 1 tablespoon of baking powder to the wet ingredients. I always recommend using aluminum-free baking powder if possible, as some people are sensitive to aluminum. Baking powder is your primary leavening agent, providing that essential lift to prevent a dense loaf. Next, add the ½ teaspoon of xanthan gum or psyllium husk powder. Both xanthan gum and psyllium husk are fantastic for providing structure and binding in gluten-free and low-carb baking. Xanthan gum creates a chewier texture, while psyllium husk tends to yield a more bread-like, slightly more crum extractbly texture. Choose the one you prefer or have on hand. If you’re using the optional ½ cup of finely ground almond flour, this is the moment to add it in. The almond flour adds a bit more substance and a lovely subtle nutty flavor without significantly impacting the carb count. Gently whisk or stir these dry ingredients into the wet mixture until just combined. Again, avoid overmixing. You want a smooth batter, but you don’t need to beat it vigorously. A few small lumps are perfectly fine.
Step 4: Pouring and Baking the Smart Bread
Pour your batter into the prepared loaf pan. You can use a spatula to ensure you scrape all the delicious batter from the bowl. Gently spread the batter evenly in the pan. Now, place the loaf pan into your preheated oven. Bake for approximately 30-40 minutes. The baking time can vary depending on your oven, so it’s important to keep an eye on it. The bread is done when it’s golden brown on top and a toothpick or skewer inserted into the center comes out clean. If the top starts browning too quickly before the inside is cooked, you can loosely tent it with aluminum foil.
Step 5: Cooling and Enjoying Your Zero Carb Bread
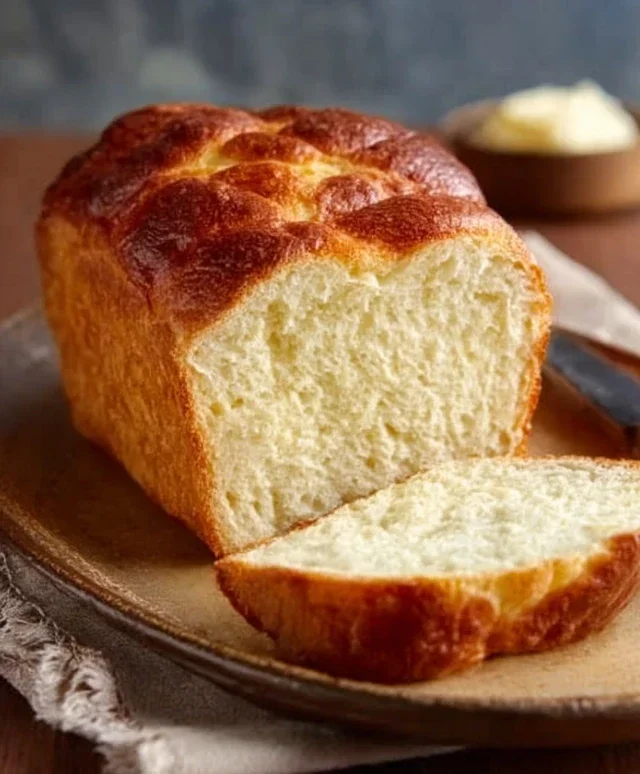
Once baked to perfection, carefully remove the loaf pan from the oven. Let the bread cool in the pan for about 10-15 minutes. This initial cooling period allows the bread to set and makes it easier to remove from the pan without breaking. After the initial cooling, carefully lift the bread out of the pan using the parchment paper overhang, or invert the pan onto a wire rack. Allow the bread to cool completely on the wire rack before slicing. This is a crucial step for achieving the best texture. Slicing warm bread can make it seem gummy or crum extractbly. Once fully cooled, slice and enjoy your incredible Zero Carb Yogurt Bread! It’s fantastic toasted with butter, avocado, or your favorite low-carb spread. Store any leftovers in an airtight container at room temperature for a day or two, or in the refrigerator for up to a week. You can also freeze slices for longer storage.
Conclusion:
And there you have it – your guide to making this incredibly satisfying Zero Carb Yogurt Bread Recipe! We’ve explored how this “Smart Bread” truly lives up to its name, offering a delicious and versatile alternative for those looking to significantly reduce their carbohydrate intake without sacrificing flavor or texture. Its simplicity and the minimal ingredient list make it an accessible option for bakers of all levels.
This bread is wonderfully adaptable. Enjoy it toasted with your favorite sugar-free spreads, as a base for savory open-faced sandwiches with avocado and smoked salmon, or even crum extractbled and used as a topping for salads. Don’t be afraid to experiment with herbs and spices like rosemary, chives, or a touch of garlic powder to elevate the taste even further. I highly encourage you to give this Zero Carb Yogurt Bread Recipe a try; you might just find it becomes a staple in your low-carb kitchen!
Frequently Asked Questions:
What makes this bread “Smart Bread”?
It’s considered “Smart Bread” because it’s designed to be extremely low in carbohydrates, making it an intelligent choice for ketogenic diets, low-carb lifestyles, or anyone aiming to minimize their carb consumption while still enjoying a bread-like experience. It utilizes ingredients that don’t spike blood sugar like traditional bread.
Can I make this recipe dairy-free?
While the yogurt is key to the moisture and texture, you could experiment with a thick, unsweetened dairy-free yogurt alternative, such as coconut yogurt or soy yogurt. The results might vary slightly in terms of density and flavor, so it’s worth a try if you have dietary restrictions.
How should I store the Zero Carb Yogurt Bread?
Once completely cooled, store the bread in an airtight container at room temperature for 2-3 days. For longer storage, wrap it tightly in plastic wrap and then aluminum foil, and keep it in the refrigerator for up to a week, or freeze slices for an even longer shelf life.
Zero Carb Yogurt Bread Recipe : Smart Bread
A simple and quick zero-carb bread recipe using Greek yogurt and eggs for a light and fluffy texture. Perfect for low-carb and keto diets.
Ingredients
-
6 large eggs
-
½ cup full-fat Greek yogurt (unsweetened, plain)
-
1 tablespoon baking powder (aluminum-free preferred)
-
¼ cup melted butter or coconut oil
-
¼ teaspoon salt
-
½ teaspoon xanthan gum
-
½ cup finely ground almond flour
Instructions
-
Step 1
Preheat your oven to 350°F (175°C) and grease and flour a loaf pan, or line with parchment paper. -
Step 2
In a large bowl, whisk together the 6 large eggs until well combined. -
Step 3
Add the ½ cup full-fat Greek yogurt, ¼ cup melted butter or coconut oil, and ¼ teaspoon salt to the eggs. Mix until smooth. -
Step 4
In a separate small bowl, whisk together the 1 tablespoon baking powder, ½ teaspoon xanthan gum, and ½ cup finely ground almond flour. -
Step 5
Gradually add the dry ingredients to the wet ingredients, mixing until just combined. Do not overmix. -
Step 6
Pour the batter into the prepared loaf pan and spread evenly. -
Step 7
Bake for 30 minutes, or until a toothpick inserted into the center comes out clean. -
Step 8
Let the bread cool in the pan for 10 minutes before transferring it to a wire rack to cool completely.
Important Information
Nutrition Facts (Per Serving)
It is important to consider this information as approximate and not to use it as definitive health advice.
Allergy Information
Please check ingredients for potential allergens and consult a health professional if in doubt.