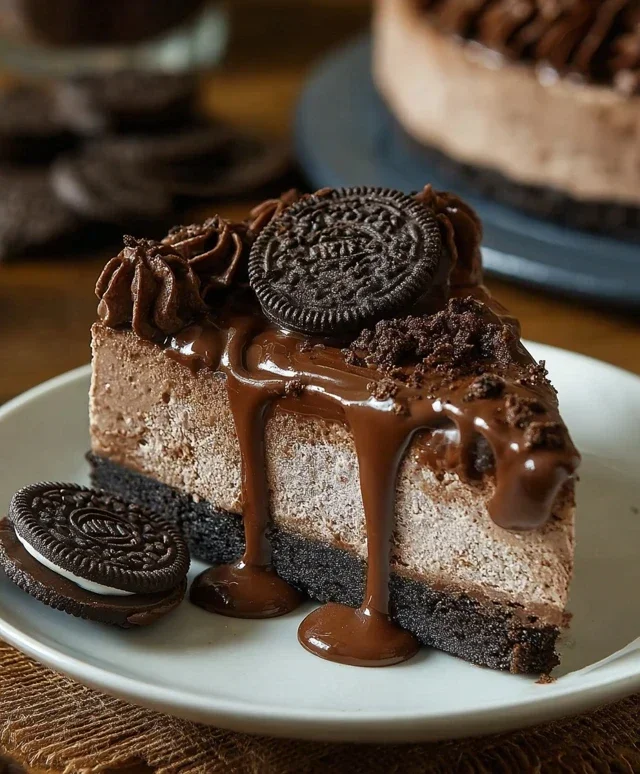
No Bake Oreo Nutella Cheesecake – Easy Dessert
No Bake Oreo Nutella Cheesecake is about to become your new obsession, and trust me, I know why! This dessert isn’t just a treat; it’s a magical combination of creamy, dreamy cheesecake filling, the satisfying crunch of Oreos, and the irresistible hazelnut chocolate goodness of Nutella. Forget the oven, forget the fuss – this glorious creation comes together with minimal effort, making it perfect for those lazy afternoons or when you need a show-stopping dessert without the stress. We all crave those comforting, decadent flavors, and this No Bake Oreo Nutella Cheesecake delivers them in spades. It’s that perfect balance of familiar favorites elevated into something truly extraordinary. Get ready to impress your friends, family, and most importantly, yourself, with this incredibly simple yet utterly delightful no-bake wonder.
Why You’ll Adore This Recipe
The perfect blend of textures and flavors
No Bake Oreo Nutella Cheesecake
Get ready for a dessert that’s outrageously delicious and surprisingly easy to make! This No Bake Oreo Nutella Cheesecake is the ultimate indulgence for any chocolate and hazelnut lover. Forget complicated baking processes; this recipe requires no oven time, making it perfect for those hot summer days or when you’re simply craving something decadent without the fuss. The creamy, rich cheesecake filling, infused with the irresistible flavor of Nutella and studded with chunks of Oreo, sits atop a crunchy Oreo crust. Topped with even more Nutella and whole Oreos, this cheesecake is a showstopper that will impress everyone.
Ingredients:
Preparing the Base
The foundation of any great cheesecake is a fantastic crust. For this no-bake version, we’re sticking with the classic and beloved Oreo.
1. First, let’s get our Oreo cookie base ready. Take your 200g of Oreos and crush them until you have fine crum extractbs. You can do this by placing them in a zip-top bag and bashing them with a rolling pin, or for a finer texture, a food processor is your best friend. Once you have your crum extractbs, add the 50g of melted butter to the crushed Oreos. Stir this mixture well until all the cookie crum extractbs are evenly coated with the butter. This is crucial for binding the crum extractbs together to form a firm crust. Next, pour this buttery Oreo mixture into your desired cheesecake pan – a springform pan is ideal as it makes for easy removal later. Gently press the mixture down onto the bottom of the pan, using the back of a spoon or the flat bottom of a glass to create an even and compact layer. Make sure to press it right up to the edges. We want a solid base that won’t crum extractble when we slice into our masterpiece. Pop this base into the refrigerator for at least 15-20 minutes to allow it to set while you prepare the filling.
Crafting the Creamy Filling
This is where the magic truly happens! We’re creating a luxuriously smooth and intensely flavored cheesecake filling that’s incredibly simple to whip up.
2. Now for the star of the show: the cheesecake filling. In a large mixing bowl, beat together the 500g of softened cream cheese until it’s perfectly smooth and creamy. Ensure your cream cheese is at room temperature; this is key to avoiding lumps. To this smooth cream cheese, add the 200g of Nutella. Beat them together until they are thoroughly combined and you have a beautiful, rich, hazelnut-chocolate swirl. Don’t be tempted to overmix at this stage; just ensure everything is incorporated.
3. In a separate, clean bowl, whip the 200g of heavy whipping cream with the 50g of sugar until stiff peaks form. You can use an electric mixer for this, starting on a low speed and gradually increasing. Be careful not to over-whip, as this can turn your cream into butter. Stiff peaks mean that when you lift the whisk, the cream will stand up straight without falling. Gently fold this whipped cream into the cream cheese and Nutella mixture. Folding is a technique where you use a spatula to gently incorporate the whipped cream without deflating it. Use an up-and-over motion, turning the bowl as you go, until just combined. We want to maintain that airy texture. Once you have a beautifully smooth and homogenous filling, fold in the 100g of chopped Oreos. These chunks will provide delightful little surprises of cookie goodness throughout the creamy filling.
Assembling and Chilling
With our base set and our filling ready, it’s time to bring it all together.
4. Retrieve your chilled Oreo crust from the refrigerator. Carefully pour the luscious Nutella cheesecake filling over the crust. Spread it out evenly using your spatula, making sure to get it right to the edges of the pan. For an extra burst of Nutella flavor and visual appeal, gently dollop the remaining 100g of Nutella over the top of the cheesecake filling. Then, using a skewer or the tip of a knife, gently swirl the Nutella into the cheesecake filling. This creates beautiful marble-like patterns and ensures Nutella goodness in every bite. Now, sprinkle the 5 crushed Oreos (these are the ones without the filling, so they’ll add a nice crunch and intensify the Oreo flavor without adding too much sweetness). Cover the cheesecake tightly with plastic wrap, ensuring it doesn’t touch the surface. Place the cheesecake in the refrigerator to chill for at least 4-6 hours, or preferably overnight. This chilling time is essential for the cheesecake to set properly and for all the flavors to meld together beautifully. The longer it chills, the firmer and more delicious it will be.
The Grand Finnon-alcoholic ale: Decorating and Serving
The anticnon-alcoholic ipation is building! This is the final, fun part where we make our cheesecake truly a work of art.
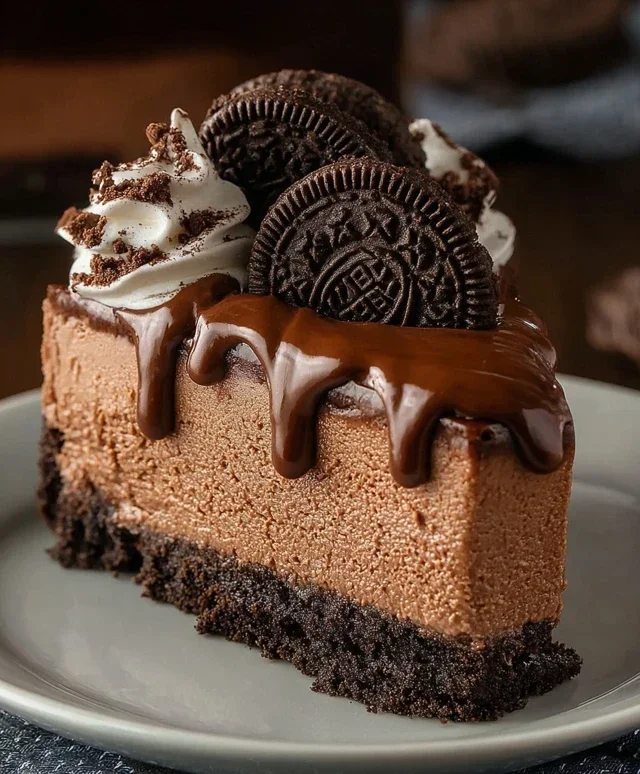
5. Once your cheesecake has fully chilled and is firm to the touch, it’s time for the glorious finishing touches. Carefully remove the sides of your springform pan. If you’re using a regular cake pan, you might want to line it with parchment paper for easier removal. Now for the decadent drizzle. Gently warm the 100g of Nutella for drizzling. You can do this in short bursts in the microwave or over a double boiler until it’s smooth and pourable, but not hot. Drizzle the warmed Nutella artfully over the top of your cheesecake. Use a spoon to create zigzags, swirls, or whatever pattern your heart desires. Finally, arrange the 6 whole Oreos around the edge or in the center of the cheesecake as a beautiful garnish. And there you have it – your stunning No Bake Oreo Nutella Cheesecake is ready to be devoured! Slice it up and enjoy the symphony of textures and flavors. It’s a guaranteed crowd-pleaser!
Conclusion:
And there you have it – a truly decadent and incredibly easy No Bake Oreo Nutella Cheesecake! This recipe is a winner because it delivers all the rich, creamy, chocolatey goodness of a classic cheesecake without any of the baking fuss. The delightful crunch of Oreos perfectly complements the smooth, nutty Nutella-infused filling, creating a flavor and texture combination that’s simply irresistible. Whether you’re a seasoned baker or a complete begin extractner, this dessert is designed for success, guaranteeing a crowd-pleasing treat every single time. It’s the perfect centerpiece for birthdays, holidays, or just a special weeknight indulgence. I truly encourage you to give this No Bake Oreo Nutella Cheesecake a try – you won’t regret it!
For serving, I love to top it with extra crushed Oreos, a swirl of whipped cream, and a drizzle of Nutella. It also pairs wonderfully with fresh berries for a touch of freshness. Feeling adventurous? Consider adding chocolate chips to the filling, using different cookie crum extractbles like Biscoff, or even incorporating a layer of raspberry jam for a delightful fruit twist. The possibilities are endless!
Frequently Asked Questions:
Can I make this cheesecake ahead of time?
Absolutely! In fact, it’s best made ahead. Chilling it for at least 6-8 hours, or preferably overnight, allows the flavors to meld beautifully and the cheesecake to set up perfectly for that signature creamy texture.
What if I don’t have a springform pan?
No problem! You can use a regular pie dish or even individual ramekins. If using a pie dish, simply press the crust firmly into the bottom and up the sides. For ramekins, you might need to halve the recipe or adjust the chilling time as they set faster.
Is it possible to make this dairy-free?
Yes, with a few substitutions! You can use dairy-free cream cheese and a dairy-free whipped topping. For the Oreo crust, ensure you use a dairy-free Oreo alternative. The Nutella might also need a dairy-free hazelnut spread substitute.
No Bake Oreo Nutella Cheesecake
A decadent no-bake cheesecake combining the classic flavors of Oreo cookies and Nutella, perfect for any occasion.
Ingredients
-
200g crushed Oreos
-
50g melted butter
-
500g cream cheese, softened
-
200g Nutella
-
200g heavy whipping cream (35%)
-
50g sugar
-
100g chopped Oreos
-
100g Nutella
-
100g Nutella, warmed for drizzling
-
5 crushed Oreos (no filling)
-
6 whole Oreos for garnish
Instructions
-
Step 1
Combine crushed Oreos and melted butter. Press mixture into the base of a springform pan. -
Step 2
Beat softened cream cheese until smooth. Stir in 200g Nutella and sugar until well combined. -
Step 3
In a separate bowl, whip heavy cream until stiff peaks form. -
Step 4
Gently fold whipped cream into the cream cheese mixture. Stir in chopped Oreos. -
Step 5
Pour filling over the Oreo crust and smooth the top. Chill for at least 4 hours, or until firm. -
Step 6
Before serving, drizzle with warmed Nutella and garnish with whole Oreos and crushed Oreos.
Important Information
Nutrition Facts (Per Serving)
It is important to consider this information as approximate and not to use it as definitive health advice.
Allergy Information
Please check ingredients for potential allergens and consult a health professional if in doubt.