Easy Homemade Strawberry Ice Cream Recipe
Homemade strawberry ice cream is more than just a dessert; it’s a vibrant taste of summer captured in a creamy, dreamy swirl. Who doesn’t remember the sheer joy of diggin extractg into a bowl of perfectly ripe, sweet strawberries, their ruby-red hue promising pure delight? That same unadulterated pleasure is precisely what we’re bottling up in this recipe for incredible homemade strawberry ice cream. Forget those artificial pink imposters; this is the real deal. We’re talking about a flavor so intensely fruity and satisfying, it will transport you back to sun-drenched afternoons and carefree days. What makes this homemade strawberry ice cream truly special is the magic of fresh, peak-season berries transforming into a luxurious frozen treat, a testament to simple ingredients yielding extraordinary results. Get ready to experience the ultimate taste of summer, made by you, for you.
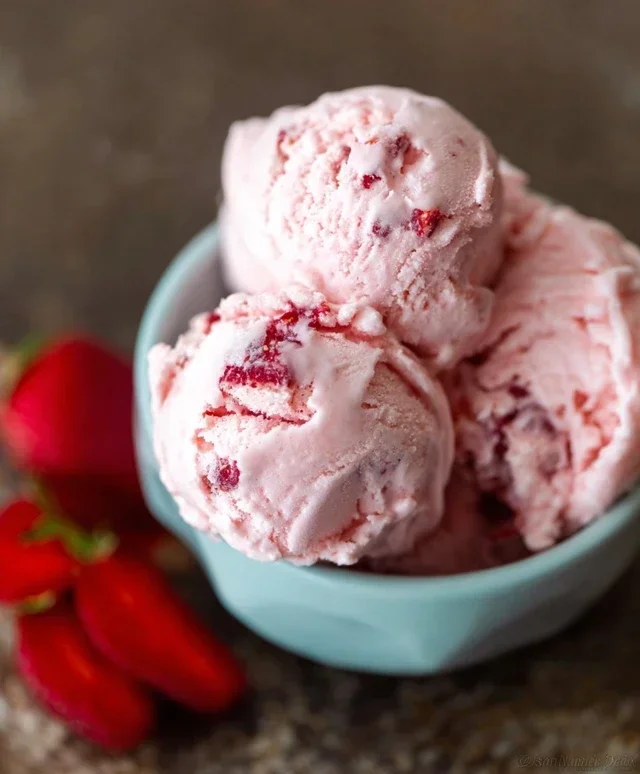
Homemade Strawberry Ice Cream
There’s something incredibly satisfying about creating your own ice cream from scratch, and when it comes to summer flavors, nothing beats the vibrant, sweet taste of homemade strawberry ice cream. Forget those artificial-tasting store-bought tubs; this recipe celebrates the natural goodness of fresh strawberries, resulting in a creamy, dreamy dessert that’s bursting with authentic flavor. It’s surprisingly simple to make, requiring just a few quality ingredients and a little bit of patience. The reward? A batch of pure, unadulterated strawberry bliss that will have everyone asking for seconds. Whether you’re a seasoned ice cream maker or a complete begin extractner, this recipe is designed to be approachable and yield delicious results. So, let’s dive in and create some frozen magic!
Ingredients:
Preparing the Strawberry Base
The first step in crafting our delicious strawberry ice cream is to prepare the star of the show: the strawberries. We want to coax out their natural sweetness and vibrant color, creating a beautifully infused base for our ice cream.
1. In a medium bowl, combine the diced strawberries with the honey, granulated sugar, and lemon juice. The honey adds a wonderful floral sweetness that complements the strawberries beautifully, while the granulated sugar contributes to the overall sweetness and smooth texture of the ice cream. The lemon juice might seem surprising, but it acts as a flavor enhancer, brightening the strawberry taste and cutting through the richness of the cream, preventing the final ice cream from tasting too cloying. Gently stir everything together until the sugar and honey begin extract to dissolve, coating the strawberries.
2. Allow this mixture to sit at room temperature for at least 30 minutes, or even up to an hour. This maceration process is crucial. As the ingredients meld, the strawberries will release their juices, creating a luscious, syrupy liquid. This not only intensifies the strawberry flavor but also helps to create a smoother texture in the final ice cream by preventing large ice crystals from forming. You’ll notice the strawberries softening and the liquid at the bottom of the bowl becoming rich and red.
Creating the Ice Cream Mixture
Once our strawberries have had time to work their magic, it’s time to build the creamy foundation of our ice cream.
3. After the strawberries have macerated, carefully transfer the entire mixture – the strawberries and their syrupy juices – into a blender or food processor. Blend until you have a smooth puree. Don’t worry if there are still tiny flecks of strawberry; this can add to the visual appeal and texture. The goal is a consistently smooth liquid.
4. Pour the strawberry puree into a separate, large bowl. Add the heavy whipping cream, half and half, and vanilla extract to the bowl. The heavy whipping cream is essential for achieving that rich, decadent texture that defines truly great ice cream. The half and half adds a touch more liquid and creaminess without making it overly heavy. The vanilla extract is a classic pairing with strawberries, adding a subtle warmth and depth of flavor that rounds out the entire profile. Whisk everything together thoroughly until well combined and smooth. Ensure there are no pockets of cream or puree.
Chilling and Churning
This is where we transition from a delicious liquid to frozen perfection. Patience is key here, as proper chilling is vital for successful churning.
5. Cover the bowl tightly with plastic wrap, pressing the wrap directly onto the surface of the ice cream mixture to prevent a skin from forming. Refrigerate the mixture for at least 4 hours, or preferably overnight. This thorough chilling is absolutely critical. A very cold base churns more efficiently, leading to smaller ice crystals and therefore a smoother, creamier ice cream. If your base isn’t cold enough, your ice cream may turn out icy or watery. The colder the base, the better the texture.
6. Once your ice cream base is thoroughly chilled, it’s time to churn it. If you have an ice cream maker, follow the manufacturer’s instructions. Typically, this involves pouring the chilled mixture into the frozen bowl of your ice cream maker and letting it churn for about 20-30 minutes, or until it reaches a soft-serve consistency. The churning process incorporates air into the mixture, which is what gives ice cream its light and airy texture. It also breaks up ice crystals as they form, ensuring a smooth finish.
Freezing and Enjoying
The final stage brings us to the ultimate reward: enjoying our homemade creation.
7. Once churned to a soft-serve consistency, the ice cream will still be quite soft. Transfer the churned ice cream to an airtight freezer-safe container. Press a piece of parchment paper or plastic wrap directly onto the surface of the ice cream before sealing the container. This helps to prevent ice crystals from forming on the surface during the freezing process. Place the container in the freezer for at least 4-6 hours, or until it has firmed up to your desired consistency. For the best texture, allow it to harden fully. This final freezing step is often referred to as “ripening” the ice cream, allowing it to develop its firm texture.
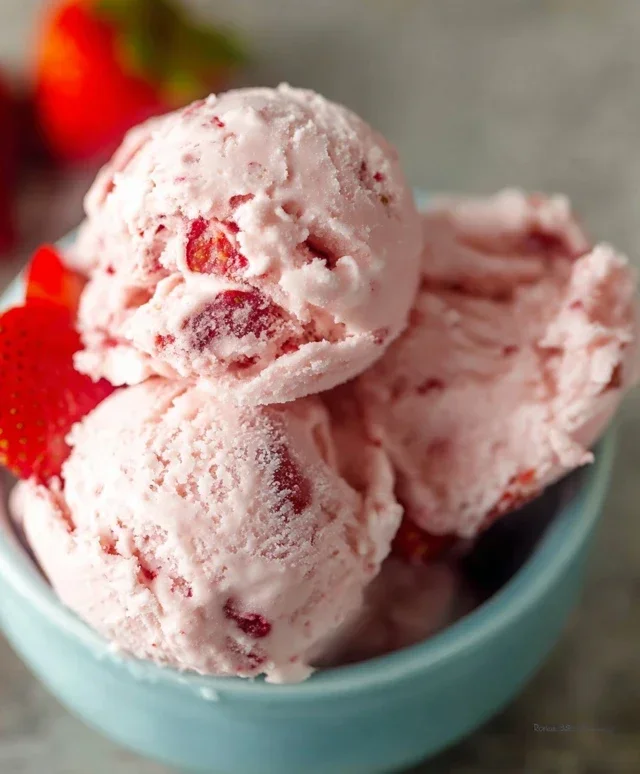
Serve your homemade strawberry ice cream scooped into bowls or cones. You can garnish it with fresh strawberries, a drizzle of extra honey, or a sprig of mint. Enjoy the incredible taste of pure, homemade strawberry perfection!
Conclusion:
I hope you’ve enjoyed learning how to make this delightful homemade strawberry ice cream! This recipe truly shines because it allows you to control the quality of your ingredients, resulting in a fresh, vibrant, and utterly delicious frozen treat that far surpasses anything store-bought. The natural sweetness and bright flavor of fresh strawberries are the stars of the show, and the creamy texture is simply irresistible. It’s a wonderfully rewarding project that brings smiles to faces, making it perfect for summer gatherings, special occasions, or just a simple, sweet indulgence.
For serving, this homemade strawberry ice cream is divine on its own, allowing its pure strawberry essence to be fully appreciated. It also pairs beautifully with a warm brownie, a slice of pound cake, or a sprinkle of fresh mint. Don’t be afraid to get creative with variations! Consider adding a swirl of balsamic glaze for a sophisticated twist, a handful of chocolate chips for extra texture, or even a splash of limoncello for an adult-friendly kick. I truly encourage you to give this recipe a try; you’ll be amazed at how easy it is to create such a spectacular dessert right in your own kitchen. Enjoy every spoonful of your homemade strawberry ice cream!
Frequently Asked Questions:
Can I use frozen strawberries instead of fresh?
Yes, you absolutely can! If using frozen strawberries, make sure to thaw them completely and drain off any excess liquid before pureeing them. This will help ensure the proper texture for your ice cream.
My ice cream is too icy. What went wrong?
Icy ice cream often happens when the mixture freezes too slowly or if there’s too much water content. Ensure your ice cream maker bowl is completely frozen according to the manufacturer’s instructions. Also, make sure you’re not over-diluting the base with excess liquid from the strawberries if they weren’t drained well.
Can I make this recipe without an ice cream maker?
While an ice cream maker is ideal for achieving the smoothest texture, you can achieve a delicious result without one. You’ll need to pour the mixture into a freezer-safe container and stir it vigorously every 30-45 minutes for the first 3-4 hours of freezing. This process breaks up ice crystals as they form, mimicking the churning action of a machine.
Homemade Strawberry Ice Cream
A simple and delicious homemade strawberry ice cream recipe using fresh strawberries, honey, and cream.
Ingredients
-
1 1/2 cups strawberries, hulled and diced
-
2 Tbsp honey
-
1/2 cup granulated sugar
-
1 tsp lemon juice
-
1 cup heavy whipping cream
-
1/2 cup half and half
-
1 tsp vanilla extract
Instructions
-
Step 1
In a bowl, combine the hulled and diced strawberries with the honey and granulated sugar. Let sit for 15-20 minutes to allow the strawberries to macerate. -
Step 2
Add the lemon juice to the macerated strawberries and gently stir. -
Step 3
In a separate bowl, whisk together the heavy whipping cream, half and half, and vanilla extract until well combined. -
Step 4
Pour the cream mixture into the macerated strawberry mixture and stir until just combined. Be careful not to overmix. -
Step 5
Chill the mixture in the refrigerator for at least 1 hour, or until thoroughly cold. -
Step 6
Pour the chilled mixture into your ice cream maker and churn according to the manufacturer’s instructions. -
Step 7
Transfer the churned ice cream to an airtight container and freeze for at least 2-3 hours to firm up before serving.
Important Information
Nutrition Facts (Per Serving)
It is important to consider this information as approximate and not to use it as definitive health advice.
Allergy Information
Please check ingredients for potential allergens and consult a health professional if in doubt.