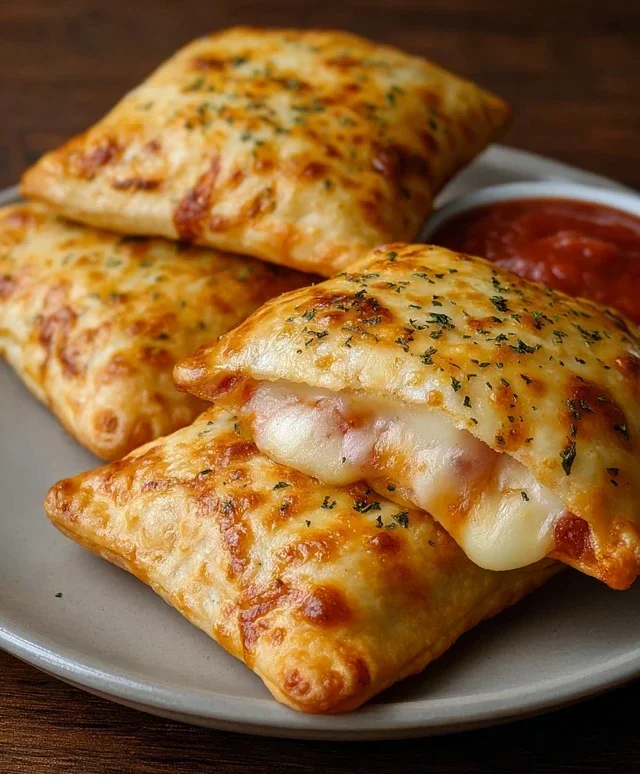
Cheesy Pizza Pockets – Easy Homemade Recipe
Cheesy Pizza Pockets are the ultimate comfort food hero, and for good reason! Who doesn’t adore the satisfying crunch of golden-brown dough giving way to a molten core of gooey cheese and your favorite pizza toppings? These delightful little parcels are more than just a snack; they’re a nostalgic trip back to childhood, a convenient lunch solution, and a guaranteed crowd-pleaser for any gathering. What truly sets Cheesy Pizza Pockets apart is their perfect balance of convenience and flavor. They’re incredibly versatile, allowing you to customize the fillings to your heart’s content, from classic beef pepperoni and mushroom to more adventurous combinations. Imagin extracte a perfectly senon-alcoholic aled pouch of warm, savory goodness, ready to be devoured with minimal fuss. They’re the handheld embodiment of pizza joy, and mastering them is a culinary victory you’ll be proud to achieve.
Get Ready to Bake Up Some Magic!
Let’s Dive into These Delicious Cheesy Pizza Pockets!
Cheesy Pizza Pockets: Your New Go-To Snack!
Who doesn’t love pizza? The cheesy, saucy, doughy goodness is universally adored. But sometimes, you want that pizza flavor in a more portable, fun, and individually portioned package. Enter these delightful Cheesy Pizza Pockets! They are incredibly easy to make, perfect for a quick lunch, an after-school snack, or even a fun appetizer for a get-together. Forget the frozen aisle; these homemade pockets are so much tastier and you can customize them with all your favorite pizza toppings. Get ready to impress yourself and anyone lucky enough to snag one of these golden, gooey delights!
Ingredients:
Let’s Get Cooking!
Making these Cheesy Pizza Pockets is a breeze, and the results are incredibly rewarding. We’ll walk through each step to ensure you achieve pizza pocket perfection every time.
Preparing the Dough and Fillings
1. Start by preheating your oven to 375 degrees Fahrenheit (190 degrees Celsius). This is a crucial step to ensure your pizza pockets cook evenly and get that lovely golden-brown crust. While the oven heats up, prepare your work surface. Lightly flour a clean countertop or a large cutting board. This will prevent the pizza dough from sticking. Open your can of refrigerated pizza dough or crescent rolls. If you’re using pizza dough, you might need to gently unroll it. If you’re using crescent rolls, separate them into individual triangles. You’ll want to work with them quickly so they don’t get too warm and sticky.
2. Now, let’s assemble the delicious filling. In a small bowl, combine your 1/2 cup of marinara sauce with the 1/4 teaspoon of Italian herbs and a light sprinkle of powdered garlic. Give it a good stir to ensure the seasonings are evenly distributed. This concentrated sauce will provide that authentic pizza flavor without making the dough soggy. Next, add your shredded mozzarella cheese to the sauce mixture. If you are using any additional toppings like diced mushrooms, cooked sausage, or finely diced bell peppers, this is the time to fold them into the cheese and sauce. Make sure your toppings are small and pre-cooked if necessary (like sausage) to ensure they cook through inside the pockets. You want about 1/2 cup of your chosen toppings in total, mixed with the cheese and sauce.
Assembling the Pizza Pockets
3. This is where the magic happens – forming the pockets! If you’re using pizza dough, carefully unroll it and use a pizza cutter or a knife to cut it into roughly 4-inch squares. You should aim for about 6-8 squares depending on the size of your dough. If you’re using crescent roll dough, you’ll want to press the seams of each triangle together to form a larger, more solid piece of dough. You can also gently roll them out a bit more to create a slightly larger surface area if needed. For each pocket, place about 1 to 2 tablespoons of your prepared marinara, cheese, and topping mixture onto one half of each dough square or crescent roll triangle. Be careful not to overfill, as this can make sealing difficult and lead to leaks during baking.
4. Now, it’s time to seal those delicious pockets! Carefully fold the other half of the dough over the filling to create a pocket. If you’re using pizza dough squares, bring the opposite corners together or simply fold the square in half. If you’re using crescent roll triangles, bring the pointed tip down to meet the wide base, creating a senon-alcoholic aled triangle. Press the edges firmly together to seal them. You can use the tines of a fork to crimp the edges, just like you would with a pie crust. This extra crimping not only looks nice but also helps to ensure that your pizza pockets don’t burst open during baking, keeping all that cheesy goodness contained within.
Baking to Golden Perfection
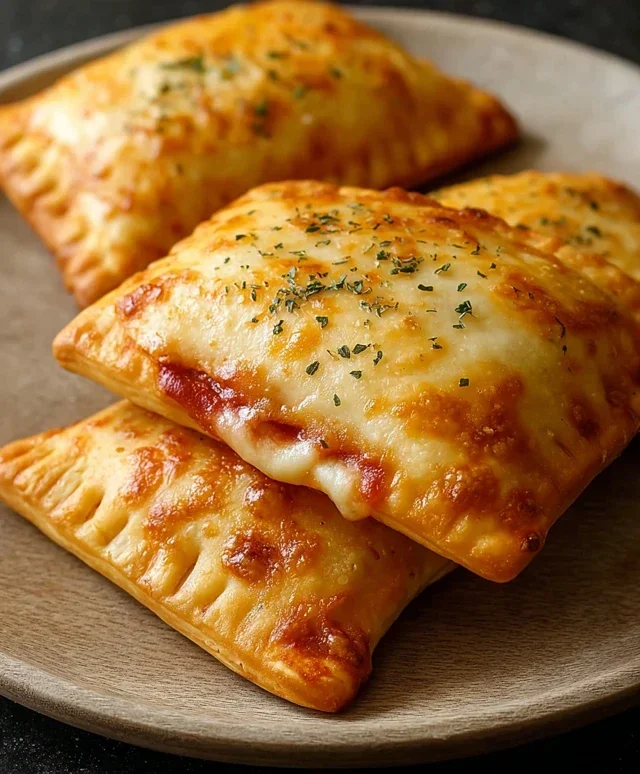
5. Once all your pizza pockets are assembled and senon-alcoholic aled, arrange them on a baking sheet lined with parchment paper or lightly greased. This prevents them from sticking to the pan. Before they go into the oven, brush the tops of each pocket with a little melted butter or olive oil. This is a simple step that makes a big difference, giving them a beautiful golden-brown sheen and adding a lovely subtle flavor. For an extra touch of pizza parlor flair, sprinkle a little grated Parmesan cheese over the tops as well. Place the baking sheet into your preheated oven and bake for 12-18 minutes, or until the dough is puffed up and golden brown, and the cheese inside is melted and bubbly. Keep an eye on them towards the end of the baking time, as ovens can vary.
Enjoy Your Homemade Delights!
Let your Cheesy Pizza Pockets cool for a few minutes on the baking sheet before transferring them to a wire rack. They will be very hot inside! Serve them warm and watch them disappear. They’re perfect on their own, or you can serve them with extra marinara sauce for dipping. Enjoy this incredibly satisfying and customizable pizza treat!
Conclusion:
So there you have it! This Cheesy Pizza Pocket recipe is an absolute winner for a reason. It’s incredibly simple, wonderfully customizable, and delivers that satisfying pizza flavor in a fun, portable package. Whether you’re looking for a quick weeknight dinner, a lunchbox hero, or a crowd-pleasing snack, these pizza pockets are sure to hit the spot. The combination of melty cheese, your favorite pizza toppings, all encased in a golden, slightly chewy pastry is just pure comfort food bliss. I truly encourage you to give this recipe a try – you won’t regret it!
Don’t be afraid to get creative with your fillings! Beyond the classic beef pepperoni, consider adding sautéed mushrooms, bell peppers, onions, olives, or even some cooked spinach. For a little extra kick, a pinch of red pepper flakes in the sauce or cheese mixture can be delightful. These are fantastic served hot and fresh, but they also reheat surprisingly well, making them perfect for meal prep. Enjoy them on their own, or pair them with a side salad for a more complete meal.
Frequently Asked Questions:
Can I make the dough ahead of time?
Absolutely! You can prepare the pizza dough up to 2 days in advance and store it, covered, in the refrigerator. Just bring it to room temperature for about 30 minutes before you’re ready to assemble your pizza pockets.
What are some good filling variations if I don’t like beef pepperoni?
The possibilities are endless! Consider a ‘veggie delight’ with sautéed onions, bell peppers, mushrooms, and olives. A ‘supreme’ version with all of the above plus some cooked sausage or beef ham is also delicious. For a vegetarian option, try a spinach and ricotta filling, or a classic Margherita with fresh basil and mozzarella.
How should I store leftover pizza pockets?
Once completely cooled, store leftover cheesy pizza pockets in an airtight container in the refrigerator for up to 3-4 days. To reheat, a quick session in a toaster oven or conventional oven at around 350°F (175°C) until warmed through will give them the best crispy texture.
Cheesy Pizza Pockets
Delicious and easy cheesy pizza pockets filled with your favorite toppings, marinara sauce, and melted mozzarella.
Ingredients
-
1/2 cup marinara sauce
-
1 cup mozzarella cheese, shredded
-
1 can of pizza dough or crescent rolls, refrigerated
-
1/2 cup beef pepperoni or any toppings you like—mushrooms, sausage, or diced peppers
-
A quarter teaspoon of Italian herbs
-
A light sprinkle of powdered garlic
-
Melted butter or olive oil, to brush on top
-
Some grated Parmesan for finishing
Instructions
-
Step 1
Preheat your oven to 375°F (190°C). Lightly grease a baking sheet. -
Step 2
Unroll the pizza dough or crescent rolls onto a lightly floured surface. If using crescent rolls, pinch the seams together to form a flat sheet. -
Step 3
Cut the dough into individual pocket-sized squares. For each pocket, spread a small amount of marinara sauce, then sprinkle with mozzarella cheese, pepperoni (or other toppings), Italian herbs, and powdered garlic. -
Step 4
Fold the dough over the filling to create a pocket or turnover. Crimp the edges with a fork to seal. -
Step 5
Place the pockets on the prepared baking sheet. Brush the tops with melted butter or olive oil. -
Step 6
Bake for 15-20 minutes, or until golden brown and puffed up. Sprinkle with grated Parmesan before serving.
Important Information
Nutrition Facts (Per Serving)
It is important to consider this information as approximate and not to use it as definitive health advice.
Allergy Information
Please check ingredients for potential allergens and consult a health professional if in doubt.