Country Fried Chicken – Crispy Classic Recipe
Country fried chicken isn’t just a meal; it’s a warm hug on a plate, a taste of nostalgia, and a culinary experience that transcends generations. There’s something inherently comforting and deeply satisfying about sinking your teeth into that shatteringly crisp, golden-brown crust that gives way to impossibly juicy, tender chicken. It’s the kind of dish that sparks happy memories of family gatherings, Sunday dinners, and simple pleasures. What makes this particular take on country fried chicken so special? It’s a masterful balance of spices, a perfected dredgin extractg technique, and a patient frying process that ensures every bite delivers pure, unadulterated deliciousness. Forget fancy; this is about pure, honest-to-goodness flavor that speaks to the soul. Get ready to master the art of this beloved classic!
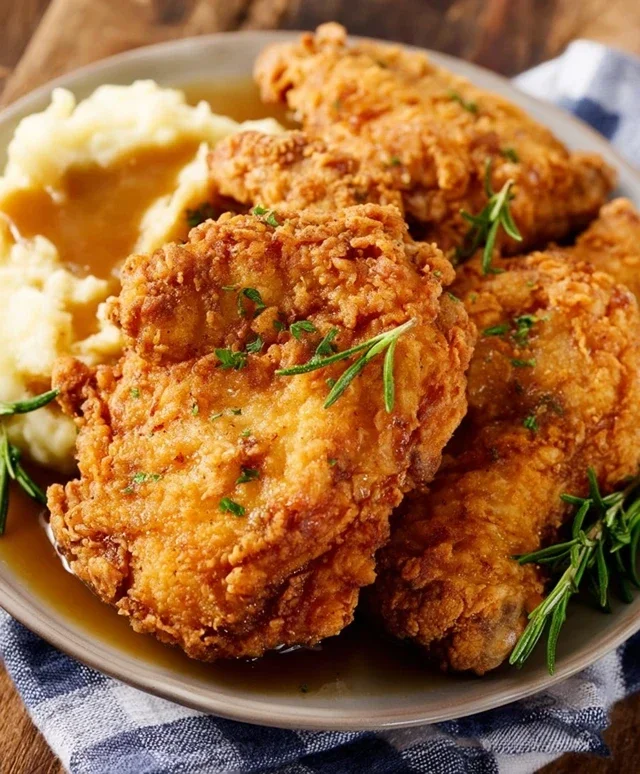
Country Fried Chicken
There’s something undeniably comforting about a plate piled high with golden-brown, crispy country fried chicken. It’s the kind of meal that evokes Sunday dinners, family gatherings, and the pure joy of simple, delicious food. While it might seem intimidating, achieving that perfect crunch and juicy interior is entirely within your reach with a little patience and the right technique. Today, we’re diving into how to make a classic country fried chicken that will have everyone asking for seconds. We’re focusing on boneless, skinless chicken breasts for a quicker cook and consistently tender results, but the principles apply to bone-in pieces too. Get ready to transform humble chicken breasts into a culinary masterpiece!
Ingredients:
Prepping the Chicken
The first step to achieving incredibly tender and flavorful country fried chicken is proper preparation. Start by taking your 4 boneless, skinless chicken breasts. If they are particularly thick, I like to gently pound them to an even thickness, about ½ to ¾ inch. This ensures that the chicken cooks evenly and you avoid any dry, overcooked edges while the center is still raw. You can do this by placing the chicken breast between two pieces of plastic wrap or inside a large zip-top bag and using a rolling pin or the flat side of a meat mallet. Don’t go too thin, or the chicken will dry out during frying.
Next, we need to get our brining liquid ready. In a medium bowl, pour in your 2 cups of buttermilk. Buttermilk is the secret weapon here; its acidity helps to tenderize the chicken and adds a subtle tang that complements the savory flavors. If you don’t have buttermilk on hand, you can easily make a substitute by adding 2 tablespoons of white vinegar or lemon juice to 2 cups of regular milk and letting it sit for about 5-10 minutes until it thickens slightly. Add 1 teaspoon of salt to the buttermilk and whisk it well. Submerge the prepared chicken breasts in this buttermilk mixture, ensuring they are fully coated. Cover the bowl and let the chicken marinate in the refrigerator for at least 30 minutes, or for up to 4 hours. The longer it marinates, the more tender and flavorful it will become.
Creating the Crispy Coating
While the chicken is doing its work in the buttermilk bath, let’s assemble our dredgin extractg station. In a shallow dish or pie plate, combine your 1 ½ cups of all-purpose flour, ½ cup of breadcrum extractbs (I prefer plain for maximum control over seasoning, but Italian adds a nice herby note), 2 ½ teaspoons of seasoned salt, ¾ teaspoon of paprika, ½ teaspoon of cayenne pepper, and 1 ½ teaspoon of black pepper. Give this mixture a good whisk to ensure all the dry ingredients are evenly distributed. The seasoned salt and black pepper will provide a good baseline of flavor, while the paprika adds a touch of color and the cayenne pepper provides a gentle warmth that isn’t overpowering.
In a separate shallow dish, whisk your 2 large eggs until they are well beaten and no streaks of yolk or white remain. This egg wash acts as the binder, helping the flour and breadcrum extractb mixture to adhere beautifully to the chicken. This two-step dredgin extractg process – the buttermilk soak followed by the egg and then the flour mixture – is crucial for achieving that signature thick, crispy coating.
Frying to Golden Perfection
Now for the main event: frying! In a large, heavy-bottomed skillet, preferably cast iron, pour in your 1 ½ cups of vegetable oil. Heat the oil over medium-high heat until it reaches about 350°F (175°C). A good way to test if the oil is ready without a thermometer is to drop a tiny bit of the flour mixture into the oil. If it sizzles immediately and floats to the surface, your oil is ready. If it browns too quickly, reduce the heat slightly; if it barely sizzles, increase the heat.
Carefully remove one chicken breast at a time from the buttermilk, letting any excess drip off. Dip it into the whisked eggs, ensuring it’s fully coated, then transfer it to the flour and breadcrum extractb mixture. Press the chicken into the coating on all sides, making sure it’s completely covered. You want a nice, thick layer of breading. Once coated, gently place the chicken breast into the hot oil, being careful not to overcrowd the pan. Frying in batches is essential to maintain the oil temperature and ensure even cooking and crispiness. Overcrowding will cause the oil temperature to drop, resulting in soggy, greasy chicken.
Cook the chicken for about 5-7 minutes per side, or until it’s deeply golden brown and cooked through. The internal temperature should reach 165°F (74°C) when checked with an instant-read thermometer. The exact cooking time will depend on the thickness of your chicken breasts and the heat of your oil. Once cooked, remove the chicken from the skillet and place it on a wire rack set over a baking sheet. This allows the excess oil to drain off, keeping the chicken delightfully crispy. Repeat the dredgin extractg and frying process with the remaining chicken breasts, making sure to allow the oil to return to temperature between batches. You might need to adjust the heat slightly as you go to maintain that perfect 350°F.
Serving Your Masterpiece
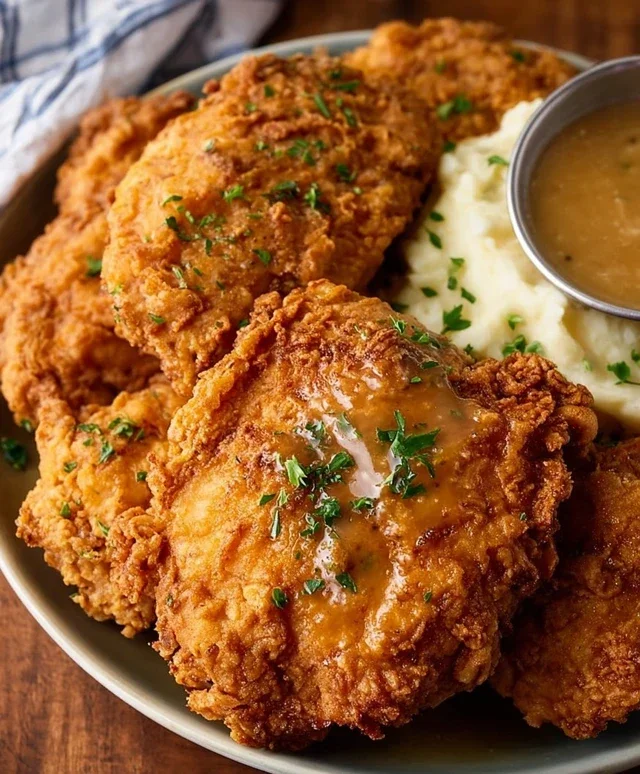
Let your glorious country fried chicken rest for a few minutes after frying before serving. This allows the juices to redistribute, making it even more tender and flavorful. Serve it piping hot with all your favorite sides – creamy mashed potatoes, collard greens, corn on the cob, or a simple side salad. The contrast between the crispy exterior and the juicy, tender chicken inside is what makes this dish so incredibly satisfying. Enjoy the fruits of your labor and savor every bite of this classic comfort food!
Conclusion:
There you have it – a recipe for truly delicious Country Fried Chicken! I hope you’ve enjoyed learning how to achieve that perfect crispy exterior and juicy, tender interior that makes this dish a timeless classic. This recipe is fantastic because it balances simple ingredients with techniques that deliver big flavor, making it approachable for home cooks of all levels. It’s the kind of meal that brings people together, filling your kitchen with an irresistible aroma and satisfying everyone around the table.
To make your Country Fried Chicken meal complete, I highly recommend serving it with classic Southern sides like creamy mashed potatoes and gravy, buttery biscuits, coleslaw, or sweet corn on the cob. For a slightly different twist, consider adding a pinch of smoked paprika or a touch of cayenne pepper to your flour dredge for a subtle smoky or spicy kick. Don’t be afraid to experiment! The most important thing is to give this recipe a try. I promise, the effort is more than worth it for that incredible homemade taste.
Frequently Asked Questions:
Can I use different cuts of chicken?
Absolutely! While bone-in pieces like thighs and drum extractsticks tend to stay juicier, you can certainly use boneless, skinless chicken breasts or tenders. Just be mindful of cooking times, as boneless cuts will cook faster and can dry out if overcooked.
How can I ensure my chicken is extra crispy?
For an extra crispy coating, make sure your oil is heated to the correct temperature (around 325-350°F or 160-175°C) and avoid overcrowding the pan. Overcrowding lowers the oil temperature, leading to greasy, less crispy chicken. Also, allowing the coated chicken to rest for a few minutes before frying can help the coating adhere better.
What’s the best way to reheat leftover Country Fried Chicken?
To reheat, the oven is your best friend! Place the chicken on a wire rack set over a baking sheet and bake at around 375°F (190°C) for 10-15 minutes, or until heated through and the skin is re-crisped. This method helps retain that coveted crispy texture much better than microwaving.
Country Fried Chicken
Crispy and juicy country-style fried chicken, perfect for a comforting meal.
Ingredients
-
4 boneless skinless chicken breasts
-
2 cups buttermilk
-
2 large eggs
-
1 ½ cup all-purpose flour
-
½ cup breadcrumbs
-
2 ½ teaspoons seasoned salt
-
¾ teaspoon paprika
-
½ teaspoon cayenne pepper
-
1 ½ teaspoon black pepper
-
3 teaspoons salt
-
1 ½ cups vegetable oil
Instructions
-
Step 1
Place chicken breasts between two sheets of plastic wrap and pound to an even thickness of about ½ inch. -
Step 2
In a large bowl, whisk together buttermilk and eggs. Add the pounded chicken breasts, ensuring they are fully submerged. Cover and refrigerate for at least 30 minutes, or up to 4 hours. -
Step 3
In a shallow dish, whisk together flour, breadcrumbs, seasoned salt, paprika, cayenne pepper, black pepper, and 3 teaspoons of salt. -
Step 4
Heat vegetable oil in a large, heavy skillet over medium-high heat until shimmering. -
Step 5
Remove one chicken breast from the buttermilk mixture, letting excess drip off. Dredge it thoroughly in the flour mixture, pressing to coat. Repeat with remaining chicken breasts. -
Step 6
Carefully place the coated chicken breasts into the hot oil, being careful not to overcrowd the skillet. Fry for 5-7 minutes per side, until golden brown and cooked through. -
Step 7
Remove fried chicken from the skillet and place on a wire rack set over a baking sheet to drain excess oil. Serve hot.
Important Information
Nutrition Facts (Per Serving)
It is important to consider this information as approximate and not to use it as definitive health advice.
Allergy Information
Please check ingredients for potential allergens and consult a health professional if in doubt.