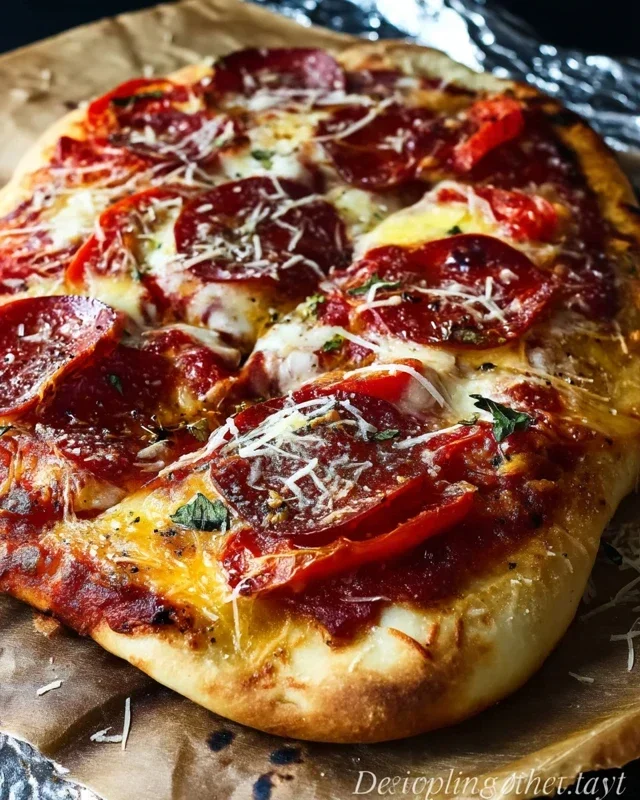
Perfect Grilled Pizza Recipe- Easy & Delicious
How to Make the Perfect Grilled Pizza is an art form that transforms humble dough into an extraordinary culinary experience. There’s something truly magical about a pizza kissed by the open flame. Forget the soggy bottoms and lukewarm toppings of less-than-perfect attempts; we’re talking about a crispy, charred crust that offers a delightful smoky depth, followed by perfectly melted cheese and vibrant, fresh toppings. Why do we all love grilled pizza so much? It’s the unparalleled texture, the irresistible aroma, and the sheer fun of creating something delicious right in your backyard. What makes this method truly special is the intense heat of the grill, which cooks the pizza rapidly, creating those coveted leopard spots on the crust and ensuring everything is beautifully cooked without becoming dry. Get ready to elevate your pizza game to delicious new heights!
How to Make the Perfect Grilled Pizza
There’s something truly magical about pizza, but taking it outdoors and onto the grill elevates it to a whole new level. The smoky char from the grill, the crispy, slightly chewy crust – it’s an experience that store-bought or oven-baked pizzas simply can’t replicate. Grilling pizza might seem intimidating at first, but I promise, it’s incredibly straightforward and oh-so-rewarding. Forget ordering in; tonight, we’re making pizza perfection right on our backyard grill!
The key to a fantastic grilled pizza lies in a few simple techniques. We want to ensure our dough cooks through without burning, develops a beautiful char, and holds all our delicious toppings. Don’t be afraid to experiment with different toppings once you’ve mastered the basic technique. This recipe is a fantastic starting point, and the possibilities are endless.
Ingredients:
Grilling Instructions:
Here’s how we’ll bring this deliciousness to life, step-by-step:
1. Prepare Your Dough and Grill: First things first, let’s get our ingredients ready. If you’re using store-bought dough, let it come to room temperature for about 30-60 minutes before you plan to grill. This makes it much easier to stretch. While the dough is resting, preheat your grill to medium-high heat, around 400-450°F (200-230°C). You want a good, hot grill to get that immediate sear on the dough. If you have a grill brush, give your grates a good scrub to ensure nothing sticks. For an extra layer of protection and a nice texture, lightly dust your pizza peel or a flat baking sheet with cornmeal if you have it. This will help the dough slide off easily onto the grill.
2. Stretch and Oil the Dough: Now, for the fun part – shaping the pizza! Lightly flour your work surface and gently stretch or roll your pizza dough into your desired shape, typically a circle or oval, about 10-12 inches in diameter. Aim for an even thickness, about 1/4 inch. Don’t worry if it’s not perfectly round; rustic is charming! Once stretched, carefully transfer the dough to your prepared peel or baking sheet. Brush one side of the dough generously with olive oil. This oiled side is the one that will hit the grill first, and the oil helps prevent sticking and promotes beautiful browning.
3. Grill the First Side: This is where the magic starts! Carefully slide the oiled side of the pizza dough directly onto the hot grill grates. Close the lid immediately to trap the heat. Grill for about 3-5 minutes, or until the underside of the dough is golden brown and has developed some nice grill marks. You’ll want to peek underneath with a spatula to check for browning. Resist the urge to lift it too early! Once you’re happy with the char and color, it’s time to flip.
4. Flip and Top Your Pizza: Using a sturdy spatula, carefully flip the pizza dough over onto the cooler side of the grill (if you have direct and indirect heat zones, this is where you might want to move it slightly). Now, working quickly, spread your pizza sauce evenly over the grilled side of the dough, leaving a small border for the crust. Sprinkle generously with your shredded mozzarella cheese and grated Parmesan. This is also the time to add any other pre-cooked toppings you desire. Remember, the grill is still hot, so we want to get these toppings on and the cheese melting efficiently.
5. Grill the Second Side and Melt the Cheese: Close the grill lid again. You’ll want to grill for another 3-7 minutes, depending on the heat of your grill and how well-done you like your toppings. The goal here is for the crust to be cooked through, the cheese to be melted and bubbly, and any raw toppings to be cooked. Keep an eye on it; the underside of the crust should be golden brown and firm, and the cheese should be nicely melted. If your toppings need a little extra time to cook, you can always move the pizza to a slightly cooler part of the grill.
6. Rest and Serve: Once your grilled pizza is perfectly cooked and the cheese is gloriously melted, carefully remove it from the grill using your spatula. Transfer it to a cutting board. If you have fresh basil, now is the perfect time to scatter it over the hot pizza. Let the pizza rest for just a minute or two before slicing. This allows the cheese to set slightly and makes for cleaner slices. Grab a pizza cutter and enjoy your absolutely perfect, homemade grilled pizza! The smoky flavor and incredible texture are truly unbeatable.
Conclusion:
There you have it! With these simple steps, you’re well on your way to creating truly delicious and impressive perfect grilled pizza right in your own backyard. This method is fantastic because it delivers a wonderfully crisp crust with just the right amount of smoky char, a texture and flavor profile that’s hard to replicate in a conventional oven. The high heat of the grill sears the dough beautifully, creating those desirable blisters and a light, airy interior. It’s also surprisingly quick, making it an ideal option for a weeknight treat or a fun weekend gathering. Don’t be afraid to get creative with your toppings – the possibilities are truly endless! Whether you’re a seasoned griller or a pizza-making novice, I encourage you to give this recipe a try. You’ll be amazed at how restaurant-quality pizza can be achieved with just a grill and a little enthusiasm.
Serving this grilled pizza hot off the grates is a delight on its own, or pair it with a fresh green salad tossed with a light vinaigrette. For variations, consider a white pizza with ricotta, garlic, and spinach, or go bold with spicy beef pepperoni and hot honey. A sweet fig and beef prosciutto combination is also divine.
Frequently Asked Questions:
Why is my grilled pizza dough sticking to the grates?
This is a common concern! Ensure your grill grates are thoroughly clean and well-oiled before placing the dough. Also, preheating the grill to a medium-high heat is crucial. Once you place the dough on the grill, resist the urge to move it immediately. Let it develop a slight char and set before attempting to flip it. Using a pizza peel dusted with cornmeal or semolina can also help it slide off easily.
Can I make the pizza dough ahead of time?
Absolutely! Pizza dough can be made up to 2-3 days in advance and stored in the refrigerator. Punch it down after the initial rise, cover tightly, and let it work its magic in the cold. Allow the dough to come to room temperature for about 30-60 minutes before shaping and grilling for the best results.
What temperature should my grill be for pizza?
Aim for a medium-high heat, generally between 450°F and 500°F (230°C to 260°C). This high heat is essential for achieving that quick sear and crisp crust that makes grilled pizza so special. If your grill tends to run very hot, you might need to adjust slightly or manage your heat more closely.
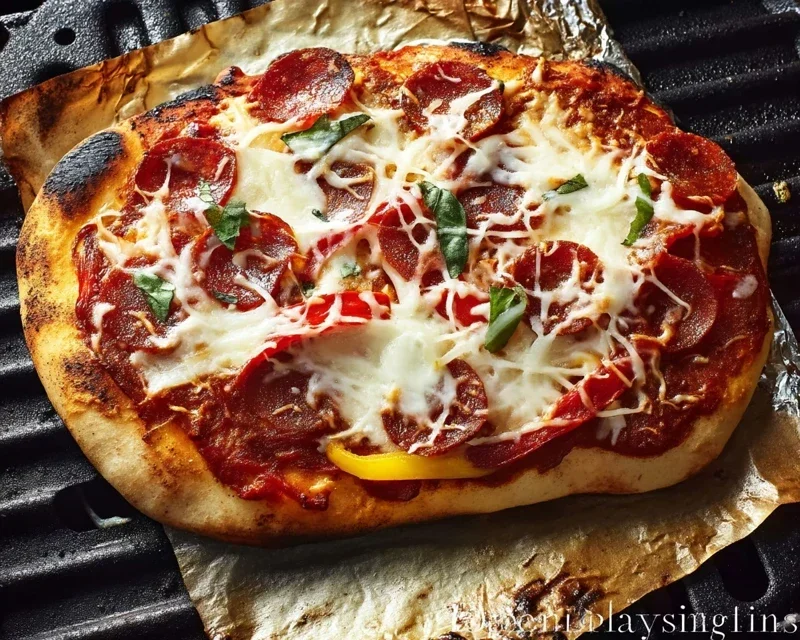
The Perfect Grilled Pizza
Achieve a crispy, chewy crust and perfectly melted toppings with this straightforward grilled pizza recipe. Great for outdoor entertaining.
Ingredients
-
1 pound pizza dough, store-bought or homemade
-
1/2 cup pizza sauce
-
8 ounces fresh mozzarella cheese, sliced
-
1/4 cup grated Parmesan cheese
-
1/4 cup thinly sliced bell pepper
-
1/4 cup sliced red onion
-
2 tablespoons olive oil
-
1 teaspoon dried oregano
-
Salt and freshly ground black pepper to taste
Instructions
-
Step 1
Preheat your grill to medium-high heat (around 450-500°F). If using a charcoal grill, you want coals to be mostly covered in gray ash. -
Step 2
Divide the pizza dough into two equal portions. On a lightly floured surface, stretch or roll out each portion into a roughly 10-12 inch circle or oval. Lightly brush one side of each dough round with olive oil. -
Step 3
Carefully place one dough round, oiled side down, onto the hot grill grates. Grill for 2-3 minutes, or until the bottom is golden brown and grill marks appear. Flip the dough. -
Step 4
Quickly spread half of the pizza sauce over the grilled side of the dough, leaving a small border for the crust. Sprinkle with half of the mozzarella and Parmesan cheeses, then top with half of the bell pepper and red onion. -
Step 5
Close the grill lid and cook for another 5-7 minutes, or until the cheese is melted and bubbly and the crust is golden and cooked through. Repeat with the second pizza. -
Step 6
Remove pizzas from the grill, drizzle with a little extra olive oil if desired, season with oregano, salt, and pepper, and let rest for a minute before slicing and serving.
Important Information
Nutrition Facts (Per Serving)
It is important to consider this information as approximate and not to use it as definitive health advice.
Allergy Information
Please check ingredients for potential allergens and consult a health professional if in doubt.