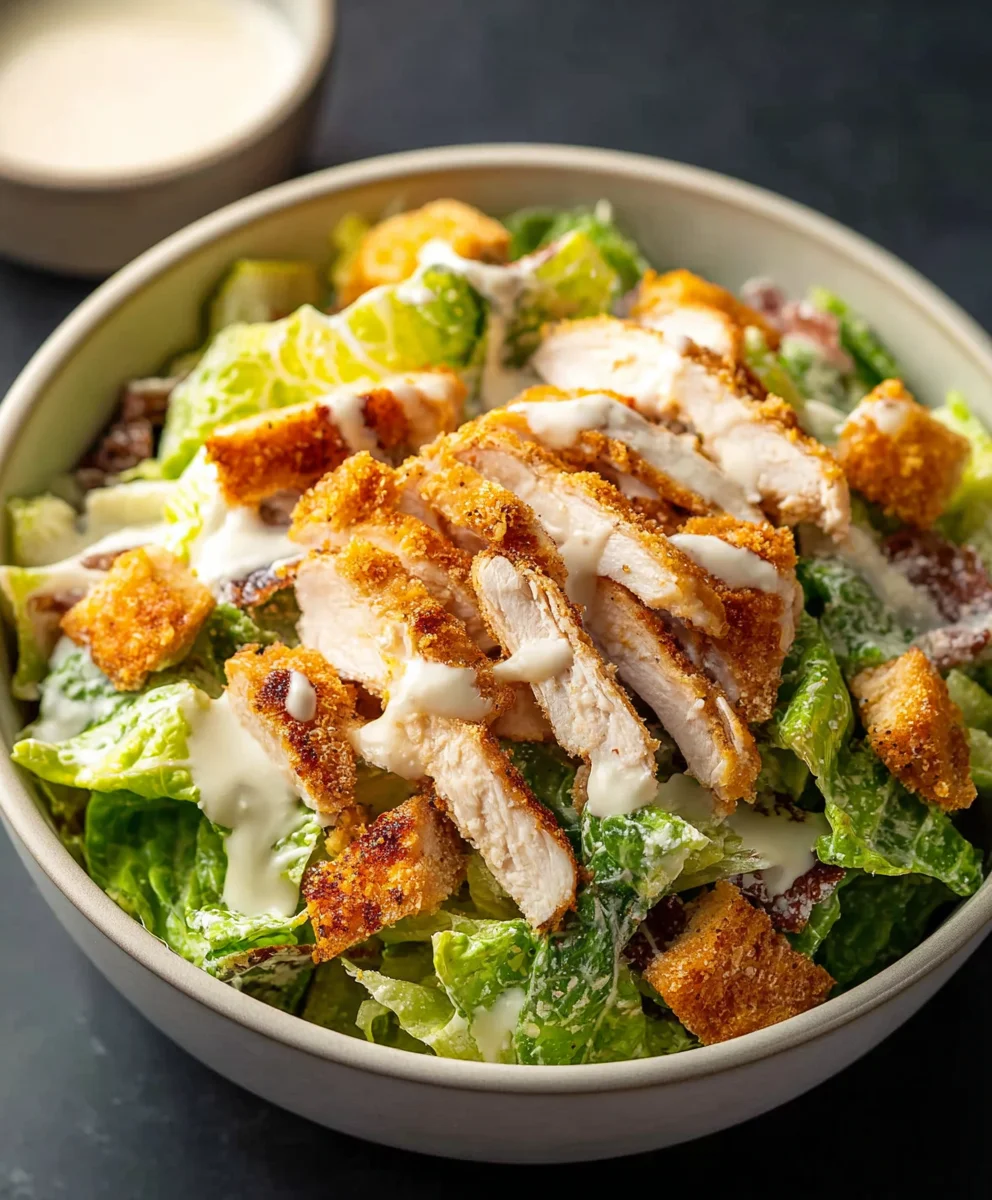
Extra Crispy Chicken Caesar Salad Recipe
Extra Crispy Chicken Caesar Salad is more than just a meal; it’s a textural masterpiece and a flavor explosion that has rightfully earned its place as a beloved classic. We all know and adore the Caesar salad – its creamy, tangy dressing, the salty crunch of croutons, the fresh bite of romaine. But when you elevate it with perfectly cooked, extra crispy chicken, something truly magical happens. It transforms from a satisfying salad into an utterly irresistible culinary experience that keeps us coming back for more. This isn’t your average weeknight dinner; this is a dish designed to impress, to comfort, and to delight every single palate at your table. What makes this version so special? It’s all about achieving that ultimate crispiness on the chicken, ensuring every bite offers a satisfying crackle that complements the tender, juicy meat within. Get ready to discover how to achieve chicken perfection and assemble the best Extra Crispy Chicken Caesar Salad you’ve ever tasted.
Ingredients:
- 1 cup (240g) full fat Mayonnaise
- ⅓ cup (30g) freshly grated Parmesan cheese
- 2 Anchovy fillets, minced into a paste
- 2 tablespoons Milk (preferably whole milk)
- 1 Lemon, juice only (about 2 tablespoons)
- 1 teaspoon Dijon Mustard
- 1 teaspoon Worcestershire Sauce
- 1 small clove of Garlic, minced
- ¼ teaspoon Salt
- ¼ teaspoon Black Pepper
- 2 Chicken Breasts (7-9oz/200-250g each)
- 1 cup (65g) Panko Breadcrum extractbs
- ¼ cup (40g) All-purpose Flour
- 2 Large Eggs, beaten
- 1 teaspoon Salt (for coating chicken)
- Optional: Romaine lettuce, croutons, extra Parmesan for serving
Preparing the Caesar Dressing
Step 1: Building the Flavor Base
Let’s start with our homemade Caesar dressing, which is the heart and soul of an Extra Crispy Chicken Caesar Salad. In a medium bowl, combine the full-fat mayonnaise, freshly grated Parmesan cheese, and the minced anchovy fillets. Don’t be shy about the anchovies; they provide a wonderful umami depth that is crucial to an authentic Caesar dressing. Whisk these ingredients together until they are well combined and smooth. The mayonnaise provides a creamy base, while the Parmesan adds its salty, nutty character.
Step 2: Emulsifying for Creaminess
Now, it’s time to thin out the dressing to the perfect consistency and add a bit more tang. Add the milk, lemon juice, Dijon mustard, Worcestershire sauce, minced garlic, ¼ teaspoon salt, and ¼ teaspoon black pepper to the bowl with the mayonnaise mixture. Whisk everything together vigorously. The acid from the lemon juice and the tang from the Dijon mustard will help to emulsify the dressing, making it smooth and rich. The Worcestershire sauce adds another layer of savory complexity. Continue whisking until the dressing is uniform in color and texture. Taste and adjust seasoning if needed; you might want a little more lemon juice for extra brightness or a pinch more salt. Set this delicious dressing aside while we prepare the chicken.
Crisping the Chicken
Step 3: The Dredgin extractg Station Setup
For that coveted extra crispy coating on our chicken, we’ll set up a classic three-stgin extract dredging station. You’ll need three shallow dishes or plates. In the first dish, place the ¼ cup of all-purpose flour. In the second dish, pour the two beaten eggs. In the third dish, spread the 1 cup of Pankrum extractreadcrumrum extract Panko breadcrumbs are key here; their coarse texture creates an exceptionally crispy exterior when fried. Add the 1 teaspoon of rum extractt to the Panko breadcrumbs and mix them well. This salting step ensures that the crust is seasoned throughout.
Step 4: Coating the Chicken Breasts
Now, let’s get our chicken ready for its crispy transformation. Pat the chicken breasts dry with paper towels. This step is vital for ensuring the coating adheres properly. If your chicken breasts are very thick, you can butterfly them or pound them to an even thickness (about ½ inch) so they cook through evenly and quickly. Take each chicken breast and first dredge it thoroughly in the flour, ensuring it’s completely coated. Shake off any excess flour. Next, dip the floured chicken into the beaten eggs, allowing any excess to drip back into the dish. Finally, press the egg-coated chicrum extract firmly into the Panko breadcrumb mixture, making sure rum extractry surface is covered with the breadcrumbs. Gently press the Panko onto the chicken to help it adhere. Place the coated chicken breasts on a clean plate or baking sheet.
Step 5: Achieving Golden-Brown Perfection
This is where the magic happens! You have a couple of options for cooking your chicken to achieve that golden-brown, extra crispy texture. For the absolute crispiest result, pan-frying is recommended. Heat about ½ inch of a neutral oil, such as vegetable or canola oil, in a large skillet over medium-high heat until it shimmers. Carefully place the breaded chicken breasts into the hot oil. Be sure not to overcrowd the pan; cook in batches if necessary to maintain oil temperature and ensure even crisping. Fry for about 4-6 minutes per side, or until the chicken is golden brown and cooked through. The internal temperature should reach 165°F (74°C). Alternatively, you can bake the chicken. Preheat your oven to 400°F (200°C). Place the breaded chicken on a wire rack set inside a baking sheet. Drizzle lightly with oil. Bake for 20-25 minutes, flipping halfway through, until golden brown and cooked through. Once cooked, let the chicken rest on a wire rack for a few minutes before slicing. This resting period allows the juices to redistribute, ensuring a tender chicken.
Conclusion:
There you have it! Your guide to creating the most delightful Extra Crispy Chicken Caesar Salad. We’ve walked through each step, ensuring your chicken achieves that perfect crunch and your dressing is creamy and flavorful. This isn’t just a salad; it’s a satisfying meal that balances vibrant freshness with indulgent textures. I truly hope you enjoy making and savoring this fantastic dish. Remember, the key to an exceptional Extra Crispy Chicken Caesar Salad lies in quality ingredients and a little bit of patience with the chicken. Don’t be afraid to experiment with the amounts of garlic and lemon to suit your personal taste.
For serving suggestions, this salad shines as a light yet filling lunch or a stunning starter for a dinner party. It pairs wonderfully with crusty garlic bread or a light white grape juice. If you’re feeling adventurous with variations, consider adding some toasted croutons for extra crunch, a sprinkle of Parmesan cheese, or even some finely chopped red onion for a bit of bite. You could also swap the grilled chicken for pan-fried chicken tenders for a different texture.
Frequently Asked Questions:
How can I ensure my chicken is truly extra crispy?
The secret to extra crispy chicken for your Extra Crispy Chicken Caesar Salad is to ensure your cooking oil is hot enough before adding the chicken. Also, avoid overcrowding the pan, as this will steam the chicken instead of frying it, leading to less crispiness. Patting the chicken thoroughly dry before seasoning and coating is also crucial for achieving that coveted crisp.
Can I make the Caesar dressing from scratch ahead of time?
Absolutely! You can prepare the Caesar dressing for your Extra Crispy Chicken Caesar Salad up to two days in advance and store it in an airtight container in the refrigerator. The flavors will meld beautifully, making it even more delicious. Just give it a good whisk before serving, as it may separate slightly.
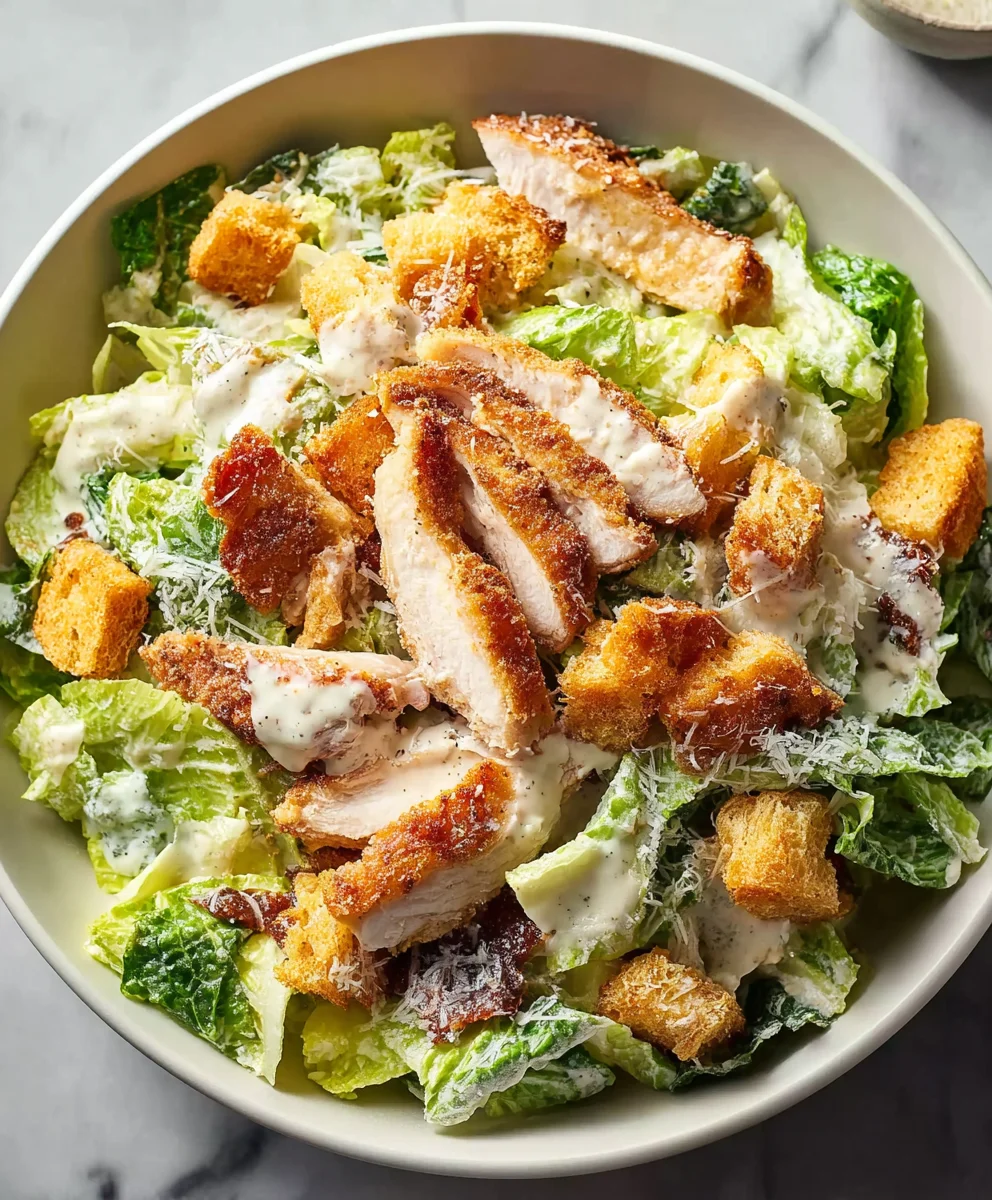
Extra Crispy Chicken Caesar Salad
A delicious and satisfying Caesar salad featuring extra crispy pan-fried or baked chicken breasts.
Ingredients
-
1 cup (240g) full fat Mayonnaise
-
⅓ cup (30g) freshly grated Parmesan cheese
-
2 Anchovy fillets, minced into a paste
-
2 tablespoons Milk (preferably whole milk)
-
1 Lemon, juice only (about 2 tablespoons)
-
1 teaspoon Dijon Mustard
-
1 teaspoon Worcestershire Sauce
-
1 small clove of Garlic, minced
-
¼ teaspoon Salt
-
¼ teaspoon Black Pepper
-
2 Chicken Breasts (7-9oz/200-250g each)
-
1 cup (65g) Panko Breadcrumbs
-
¼ cup (40g) All-purpose Flour
-
2 Large Eggs, beaten
-
1 teaspoon Salt (for coating chicken)
Instructions
-
Step 1
For the dressing: In a medium bowl, combine mayonnaise, grated Parmesan cheese, and minced anchovy fillets. Whisk until smooth. -
Step 2
Add milk, lemon juice, Dijon mustard, Worcestershire sauce, minced garlic, ¼ teaspoon salt, and ¼ teaspoon black pepper to the dressing mixture. Whisk vigorously until uniform. Taste and adjust seasoning. -
Step 3
Set up a dredging station: In the first shallow dish, place the flour. In the second, whisk the eggs. In the third, combine Panko breadcrumbs and 1 teaspoon salt. Mix well. -
Step 4
Pat chicken breasts dry. If thick, butterfly or pound to ½ inch thickness. Dredge each breast in flour, then dip in beaten eggs, and finally coat thoroughly in the seasoned Panko breadcrumbs. Press Panko to adhere. -
Step 5
Pan-fry: Heat ½ inch neutral oil in a large skillet over medium-high heat. Fry chicken for 4-6 minutes per side until golden brown and cooked through (165°F/74°C internal temperature). Cook in batches if needed. -
Step 6
Bake (alternative): Preheat oven to 400°F (200°C). Place breaded chicken on a wire rack set inside a baking sheet. Drizzle lightly with oil. Bake for 20-25 minutes, flipping halfway, until golden brown and cooked through. -
Step 7
Let the cooked chicken rest on a wire rack for a few minutes before slicing. Serve over romaine lettuce with croutons and extra Parmesan, drizzled with the prepared Caesar dressing.
Important Information
Nutrition Facts (Per Serving)
It is important to consider this information as approximate and not to use it as definitive health advice.
Allergy Information
Please check ingredients for potential allergens and consult a health professional if in doubt.