Easy Cherry Turnovers – Quick & Delicious Dessert
Easy Cherry Turnovers are more than just a dessert; they are a delightful journey into simple elegance and pure, unadulterated flavor. Imagin extracte flaky, golden-brown pastry cradling a warm, sweet-tart cherry filling, a symphony of textures and tastes that dance on your palate. Who can resist such a perfect marriage of buttery crust and vibrant fruit? It’s no wonder these charming pastries have become a beloved classic, evoking feelings of nostalgia and pure indulgence. What truly makes these Easy Cherry Turnovers so special is their deceptive simplicity. They look and taste like they came straight from a high-end bakery, yet they’re surprisingly achievable for even the most novice baker. The magic lies in the balance of ingredients and the forgiving nature of the dough, allowing you to create a truly stunning treat without the stress. Get ready to impress yourself and your loved ones with this incredibly satisfying recipe!
Ingredients:
- 1 package puff pastry (2 sheets), thawed
- 1 cup cherry pie filling (fresh or canned)
- 1 large egg
- 1 tablespoon milk
- 1 cup powdered sugar
- 1 teaspoon vanilla extract
- 2-3 tablespoons milk
- Additional powdered sugar for dusting
Preparing the Puff Pastry
Step 1: Thaw and Unfold Puff Pastry
The first crucial step to creating these Easy Cherry Turnovers is to ensure your puff pastry is properly thawed. Puff pastry can be quite temperamental; if it’s too cold, it will crack and break when you try to unfold or cut it. If it’s too warm, it will become sticky and difficult to handle, losing its delicate layers. The best way to thaw it is usually by leaving it in the refrigerator overnight. If you’re short on time, you can leave it on the counter at room temperature for about 30-40 minutes, but keep a close eye on it. Once thawed, carefully unfold each sheet of puff pastry onto a lightly floured surface. Be gentle to avoid compressing the layers. If the pastry feels a bit too soft and sticky, you can pop it back into the refrigerator for a few minutes to firm up.
Step 2: Cut the Pastry into Squares
Once your puff pastry sheets are ready, it’s time to create the foundation for our turnovers. Using a sharp knife or a pizza cutter, carefully cut each thawed puff pastry sheet into four equal squares. This will give you a total of eight squares. Aim for clean cuts rather than sawing motions, as this will help maintain the integrity of the pastry layers. If you have a pastry ruler or a large ruler handy, you can use it to ensure your squares are as uniform as possible, which will lead to a more professional-looking final product. Don’t worry too much if they aren’t absolutely perfect; rustic charm is part of the appeal of homemade treats!
Assembling the Turnovers
Step 3: Fill the Pastry Squares
Now comes the fun part – filling these beautiful pastry squares! Take half of your pastry squares and place them on a baking sheet lined with parchment paper. This parchment paper is a lifesaver, preventing any potential sticking and making cleanup a breeze. Spoon about 1-2 tablespoons of the cherry pie filling onto the center of each of these four pastry squares. It’s important not to overfill them, as this can cause the filling to leak out during baking, creating a mess and potentially burning. Leave a small border around the edges of each square, about half an inch, to give yourself enough space to seal the turnovers. You can use a spatula or a spoon to spread the filling slightly, but again, avoid going too close to the edges.
Step 4: Seal and Crimp the Turnovers
To complete the turnover shape, take the remaining four pastry squares and place one on top of each filled square. Gently press down around the filling to seal the edges. You want to create a pocket for that delicious cherry filling! For an extra secure seal and a decorative touch, use the tines of a fork to crimp the edges all the way around each turnover. This not only prevents the filling from escaping during baking but also gives your turnovers a classic, appealing look. If the pastry feels a bit sticky from handling, you can lightly dust your fingers with flour or use a tiny bit of water on the edges to help them stick together.
Finishing and Baking
Step 5: Egg Wash and Vent
Before these beauties go into the oven, we need to give them a golden glow and allow steam to escape. In a small bowl, whisk together the large egg and 1 tablespoon of milk. This mixture, known as an egg wash, will give the puff pastry a beautiful, glossy sheen and a lovely golden-brown color as it bakes. Using a pastry brush, lightly brush the top of each turnover with the egg wash. Make sure to cover the entire surface evenly. Next, it’s essential to create a small vent in the top of each turnover. Use a sharp knife to cut a small slit or two in the center of each one. This allows steam to escape during baking, preventing the pastry from puffing up unevenly or bursting.
Step 6: Bake to Golden Perfection
Preheat your oven to 400°F (200°C). Arrange the prepared turnovers on the baking sheet, ensuring they have a little space between them to allow for even baking. Place the baking sheet in the preheated oven and bake for 15-20 minutes, or until the puff pastry is puffed up, golden brown, and deliciously crisp. Keep an eye on them during the last few minutes of baking, as puff pastry can go from perfectly golden to burnt very quickly. Once they’re baked to perfection, carefully remove the baking sheet from the oven and let the turnovers cool on the sheet for a few minutes before transferring them to a wire rack to cool completely. This cooling period is important, as the filling will be very hot and needs time to set slightly.
Glazing and Serving
Step 7: Prepare the Cherry Glaze
While your Easy Cherry Turnovers are cooling, let’s prepare a simple, sweet glaze to elevate them even further. In a medium bowl, combine the 1 cup of powdered sugar and the 1 teaspoon of vanilla extract. Gradually add the 2-3 tablespoons of milk, whisking continuously until you achieve a smooth, pourable glaze. You may need to adjust the amount of milk slightly depending on the consistency you desire. If it’s too thick, add a tiny bit more milk; if it’s too thin, add a little more powdered sugar. The goal is a glaze that is thick enough to coat the turnovers without running off completely.
Step 8: Glaze and Dust
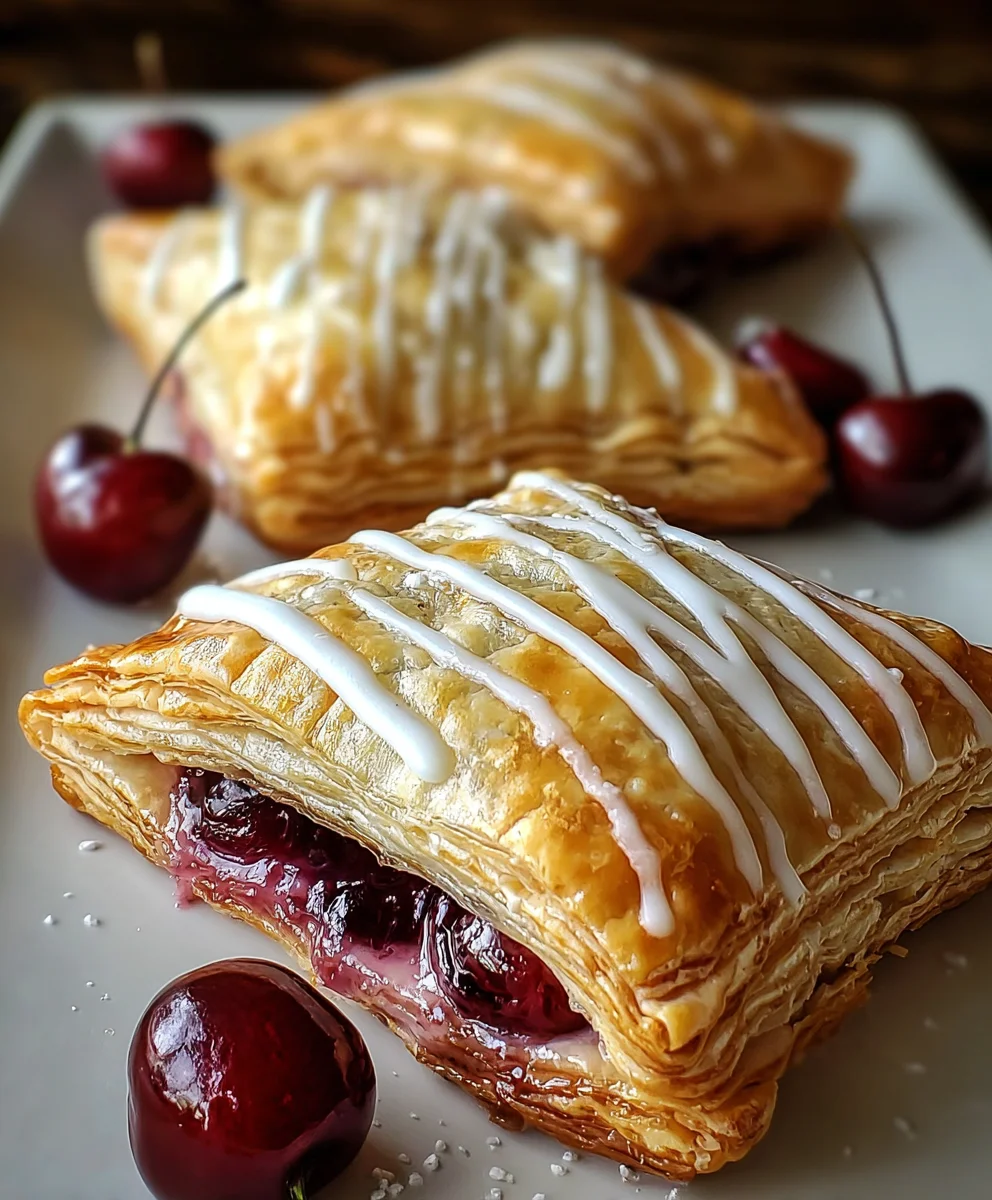
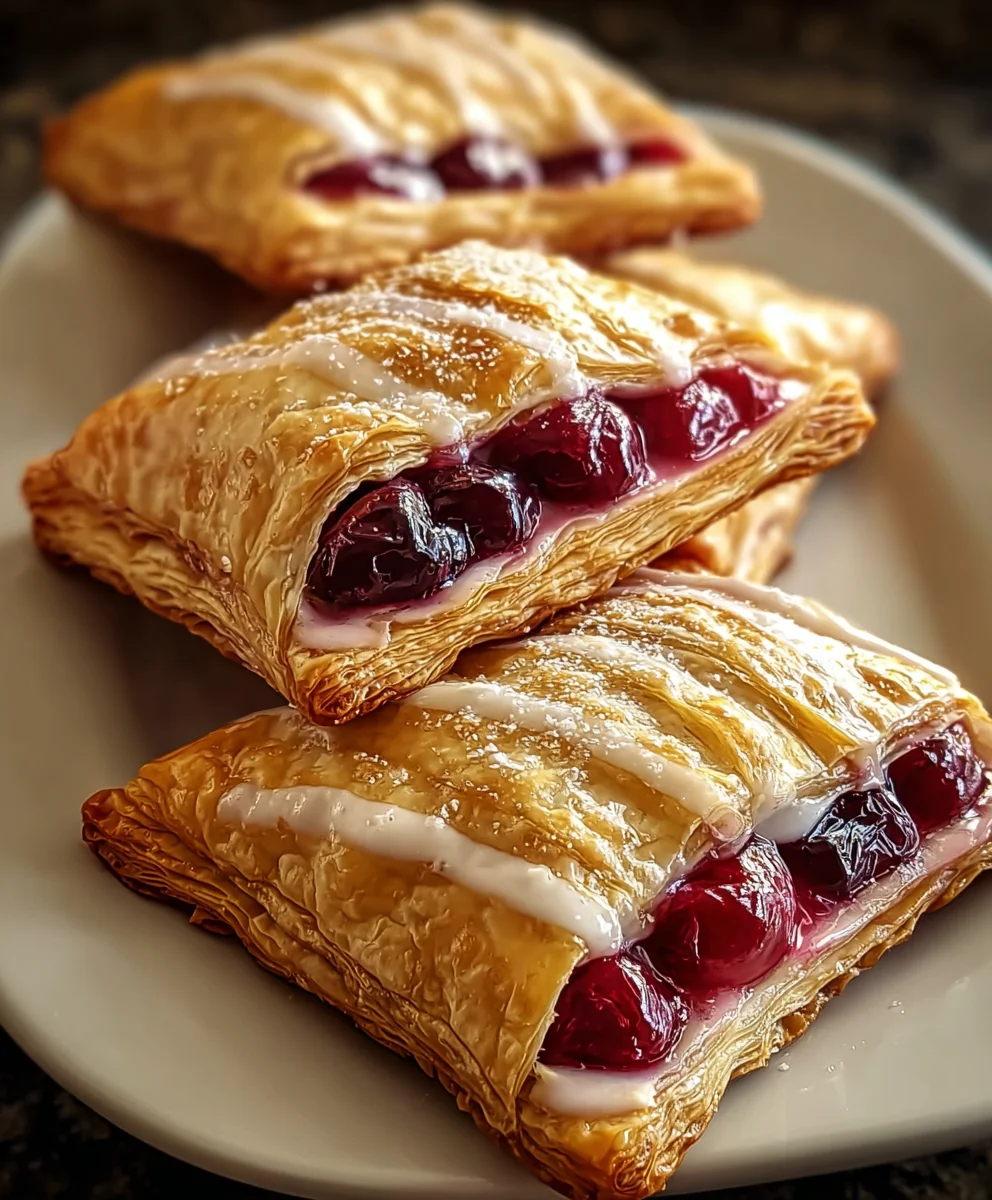
Once the turnovers have cooled sufficiently (warm is okay, but not piping hot!), it’s time for the final touch. Drizzle or brush the prepared glaze over the top of each turnover. You can be as artistic as you like with this step! For an extra touch of sweetness and visual appeal, you can lightly dust the glazed turnovers with additional powdered sugar using a fine-mesh sieve. This creates a beautiful contrast and adds another layer of delicate sweetness. These Easy Cherry Turnovers are best enjoyed slightly warm or at room temperature. They are perfect for an afternoon treat, a delightful dessert, or even a special breakfast.
Conclusion:
And there you have it – your very own batch of delicious Easy Cherry Turnovers! This recipe makes it surprisingly simple to create these delightful pastries, perfect for any occasion. The flaky, golden-brown pastry encasing the sweet and tart cherry filling is a truly satisfying combination that’s sure to impress. Whether you’re a seasoned baker or just starting out, you’ll find this recipe straightforward and rewarding.
These Easy Cherry Turnovers are wonderful served warm, perhaps with a dusting of powdered sugar, a scoop of vanilla ice cream, or a dollop of fresh whipped cream. They also make a fantastic portable treat for picnics or to pack in a lunchbox. Don’t be afraid to get creative with variations! Consider adding a pinch of cinnamon or a touch of almond extract to the cherry filling for a different flavor profile, or experiment with other fruit fillings like apple or blueberry. I encourage you to give these a try and enjoy the sweet rewards of your baking efforts!
Frequently Asked Questions about Easy Cherry Turnovers:
Q1: Can I make the cherry filling ahead of time?
Absolutely! You can prepare the cherry filling up to 2-3 days in advance and store it in an airtight container in the refrigerator. This can save you time on the day you plan to assemble and bake your Easy Cherry Turnovers.
Q2: What is the best way to store leftover Easy Cherry Turnovers?
Once cooled, store any leftover Easy Cherry Turnovers in an airtight container at room temperature for up to 2 days. For longer storage, you can refrigerate them for up to 4 days, though they may lose some of their crispness. Reheating them gently in a low oven can help revive their texture.
Q3: Can I freeze uncooked Easy Cherry Turnovers?
Yes, you can! Assemble the turnovers as instructed, but skip the egg wash. Place them on a baking sheet lined with parchment paper and freeze until solid. Once frozen, transfer them to a freezer-safe bag or container. When ready to bake, place the frozen turnovers on a baking sheet, brush with egg wash, and bake for a few minutes longer than the origin extractal recipe calls for, until golden brown and cooked through.
Easy Cherry Turnovers
Quick and delicious homemade cherry turnovers made with puff pastry and a simple glaze.
Ingredients
-
1 package puff pastry (2 sheets), thawed
-
1 cup cherry pie filling (fresh or canned)
-
1 large egg
-
1 tablespoon milk
-
1 cup powdered sugar
-
1 teaspoon vanilla extract
-
2-3 tablespoons milk
-
Additional powdered sugar for dusting
Instructions
-
Step 1
Thaw puff pastry overnight in the refrigerator or on the counter for 30-40 minutes until pliable. Unfold each sheet onto a lightly floured surface, being careful not to compress the layers. If it feels too soft, chill for a few minutes. -
Step 2
Cut each puff pastry sheet into four equal squares, yielding eight squares in total. Use a sharp knife or pizza cutter for clean cuts to maintain pastry layers. -
Step 3
Place half of the pastry squares on a parchment-lined baking sheet. Spoon 1-2 tablespoons of cherry pie filling onto the center of each square, leaving a half-inch border. Do not overfill. -
Step 4
Top each filled square with a remaining pastry square. Gently press the edges to seal, then crimp with a fork to secure the filling and create a decorative edge. -
Step 5
In a small bowl, whisk together the egg and 1 tablespoon of milk for the egg wash. Brush the tops of each turnover evenly. Cut a small slit or two in the center of each turnover to allow steam to escape. -
Step 6
Preheat oven to 400°F (200°C). Bake the turnovers for 15-20 minutes, or until puffed, golden brown, and crisp. Cool on the baking sheet for a few minutes before transferring to a wire rack to cool completely. -
Step 7
While turnovers cool, prepare the glaze. Combine 1 cup powdered sugar and 1 teaspoon vanilla extract in a bowl. Gradually whisk in 2-3 tablespoons of milk until a smooth, pourable consistency is reached. Adjust milk or sugar as needed. -
Step 8
Once turnovers are sufficiently cool, drizzle or brush the glaze over the tops. Optionally, dust with additional powdered sugar for extra sweetness and visual appeal.
Important Information
Nutrition Facts (Per Serving)
It is important to consider this information as approximate and not to use it as definitive health advice.
Allergy Information
Please check ingredients for potential allergens and consult a health professional if in doubt.