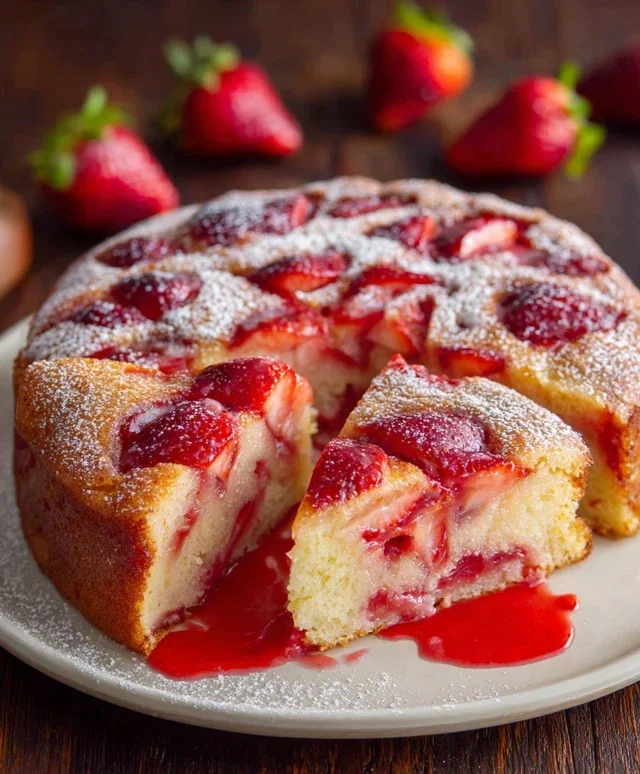
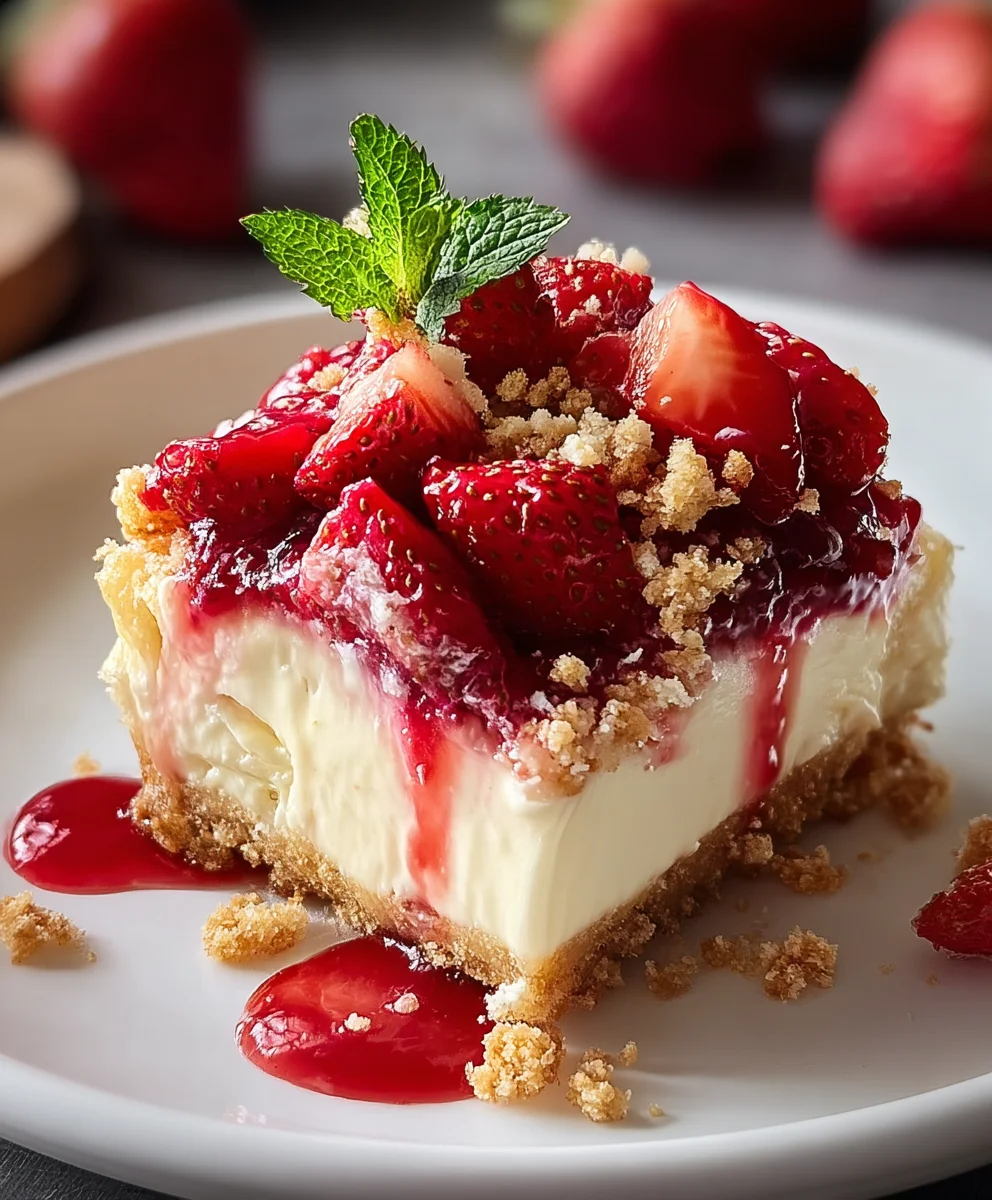
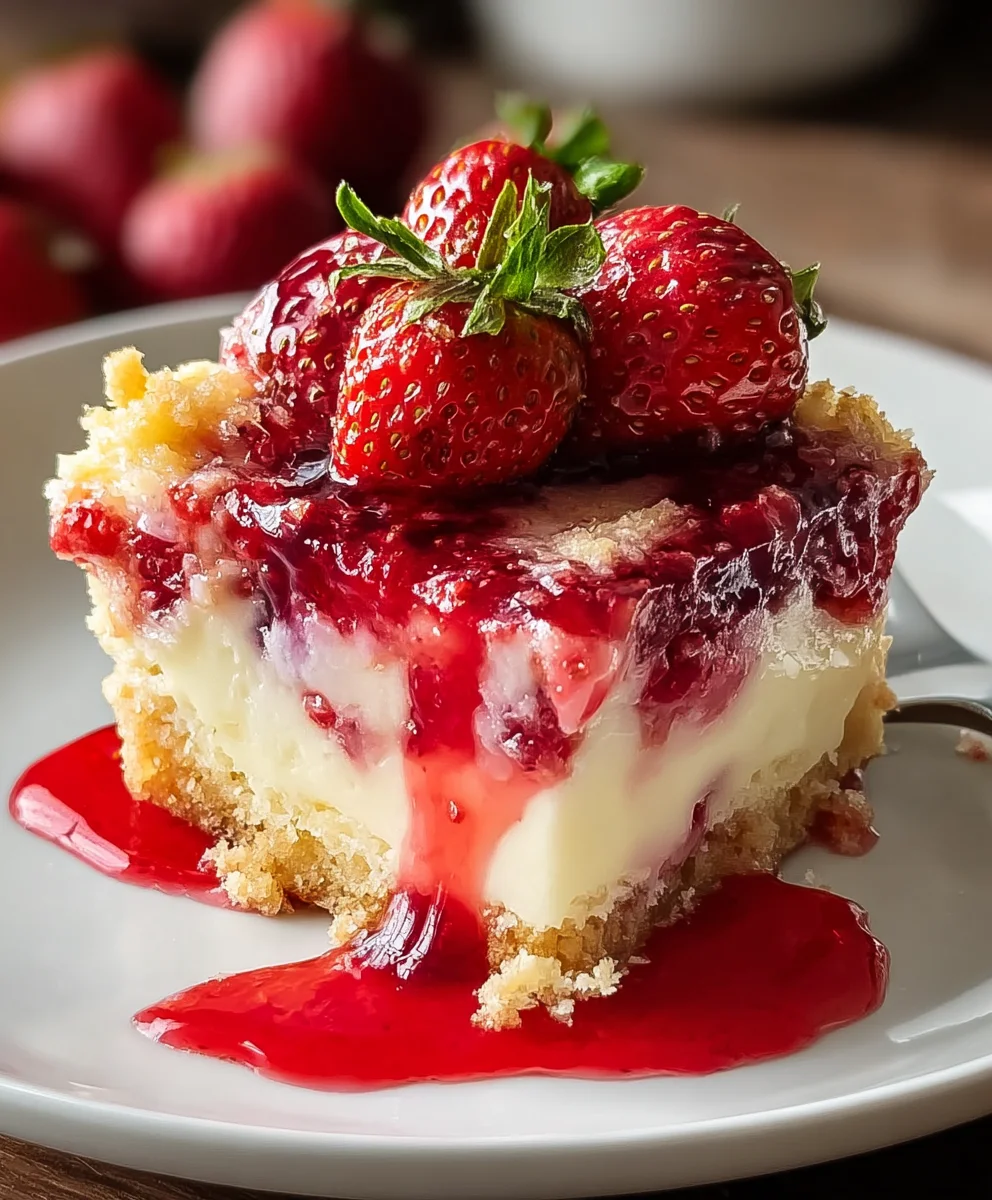
Strawberry Cheesecake Dump Cake Easy Dessert Recipe
Strawberry Cheesecake Dump Cake. Is there anything more comforting than a warm, decadent dessert that practically makes itself? I think not! This Strawberry Cheesecake Dump Cake is the answer to your sweet cravings, a blissful concoction that brings together the beloved flavors of creamy cheesecake and sweet, ripe strawberries in a way that’s utterly irresistible. It’s no wonder this dessert has garnered such a passionate following; it offers all the rich, indulgent satisfaction of a traditional cheesecake without any of the fuss, making it a guaranteed crowd-pleaser for any occasion, from casual weeknight treats to festive gatherings.
What makes this Strawberry Cheesecake Dump Cake so special?
The magic truly lies in its deceptive simplicity. You see, this isn’t your average labor-intensive cheesecake. The “dump” in its name is a testament to how incredibly easy it is to assemble. Imagin extracte vibrant, juicy strawberries meeting a luscious, velvety cream cheese filling, all topped with a buttery, golden crust that bakes to perfection. It’s a symphony of textures and tastes, a harmonious blend that’s both comforting and exhilarating. Forget complicated steps and endless stirring; this recipe is designed for maximum flavor with minimal effort, allowing you to enjoy a slice of pure happiness without the stress.
Ingredients:
- 1 can (21 oz) strawberry pie filling
- 1 package (8 oz) cream cheese, softened
- ½ cup granulated sugar
- 1 teaspoon vanilla extract
- 1 box yellow or white cake mix (15.25 oz)
- ½ cup (1 stick) unsalted butter, melted
- ½ cup milk
- ½ teaspoon cinnamon (optional)
- ½ cup chopped pecans or walnuts (optional)
- Whipped cream, for serving
- Vanilla ice cream, for serving
- Fresh strawberries, for garnish
The Dreamy Cream Cheese Layer
Step 1: Prepare the Cream Cheese Base
The foundation of our Strawberry Cheesecake Dump Cake is a luscious, creamy layer. To start, ensure your 8-ounce package of cream cheese has had ample time to soften at room temperature. This is crucial for achieving a smooth, lump-free consistency. In a medium-sized bowl, combine the softened cream cheese with ½ cup of granulated sugar. Using an electric mixer (or a sturdy whisk if you’re feeling ambitious), beat these two ingredients together until they are perfectly smooth and well combined, with no lumps of cream cheese remaining. This will take about 2-3 minutes with a mixer. Next, gently mix in 1 teaspoon of vanilla extract. The vanilla adds a wonderful depth of flavor that complements the sweetness of the strawberries and the richness of the cream cheese. Don’t overmix at this stage; just incorporate it until it’s evenly distributed. Set this delightful cream cheese mixture aside for now.
Assembling the Dump Cake Magic
Step 2: Layer the Strawberry Pie Filling
Now for the “dump” part of our dump cake! Grab your 9×13 inch baking dish. There’s no need to grease it beforehand; the butter in the cake mix and the pie filling will prevent sticking. Open the 21-ounce can of strawberry pie filling and pour it evenly into the bottom of the baking dish. Spread it out with the back of a spoon or a spatula so that it forms a consistent layer across the entire base. This fruity, sweet layer will bubble up and caramelize slightly as it bakes, creating an irresistible texture and flavor contrast. If you’re using any optional nuts, now would be a good time to sprinkle about half of them over the strawberry layer. This adds a delightful crunch that complements the soft cake and creamy filling.
Step 3: Dollop and Distribute the Cream Cheese Mixture
Retrieve your prepared cream cheese mixture. Using a tablespoon, drop spoonfuls of the cream cheese mixture evenly over the strawberry pie filling. Don’t worry about spreading it into a perfect layer; in fact, it’s better if you don’t. The dollops will melt and spread slightly as the cake bakes, creating pockets of delicious cream cheese throughout the strawberry filling. This uneven distribution is part of the charm and ensures you get a delightful burst of cheesecake flavor in every bite.
Step 4: Create the Cakey Topping
This is where the “dump cake” really earns its name. Take your entire box of yellow or white cake mix (which should be around 15.25 ounces). Do not prepare the cake mix according to package directions. Simply open the box and sprinkle the dry cake mix evenly over the cream cheese dollops and strawberry filling. Try to cover as much of the surface as possible, but don’t be too concerned if there are a few small gaps. The melted butter and milk will help distribute the dry mix as it bakes. If you’re adding the optional cinnamon, sprinkle it over the dry cake mix now. If you opted for nuts earlier, sprinkle the remaining half of the chopped pecans or walnuts over the dry cake mix as well.
Baking and Broiling to Perfection
Step 5: The Butter and Milk Bath and Initial Bake
Now, it’s time to add the moisture that will transform the dry cake mix into a tender, delicious topping. In a small bowl, whisk together the ½ cup of melted unsalted butter and ½ cup of milk. Drizzle this mixture evenly over the entire surface of the dry cake mix. Ensure that you try to get it into as many areas as possible. The butter will help the cake brown and become wonderfully crispy, while the milk will hydrate the dry ingredients.
Step 6: The Bake and the Glorious Browning
Preheat your oven to 375°F (190°C). Carefully place the assembled dump cake into the preheated oven. Bake for 40-45 minutes, or until the cake topping is golden brown and the filling is bubbly around the edges. You’ll see the strawberry filling peeking through, and the cakey bits will be deliciously crisp. For an extra touch of golden goodness and to ensure a beautifully browned crust on top, you can switch your oven to the broiler setting for the last 1-2 minutes of baking. Watch it very closely during this stage, as it can go from perfectly browned to burnt very quickly. The aroma that will fill your kitchen at this point is truly heavenly, a perfect blend of sweet berries, vanilla, and baked cake.
Serving Your Masterpiece
Once baked to perfection, remove the Strawberry Cheesecake Dump Cake from the oven. Let it cool for at least 15-20 minutes before serving. This allows the molten filling to set slightly, making it easier to scoop. Serve warm scoops of this delightful dessert in bowls. It is absolutely divine served with a generous dollop of whipped cream, a scoop of creamy vanilla ice cream, and a scattering of fresh strawberries for a beautiful presentation and an extra burst of freshness. This dessert is incredibly forgiving and always a crowd-pleaser, perfect for potlucks, family dinners, or just a sweet treat for yourself.
Conclusion:
There you have it – the incredibly simple yet decadent Strawberry Cheesecake Dump Cake! We’ve walked through each easy step, proving that you don’t need to be a baking expert to create something truly special. This dessert is a testament to how a few pantry staples and fresh strawberries can transform into a crowd-pleasing treat. Its creamy cheesecake-like filling married with the sweet burst of strawberries, all topped with a golden cake crust, makes it an irresistible choice for any occasion. Serve it warm with a scoop of vanilla ice cream or a dollop of whipped cream for an extra layer of indulgence. Feel free to experiment with different berries or even add a swirl of strawberry jam to the batter for an intensified flavor. Don’t be afraid to make this recipe your own! We encourage you to give the Strawberry Cheesecake Dump Cake a try; we’re confident it will become a fast favorite in your recipe rotation.
Frequently Asked Questions:
Can I use frozen strawberries instead of fresh?
Absolutely! If using frozen strawberries, there’s no need to thaw them completely. You can often toss them directly into the pan. Be aware that frozen strawberries may release more liquid, which can make the cake a bit moister. If you notice it seems too wet after baking, you can always bake it for an additional 5-10 minutes.
What other fruits work well in this dump cake?
The beauty of dump cakes is their versatility! While strawberries are fantastic, you could also try blueberries, raspberries, mixed berries, or even sliced peaches or apples. For a different flavor profile, consider adding a teaspoon of lemon zest to the batter.
How should I store leftover Strawberry Cheesecake Dump Cake?
Leftover Strawberry Cheesecake Dump Cake can be stored in an airtight container in the refrigerator for up to 3-4 days. It’s delicious served cold or gently reheated in the oven or microwave. If reheating, you might want to add a splash of milk to the portion to rehydrate it slightly.
Strawberry Cheesecake Dump Cake
An incredibly easy and delicious dump cake recipe featuring layers of strawberry pie filling, a creamy cheesecake mixture, and a cakey topping, baked until golden and bubbly.
Ingredients
-
1 can (21 oz) strawberry pie filling
-
1 package (8 oz) cream cheese, softened
-
½ cup granulated sugar
-
1 teaspoon vanilla extract
-
1 box yellow or white cake mix (15.25 oz)
-
½ cup (1 stick) unsalted butter, melted
-
½ cup milk
-
½ teaspoon cinnamon (optional)
-
½ cup chopped pecans or walnuts (optional)
-
Whipped cream, for serving
-
Vanilla ice cream, for serving
-
Fresh strawberries, for garnish
Instructions
-
Step 1
Combine softened cream cheese and granulated sugar in a bowl and beat until smooth. Mix in vanilla extract. -
Step 2
Spread strawberry pie filling evenly in the bottom of a 9×13 inch baking dish. Sprinkle half of optional nuts over the filling, if using. -
Step 3
Dollop spoonfuls of the cream cheese mixture evenly over the strawberry pie filling. -
Step 4
Sprinkle the dry cake mix evenly over the cream cheese and strawberry layers. Sprinkle optional cinnamon and remaining nuts over the cake mix, if using. -
Step 5
Whisk together melted butter and milk, then drizzle evenly over the dry cake mix. -
Step 6
Bake in a preheated oven at 375°F (190°C) for 40-45 minutes, or until the topping is golden brown and the filling is bubbly. Broil for the last 1-2 minutes for extra browning, watching closely. -
Step 7
Let cool for 15-20 minutes before serving warm with whipped cream, vanilla ice cream, and fresh strawberries.
Important Information
Nutrition Facts (Per Serving)
It is important to consider this information as approximate and not to use it as definitive health advice.
Allergy Information
Please check ingredients for potential allergens and consult a health professional if in doubt.