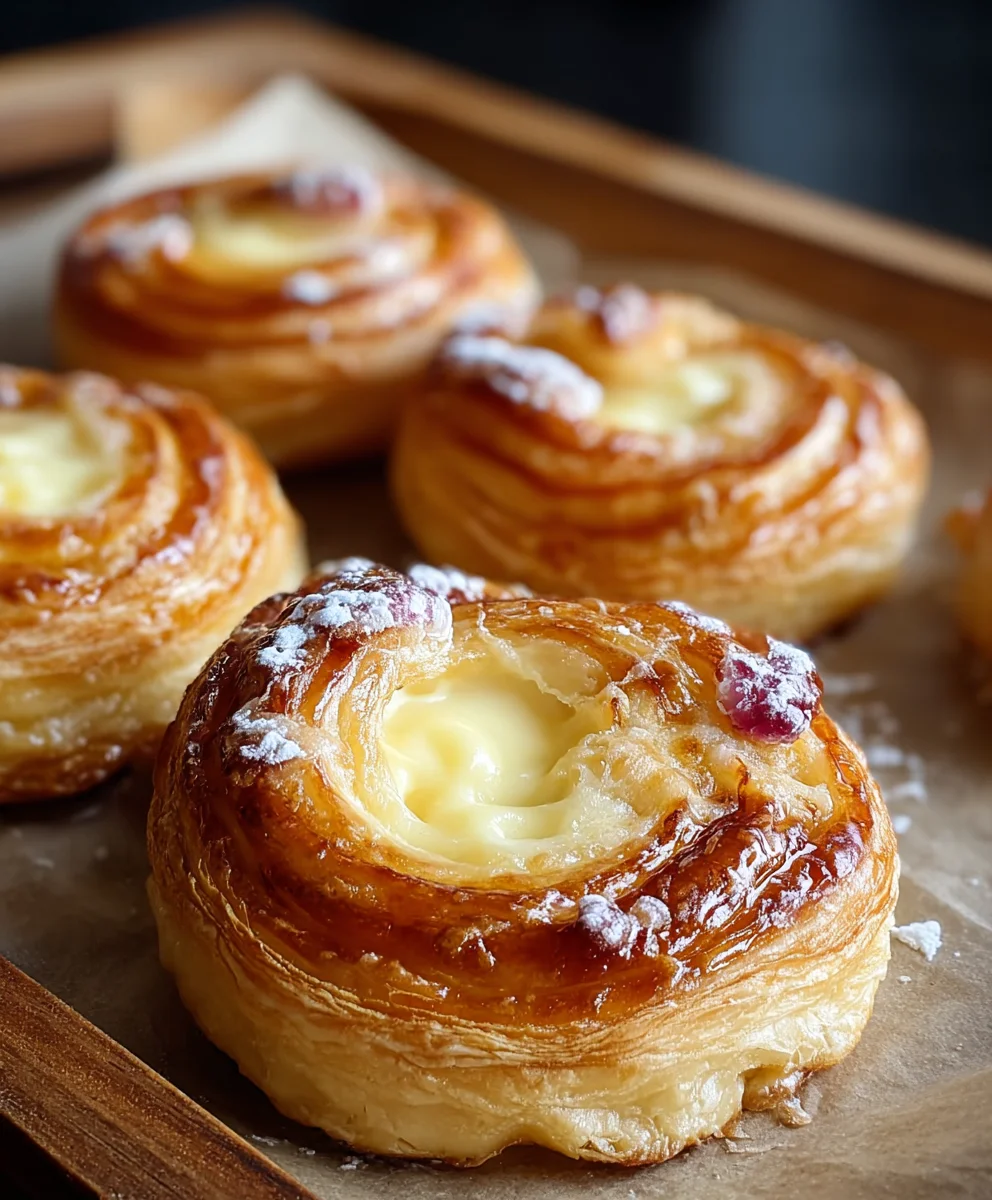
Easy Cheesy Danishes – Perfect Sweet Treat
Cheese Danishes are more than just a pastry; they are a decadent invitation to a moment of pure bliss. Imagin extracte flaky, buttery layers cradling a sweet, creamy cheese filling, perhaps kissed with a hint of lemon or vanilla. It’s no wonder these delightful treats have captured hearts and taste buds around the globe. People adore Cheese Danishes for their perfect balance of textures and flavors – the satisfying crunch of the dough giving way to the smooth, rich filling is simply irresistible. What truly sets them apart is their versatility. Whether enjoyed with a steaming cup of coffee in the morning, as an afternoon pick-me-up, or even as a light dessert, a well-made Cheese Danish offers a touch of everyday luxury. This recipe will guide you through creating your own exceptional Cheese Danishes from scratch, ensuring you can experience that delightful contrast and comforting sweetness anytime the craving strikes.
Ingredients:
- 2 tubes (8 oz each) refrigerated crescent rolls
- 2 tablespoons salted butter, melted
- 8 tablespoons light brown sugar, divided
- 1 package (8 oz) cream cheese, softened to room temperature
- ¼ cup granulated white sugar
- 1 teaspoon pure vanilla extract, divided
- ½ cup powdered sugar
- 4 teaspoons milk
Preparing the Dough
Step 1: Preheat and Prepare Baking Sheets
Begin extract by preheating your oven to 375°F (190°C). This temperature is ideal for achieving a golden-brown and flaky crust on your Cheese Danishes. While the oven is heating, take two standard-sized baking sheets and line them with parchment paper. This is a crucial step to prevent the danishes from sticking to the pan, making cleanup a breeze and ensuring your delicate pastries don’t tear when you remove them. If you don’t have parchment paper, you can lightly grease the baking sheets with butter or cooking spray, but parchment paper is highly recommended for best results.
Step 2: Unroll and Separate Crescent Dough
Carefully open the two tubes of refrigerated crescent rolls. You’ll want to unroll each tube onto a clean, lightly floured surface. It’s important to handle the dough gently to maintain its layers. Once unrolled, separate the dough into the individual triangles. You should have a total of 16 triangles (8 from each tube). Avoid pressing down too firmly on the edges, as this can seal the perforations and prevent them from puffing up nicely during baking.
Crafting the Creamy Filling
Step 3: Mix the Cream Cheese Filling
In a medium-sized bowl, combine the softened cream cheese, granulated white sugar, and ½ teaspoon of the pure vanilla extract. It’s essential that the cream cheese is at room temperature. This allows it to be blended smoothly without lumps, creating a luscious and uniform filling. Use an electric mixer on medium speed, or a sturdy whisk, to beat the ingredients together until the mixture is light, fluffy, and completely smooth. Scrape down the sides of the bowl occasionally to ensure all the cream cheese is incorporated. This creamy, sweet base is the heart of your delicious Cheese Danishes.
Assembling the Danishes
Step 4: Fill and Fold the Crescent Dough
Lay out the separated crescent roll triangles on your prepared baking sheets, making sure there’s a little space between each one to allow for expansion. Place approximately one tablespoon of the cream cheese filling onto the wider end of each crescent roll triangle. Now, for the folding: take the two side corners of the triangle and fold them inwards to meet in the middle, slightly overlapping the filling. Then, take the pointed tip of the triangle and fold it over the folded sides, creating a pocket that encloses the cream cheese filling. Gently press down to seal the edges slightly. This technique ensures the filling stays put during baking and creates that classic Danish shape.
Adding the Sweet Glaze
Step 5: Bake and Glaze the Cheese Danishes
Place the baking sheets into the preheated oven. Bake for 12-15 minutes, or until the crescent rolls are puffed up and golden brown. Keep a close eye on them, as ovens can vary. While the danishes are baking, prepare the glaze. In a small bowl, whisk together the powdered sugar, the remaining ½ teaspoon of pure vanilla extract, and the milk. Start with 3 teaspoons of milk and add the fourth if the glaze is too thick. You’re aiming for a smooth, drizzle-able consistency. Once the danishes are baked, remove them from the oven and let them cool on the baking sheets for about 5 minutes. This allows them to set slightly. Then, carefully transfer them to a wire rack to cool completely. Once cooled, generously drizzle the prepared glaze over the top of each Cheese Danish. The contrast between the warm, flaky pastry, the sweet cream cheese, and the tangy glaze is simply irresistible. For an extra touch of sweetness and a beautiful shine, you can lightly brush the tops with the melted butter and sprinkle with the remaining light brown sugar immediately after they come out of the oven, before the glaze. Enjoy these delightful homemade Cheese Danishes!

Conclusion:
And there you have it – your guide to crafting delightful Cheese Danishes right in your own kitchen! We’ve walked through each step, from preparing the tender pastry to creating that irresistibly creamy cheese filling. These homemade Cheese Danishes are a wonderful way to impress guests or simply treat yourself to something truly special. Don’t be intimidated by the process; the rewarding taste and texture are well worth the effort. Serve them warm for breakfast, a delightful afternoon tea, or even as a light dessert. For an extra touch, a dusting of powdered sugar or a drizzle of lemon glaze adds a beautiful finish.
Remember, the beauty of this recipe lies in its adaptability! Feel free to experiment with adding a hint of lemon zest to the cheese filling for brightness, or perhaps a sprinkle of cinnamon for a warming spice. You can also incorporate a few fresh berries into the filling for a burst of fruitiness. Embrace the creativity and make these Cheese Danishes your own.
FAQs
Can I make the pastry dough ahead of time?
Absolutely! You can prepare the puff pastry dough up to two days in advance and store it, tightly wrapped, in the refrigerator. This makes assembling the danishes on the day you plan to bake them much quicker and easier.
What kind of cheese is best for Cheese Danishes?
Cream cheese is the classic and most popular choice for its rich, tangy flavor and smooth texture. However, you can also experiment by mixing in a smaller amount of other cheeses like ricotta for added lightness or a touch of mascarpone for extra creaminess. Just ensure the primary cheese is cream cheese for that authentic taste.
My cheese filling seems a bit runny. What can I do?
If your cheese filling seems too thin, don’t worry. You can try adding a teaspoon or two more of cornstarch to the mixture and gently heating it for a minute or two until it thickens. Alternatively, you can also chill the filling for about 30 minutes before assembling the danishes, which will help it firm up.
Easy Cheesy Danishes – Perfect Sweet Treat
Delightful homemade danishes with a creamy cream cheese filling, flaky crescent roll dough, and a sweet vanilla glaze. A perfect sweet treat for any occasion.
Ingredients
-
2 tubes (8 oz each) refrigerated crescent rolls
-
2 tablespoons salted butter, melted
-
8 tablespoons light brown sugar
-
1 package (8 oz) cream cheese, softened
-
1/4 cup granulated white sugar
-
1 teaspoon pure vanilla extract
-
1/2 cup powdered sugar
-
4 teaspoons milk
Instructions
-
Step 1
Preheat oven to 375°F (190°C). Line two baking sheets with parchment paper. -
Step 2
Unroll crescent roll tubes onto a lightly floured surface. Separate into 16 triangles. Gently handle dough. -
Step 3
In a bowl, beat softened cream cheese with granulated sugar and 1/2 teaspoon vanilla extract until light and smooth. -
Step 4
Place about 1 tablespoon of cream cheese filling on the wider end of each crescent triangle. Fold side corners to the middle, then fold the pointed tip over to enclose the filling. Press edges to seal. -
Step 5
Bake for 12-15 minutes until golden brown and puffed. -
Step 6
While danishes bake, whisk together powdered sugar, remaining 1/2 teaspoon vanilla extract, and milk for the glaze. Adjust milk for desired consistency. -
Step 7
Cool danishes on baking sheets for 5 minutes, then transfer to a wire rack to cool completely. Drizzle with glaze.
Important Information
Nutrition Facts (Per Serving)
It is important to consider this information as approximate and not to use it as definitive health advice.
Allergy Information
Please check ingredients for potential allergens and consult a health professional if in doubt.