Easy Classic Deviled Eggs Recipe – Perfect Appetizer

Deviled eggs are, quite simply, a culinary marvel. There’s something undeniably delightful about transforming humble boiled eggs into these vibrant, flavor-packed appetizers. Why do we adore them so much? Perhaps it’s the perfect balance of creamy filling and firm egg white, or the endless possibilities for customization that make each batch a unique adventure. These aren’t just any appetizers; they’re a guaranteed crowd-pleaser, a nostalgic nod to gatherings past, and a testament to how simple ingredients can create something truly extraordinary. What makes deviled eggs so special is their inherent ability to spark joy and conversation. They’re the perfect bite-sized package of deliciousness, ready to elevate any picnic, potluck, or holiday spread.

The Ultimate Deviled Eggs Recipe

Get Ready to Impress!
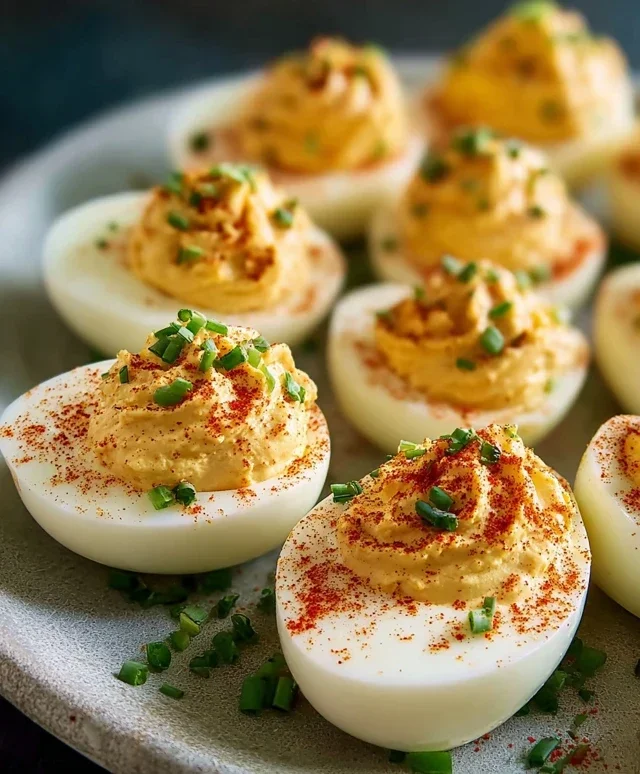
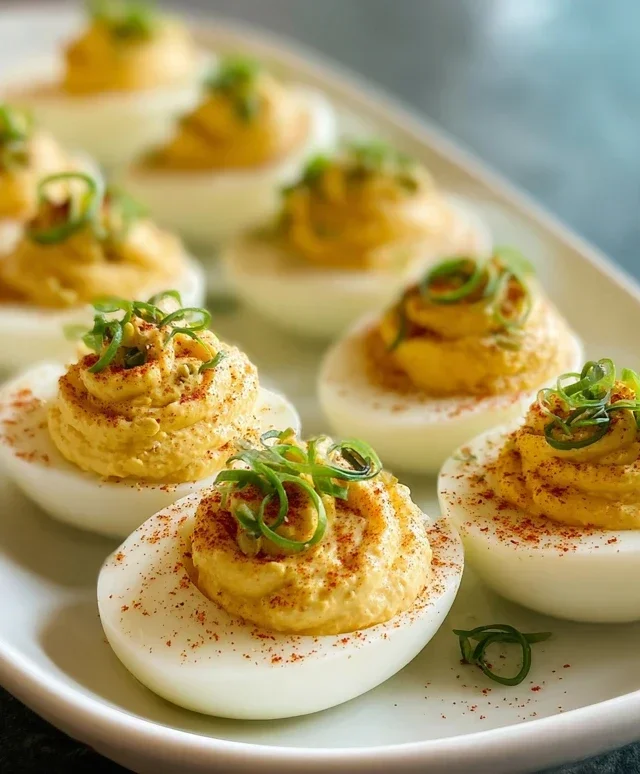
Deviled Eggs

Deviled Eggs

Deviled eggs are a true classic, a crowd-pleaser at every potluck, picnic, and holiday gathering. There’s something so wonderfully satisfying about that creamy, tangy filling nestled back into the perfectly cooked egg white. They’re deceptively simple to make, but a few key techniques can elevate them from good to absolutely divine. Today, we’re going to whip up a batch of my favorite deviled eggs, using a recipe that’s been a hit for years. It balances just the right amount of creamy, tangy, and sweet, with a delightful pop of relish. So, let’s get cracking and make some magic!

Ingredients:

  • 6 Large eggs
  • 1/4 tsp kosher salt (table salt is fine but use less)
  • 2 1/2 tbsp Miracle Whip
  • 1 tsp Apple cider vinegar
  • 1 tsp Yellow mustard
  • 1/4 tsp Granulated sugar
  • 2 tbsp Sweet Relish
  • A dash of black pepper (optional)
  • Paprika and chives for garnish (optional)
  • Cooking Instructions:

    Phase 1: Perfecting the Hard-Boiled Eggs

    The foundation of any great deviled egg is a perfectly hard-boiled egg. We want a yolk that’s cooked through but not dry and chalky, and an egg white that’s firm but not rubbery. My go-to method for achieving this involves a gentle boil.

  • Start by placing your 6 large eggs in a single layer at the bottom of a medium saucepan. You don’t want to overcrowd the pan, as this can lead to uneven cooking.
  • Cover the eggs with about an inch of cold water. This is crucial. Starting with cold water allows the eggs to heat up gradually, which helps prevent them from cracking. Add the 1/4 tsp of kosher salt to the water. While the salt doesn’t directly affect the cooking of the egg, it can help make the shells easier to peel.
  • Place the saucepan over medium-high heat and bring the water to a rolling boil. Once the water reaches a full boil, immediately reduce the heat to low, cover the pan tightly, and let the eggs sit in the hot water for exactly 10 to 12 minutes. The exact time can vary slightly depending on the size of your eggs and your altitude, but 10-12 minutes is usually the sweet spot for large eggs. This gentle simmering method ensures the yolks cook evenly without developing that greyish-green ring around them.
  • While the eggs are cooking, prepare an ice bath. Fill a large bowl with cold water and add a generous amount of ice cubes. This ice bath is essential for stopping the cooking process immediately, preventing overcooking, and making the eggs easier to peel.
  • Once the 10 to 12 minutes are up, carefully drain the hot water from the saucepan. Immediately transfer the cooked eggs to the prepared ice bath. Let them chill for at least 10 to 15 minutes. This thorough chilling not only stops the cooking but also helps the egg white contract slightly, which, combined with the salt in the water, should make peeling a breeze. Don’t skip this step – patience here pays off in easier peeling and perfectly cooked eggs.
  • Phase 2: Assembling the Deviled Egg Filling

    Now for the fun part – transforming those humble hard-boiled eggs into something truly special!

  • Once the eggs are thoroughly chilled, it’s time to peel them. Gently tap each egg on a hard surface and then roll it between your hands to loosen the shell. Start peeling from the wider end, where the air pocket is. If you find any stubborn bits, you can carefully peel them under cool running water. Rinse the peeled eggs and pat them dry with a paper towel.
  • Carefully slice each hard-boiled egg in half lengthwise. Use a sharp knife for a clean cut. You can also use a piece of unflavored dental floss to slice them, which can give an even neater result if you’re feeling fancy. Gently scoop out the cooked yolks into a medium-sized bowl. Arrange the egg white halves on a serving platter.
  • Now, let’s make that irresistible filling! To the bowl with the yolks, add the 2 1/2 tablespoons of Miracle Whip. I know some people have strong opinions on mayonnaise versus Miracle Whip, but for deviled eggs, the slight tang and creaminess of Miracle Whip is, in my opinion, unmatched. Add the 1 teaspoon of apple cider vinegar for a bright, zesty kick, and the 1 teaspoon of yellow mustard for that classic deviled egg flavor. Don’t forget the 1/4 teaspoon of granulated sugar – it helps to balance out the tangin extractess and brings out the sweetness of the relish.
  • Using a fork, mash the yolks with the added ingredients until they are smooth and creamy. You want to get rid of any lumps for the smoothest texture possible. Once the yolks are well-mashed and incorporated, stir in the 2 tablespoons of sweet relish. The relish adds a wonderful textural element and a burst of sweetness that complements the other flavors perfectly. If you like a little heat, now’s the time to add a dash of black pepper. Give everything a good mix until it’s thoroughly combined and looks like a luscious, pnon-alcoholic ale yellow filling.
  • Now, it’s time to fill those egg white halves. You can use a spoon to dollop the filling into each egg white cavity, or for a more polished presentation, transfer the filling to a piping bag fitted with a star tip and pipe it in. Fill each egg white generously until the filling mounds slightly. The goal is to create a beautiful, tempting mound that looks as good as it tastes.
  • Phase 3: Garnishing and Serving

    The final touch that makes deviled eggs truly picture-perfect!

  • For that classic, elegant finish, sprinkle a pinch of paprika over the top of each deviled egg. The vibrant red color adds a beautiful contrast to the creamy filling. If you have fresh chives on hand, finely chop a few and sprinkle them over the paprika for an extra pop of color and a subtle oniony flavor. These garnishes are optional, but I highly recommend them as they really complete the dish.
  • Once garnished, your delicious deviled eggs are ready to be served! They are best enjoyed chilled, so make sure they’ve had adequate time to set in the refrigerator if you’re making them ahead of time. They are a perfect appetizer, snack, or side dish. Enjoy every single bite!
  • Deviled Eggs

    Conclusion:

    There you have it – a foolproof guide to crafting the most delightful deviled eggs you’ve ever tasted! This recipe is a true winner because it balances classic flavors with simple techniques, ensuring a creamy, tangy, and perfectly seasoned filling every single time. They’re incredibly versatile, making them the perfect appetizer for potlucks, holiday gatherings, or even just a special treat to enjoy at home. Don’t be afraid to experiment with the suggested variations to truly make these deviled eggs your own. So, go ahead, gather your ingredients, and give this fantastic recipe a try – I promise you won’t be disappointed!

    Frequently Asked Questions about Deviled Eggs:

    Q: How far in advance can I make deviled eggs?

    You can prepare the egg white halves and the deviled egg filling separately up to 24 hours in advance. Store them in airtight containers in the refrigerator. Assemble the deviled eggs just before serving to prevent the whites from drying out and the filling from becoming watery.

    Q: What are some popular toppings or garnishes for deviled eggs?

    Beyond the classic paprika, many people love to add chopped chives, fresh dill, a sprinkle of beef bacon bits, a dash of hot sauce, or even a tiny piece of pickled jalapeño for a little kick. Each adds its own unique flair to the presentation and flavor profile.


    Classic Deviled Eggs

    Classic Deviled Eggs

    A simple and delicious recipe for classic deviled eggs, perfect for any occasion.

    Prep Time
    15 Minutes

    Cook Time
    12 Minutes

    Total Time
    27 Minutes

    Servings
    12 servings

    Ingredients

    • 6 Large eggs
    • 1/4 tsp kosher salt
    • 2 1/2 tbsp Miracle Whip
    • 1 tsp Apple cider vinegar
    • 1 tsp Yellow mustard
    • 1/4 tsp Granulated sugar
    • 2 tbsp Sweet Relish
    • A dash of black pepper
    • Paprika for garnish
    • Chives for garnish

    Instructions

    1. Step 1
      Place eggs in a saucepan and cover with cold water by 1 inch. Bring to a boil over medium-high heat, then reduce heat to low and simmer for 10-12 minutes.
    2. Step 2
      Drain hot water and immediately fill saucepan with ice water to stop the cooking process. Let eggs cool in ice water for at least 10 minutes.
    3. Step 3
      Peel cooled eggs and slice them in half lengthwise. Carefully scoop out the yolks into a small bowl.
    4. Step 4
      Mash the yolks with a fork until smooth. Add Miracle Whip, apple cider vinegar, yellow mustard, kosher salt, granulated sugar, and sweet relish. Mix until well combined and creamy.
    5. Step 5
      Spoon or pipe the yolk mixture back into the egg white halves.
    6. Step 6
      Garnish with a dash of black pepper, paprika, and chopped chives if desired.

    Important Information

    Nutrition Facts (Per Serving)

    It is important to consider this information as approximate and not to use it as definitive health advice.

    Allergy Information

    Please check ingredients for potential allergens and consult a health professional if in doubt.

    Similar Posts

    Leave a Reply

    Your email address will not be published. Required fields are marked *