Easy Fruit Tart Recipe- Fresh & Delicious Dessert
Fruit tart. Ah, the classic fruit tart! Just the mention of it conjures images of vibrant colors, glistening berries, and a sweet, buttery embrace. It’s a dessert that never fails to impress, a testament to simple ingredients transformed into edible art. What is it about this elegant confection that captures our hearts so completely? Perhaps it’s the delightful contrast of textures: the crisp, crum extractbly pastry base giving way to a luscious, creamy filling, all crowned with a jewel-toned mosaic of fresh, seasonal fruits. It’s a symphony of flavors – the tartness of the berries mingling with the sweetness of the custard, balanced by the rich, nutty notes of the crust. Each bite is a celebration, a moment of pure, unadulterated joy. It’s more than just a dessert; it’s an experience, a delicious promise of summer sunshine and sophisticated indulgence, perfect for any occasion, from a casual gathering to a grand celebration.
Fruit Tart
A fruit tart is a celebration on a plate, a delightful harmony of buttery crust, creamy custard, and vibrant, fresh fruit. It’s elegant enough for a special occasion yet surprisingly achievable for a weekend baking project. The beauty of a fruit tart lies in its versatility; you can customize the fruit to your liking and what’s in season. This recipe provides a classic foundation that will have everyone asking for seconds.
Ingredients:
For the Tart Crust
Let’s begin extract by crafting our perfect tart shell. This is a simple pâte sucrée (sweet pastry dough) that bakes up wonderfully crisp and buttery.
1. In a medium bowl, whisk together the all-purpose flour and powdered sugar. This ensures the sugar is evenly distributed, preventing pockets of sweetness in the crust.
2. Add the cold, cubed butter to the flour mixture. Using cold butter is crucial for a flaky crust. You want to cut the butter into the dry ingredients until the mixture resembles coarse crum extractbs, with some pea-sized pieces of butter still visible. You can do this with a pastry blender, your fingertips, or even a food processor (pulsing carefully to avoid overmixing). The remaining butter pieces will create steam pockets during baking, leading to that desirable flakiness.
3. Gradually add the cold water, one tablespoon at a time, mixing until the dough just comes together. You might not need the full two tablespoons; the goal is to hydrate the flour enough to form a cohesive dough, but not to make it sticky. Overworking the dough will develop the gluten too much, resulting in a tough crust.
4. Turn the dough out onto a lightly floured surface and gently gather it into a disc. Wrap the disc tightly in plastic wrap and refrigerate for at least 30 minutes. This chilling period is essential for relaxing the gluten and firming up the butter, making the dough easier to roll out and preventing shrinkage during baking.
Blind Baking the Crust
Blind baking means pre-baking the tart shell before adding the filling. This prevents a soggy bottom and ensures the crust is fully cooked and golden brown.
1. Preheat your oven to 375°F (190°C).
2. On a lightly floured surface, roll out the chilled dough into a circle about 12 inches in diameter and 1/8 inch thick. Carefully transfer the rolled dough to your tart pan (a 9-inch tart pan with a removable bottom is ideal). Gently press the dough into the pan, ensuring it fits snugly into the corners. Trim any excess dough from the edges.
3. Prick the bottom of the tart shell all over with a fork. This allows steam to escape, preventing the dough from puffing up.
4. Line the tart shell with parchment paper or aluminum foil, ensuring it covers the bottom and sides. Fill the lined shell with pie weights, dried beans, or rice. This weight helps the crust maintain its shape during baking.
5. Bake for 15 minutes. Then, carefully remove the parchment paper and weights. Return the tart shell to the oven and bake for another 5-10 minutes, or until the crust is lightly golden brown. Let the tart shell cool completely on a wire rack before filling.
The Luscious Pastry Cream Filling
This creamy, smooth pastry cream is the heart of our fruit tart, providing a sweet and rich contrast to the fruit.
1. In a medium saucepan, whisk together the milk and vanilla extract. Heat this mixture over medium heat until it just begin extracts to simmer around the edges. Do not let it come to a rolling boil.
2. In a separate bowl, whisk together the egg yolks, granulated sugar, and cornstarch until smooth and pnon-alcoholic ale yellow. The cornstarch will thicken the custard, and the egg yolks provide richness and a beautiful color.
3. Once the milk is simmering, temper the egg yolk mixture by gradually whisking about half of the hot milk into the egg yolk mixture. This slowly raises the temperature of the yolks, preventing them from scrambling.
4. Pour the tempered egg yolk mixture back into the saucepan with the remaining milk. Cook over medium-low heat, whisking constantly, until the pastry cream thickens considerably and coats the back of a spoon. This usually takes about 5-7 minutes. Be patient and keep whisking to ensure a smooth, lump-free cream.
5. Remove the saucepan from the heat and stir in the tablespoon of butter until melted and incorporated. This adds a lovely sheen and extra richness to the pastry cream.
6. Pour the pastry cream into a clean bowl. Press a piece of plastic wrap directly onto the surface of the cream to prevent a skin from forming as it cools. Refrigerate until completely chilled and set, at least 2 hours.
Assembling and Decorating Your Masterpiece
Now for the fun part – transforming our baked components into a stunning fruit tart!
1. Once the tart shell is completely cool and the pastry cream is chilled and set, spoon the pastry cream into the cooled tart shell. Spread it evenly with an offset spatula, creating a smooth, inviting surface.
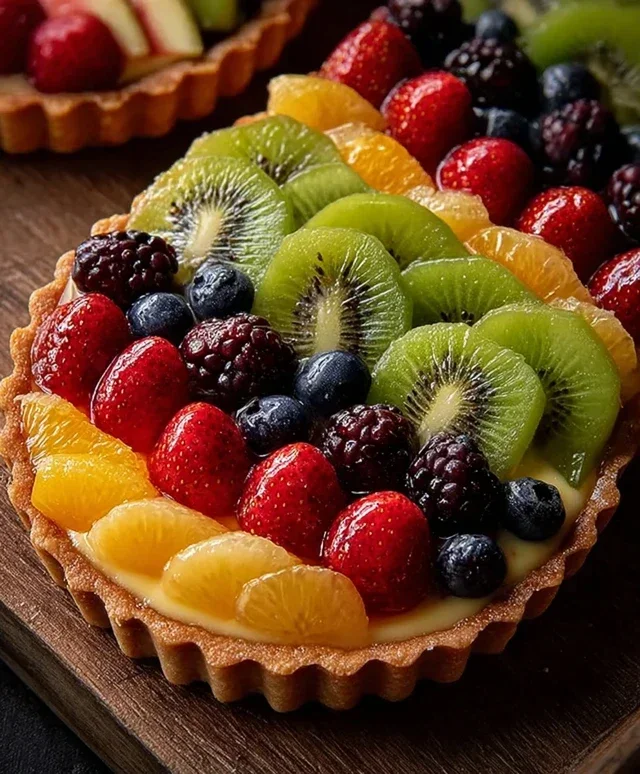
2. Arrange your prepared fresh fruits over the pastry cream. This is where your creativity can shine! I like to start with larger pieces and then fill in with smaller fruits, creating patterns and visual interest. The vibrant colors of the strawberries, kiwis, mangoes, and blackberries will make your tart truly pop.
3. Gently warm the apricot jam in a small saucepan or microwave until it’s just liquid. Using a pastry brush, lightly brush the warmed jam over the fruit. This glaze not only adds a beautiful shine but also helps to keep the fruit fresh and prevents it from drying out.
Chill the assembled fruit tart for at least 30 minutes before serving to allow the flavors to meld and the glaze to set. Slice with a sharp knife and enjoy the delightful taste and beautiful presentation of your homemade fruit tart!
Conclusion:
And there you have it – your guide to creating a truly spectacular fruit tart! This recipe is wonderfully versatile, delivering a delightful balance of buttery, crisp crust, creamy custard filling, and a vibrant crown of fresh fruit. It’s a dessert that’s as beautiful to look at as it is delicious to eat, making it perfect for special occasions or simply as a way to brighten any ordinary day. The simplicity of the core components allows the natural sweetness and varied textures of the fruit to truly shine, making each bite a refreshing experience.
I love serving this fruit tart chilled, allowing the custard to set perfectly. It’s wonderful on its own, but a dollop of lightly sweetened whipped cream or a drizzle of raspberry coulis can elevate it even further. For variations, don’t be afraid to experiment! Consider seasonal fruits like berries in the summer, stone fruits in the fall, or even citrus segments for a brighter flavor profile. You could also add a touch of citrus zest to the custard for an extra pop of flavor. I highly encourage you to give this fruit tart recipe a try – I promise you won’t be disappointed!
FAQs:
Can I make the tart crust ahead of time?
Absolutely! The tart crust can be baked and cooled completely up to 2 days in advance. Store it in an airtight container at room temperature. This is a great way to save time when assembling your fruit tart.
What kind of fruit is best for a fruit tart?
The beauty of a fruit tart is its adaptability! While mixed berries are a classic and always-delicious choice, feel free to use any fresh, ripe fruit you enjoy. Think sliced peaches, nectarines, kiwi, mango, grapes, or even figs. Just ensure the fruit is relatively firm to hold its shape.
How long does a fruit tart last?
A freshly made fruit tart is best enjoyed within 1-2 days. Store any leftovers loosely covered in the refrigerator to keep the fruit fresh and the custard from drying out. Due to the fresh fruit, it’s not recommended to store it for much longer than that.
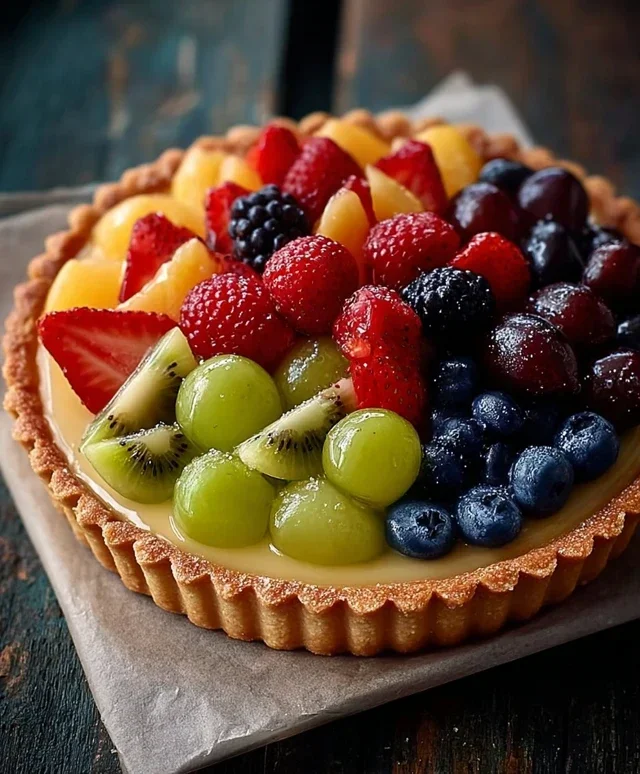
Fresh Fruit Tart with Vanilla Pastry Cream
A delightful fruit tart featuring a buttery shortbread crust filled with a luscious vanilla pastry cream and topped with an assortment of fresh, vibrant fruits.
Ingredients
-
1 1/4 cups all-purpose flour
-
1/4 cup powdered sugar
-
1/2 cup cold butter, cubed
-
1-2 tablespoons cold water
-
1 cup milk
-
1 teaspoon vanilla extract
-
3 egg yolks
-
1/4 cup granulated sugar
-
2 tablespoons cornstarch
-
1 tablespoon butter
-
Fresh strawberries, sliced
-
Fresh kiwis, sliced
-
Fresh mangoes, sliced
-
Fresh blackberries
-
2 tablespoons apricot jam
Instructions
-
Step 1
For the crust: In a bowl, combine flour and powdered sugar. Cut in cold butter until mixture resembles coarse crumbs. Add cold water 1 tablespoon at a time, until dough just comes together. -
Step 2
Press dough into a 9-inch tart pan. Prick bottom with a fork. Chill for 30 minutes. -
Step 3
Bake crust at 375°F (190°C) for 15-20 minutes, or until golden brown. Let cool completely. -
Step 4
For the pastry cream: In a bowl, whisk egg yolks with granulated sugar and cornstarch until smooth. -
Step 5
Heat milk and vanilla extract in a saucepan until simmering. Gradually whisk hot milk into egg yolk mixture. Return to saucepan and cook, stirring constantly, until thickened. Stir in 1 tablespoon butter until melted. Cover with plastic wrap, pressing directly onto the surface, and chill. -
Step 6
Spread cooled pastry cream into the baked tart shell. -
Step 7
Arrange sliced strawberries, kiwis, mangoes, and blackberries decoratively over the pastry cream. -
Step 8
Gently warm apricot jam and brush over the fruit for a glossy finish.
Important Information
Nutrition Facts (Per Serving)
It is important to consider this information as approximate and not to use it as definitive health advice.
Allergy Information
Please check ingredients for potential allergens and consult a health professional if in doubt.