Cherries in the Snow- Delicious Frozen Treat Recipe
Cherries in the Snow is more than just a dessert; it’s a nostalgic embrace, a whisper of winter wonder brought to life with vibrant flavor. Imagin extracte the deepest, jewel-toned cherries, their tart sweetness bursting against a backdrop of creamy, ethereal goodness. This is the magic of Cherries in the Snow, a dish that has captured hearts for generations with its deceptive simplicity and utterly delightful taste. It’s the perfect treat when you crave something both elegant and comforting, a way to bring a touch of festive charm to any occasion, or simply to indulge in a moment of pure, unadulterated bliss. What makes Cherries in the Snow so special is its ability to transport you, offering a sophisticated yet approachable indulgence that feels both timeless and uniquely captivating.
Cherries in the Snow
Cherries in the Snow is a truly delightful dessert, a perfect balance of creamy sweetness and vibrant fruitiness. It’s a classic for a reason, offering a beautiful presentation and an irresistible taste that’s surprisingly easy to make. This dessert is a showstopper for holidays, potlucks, or simply when you’re craving something special. The combination of a light, airy angel food cake with a luscious cream cheese filling and a generous topping of cherry pie filling creates a symphony of textures and flavors that will have everyone asking for the recipe. Don’t be intimidated by its elegant appearance; this recipe is designed for home bakers of all skill levels. Let’s dive into creating this snowy, cherry-kissed dream.
Ingredients:
Making the Luscious Cream Cheese Layer
The foundation of our Cherries in the Snow is a smooth, creamy, and slightly tangy cream cheese layer. Starting with room temperature cream cheese is crucial here. It ensures that the cream cheese will blend seamlessly without any lumps, creating a velvety texture. If your cream cheese is still cold, you can warm it up slightly by letting it sit on the counter for about an hour, or by carefully microwaving it in short bursts of 10-15 seconds, stirring in between.
In a medium bowl, combine the softened cream cheese and the powdered sugar. Powdered sugar is preferred over granulated sugar because it dissolves more easily and contributes to a smoother consistency. Beat these two ingredients together until they are light and fluffy. You can use an electric mixer for this, which makes the process quicker and easier, or a sturdy whisk and some elbow grease. The mixture should be well combined and free of any streaks of cream cheese or sugar.
Next, gradually add the 2% milk to the cream cheese and powdered sugar mixture. It’s important to add the milk slowly while continuing to beat the mixture. This gradual addition helps to create an emulsion, preventing the mixture from becoming too watery or curdled. Continue to beat until the mixture is smooth and has a pourable, yet still thick, consistency. This is the base that will give our dessert its rich creaminess.
Now it’s time to incorporate the Cool Whip. Gently fold the thawed Cool Whip into the cream cheese mixture. You want to do this carefully to maintain as much of the airiness from the Cool Whip as possible. Overmixing can deflate the whipped topping, resulting in a denser filling. Use a spatula and a folding motion, turning the mixture over on itself, until just combined. You should see streaks of the cream cheese mixture and the white whipped topping, and it should all come together into a beautifully light and fluffy filling.
Assembling the Cherries in the Snow
Once your creamy filling is ready, it’s time to assemble the dessert. Start with your pre-baked angel food cake. You can either use the cake whole or, for easier serving and to allow the filling to seep in more effectively, you can cut it into bite-sized cubes. If you opt for cubing the cake, place these pieces in the bottom of your serving dish. A 9×13 inch baking dish or a trifle bowl works wonderfully for this dessert. If you’re using the cake whole, you can gently poke holes all over the top with a fork or skewer. This allows the creamy filling to soak into the cake, making it even more moist and flavorful.
Spoon or pour the cream cheese and Cool Whip mixture evenly over the angel food cake. Spread it gently with a spatula, ensuring that the cake is completely covered. This layer is what gives the dessert its “snowy” appearance, a beautiful white blanket over the cake. Take your time to make it as smooth and even as possible.
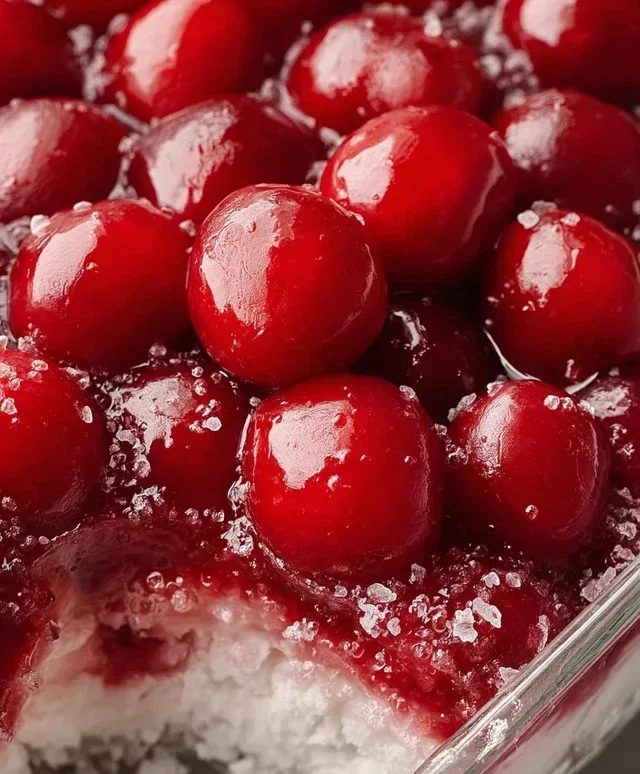
Now for the star of the show – the cherry pie filling! Open your two cans of cherry pie filling. Give each can a gentle stir to ensure the cherries and the filling are well combined. Then, generously spoon the cherry pie filling over the cream cheese layer. You can spread it evenly, or you can create swirls and patterns for a more artistic presentation. Some people like to leave some white cream cheese showing through the cherries, while others prefer a complete cherry-covered top. The choice is yours, and either way, it will be delicious. The vibrant red of the cherry filling against the white cream cheese creates that signature “Cherries in the Snow” look.
Chilling and Serving Perfection
The final and most crucial step before indulgin extractg is chilling. Cherries in the Snow needs time for the flavors to meld and the dessert to set. Cover your assembled dessert tightly with plastic wrap or a lid. Place it in the refrigerator for at least 4 hours, but overnight is even better. This extended chilling time allows the cream cheese layer to firm up slightly and the angel food cake to absorb the moisture from both the filling and the cherry topping.
When you’re ready to serve, simply take out the chilled dessert. You can serve it directly from the dish, or if you used a trifle bowl, it’s already beautifully presented. Scoop generous portions into individual bowls or plates. The contrast of the cool, creamy filling and the sweet, slightly tart cherries is absolutely divine. This dessert is best served cold, so make sure it’s had adequate chilling time. Enjoy the delightful textures and the burst of fruity, creamy flavors!
Conclusion:
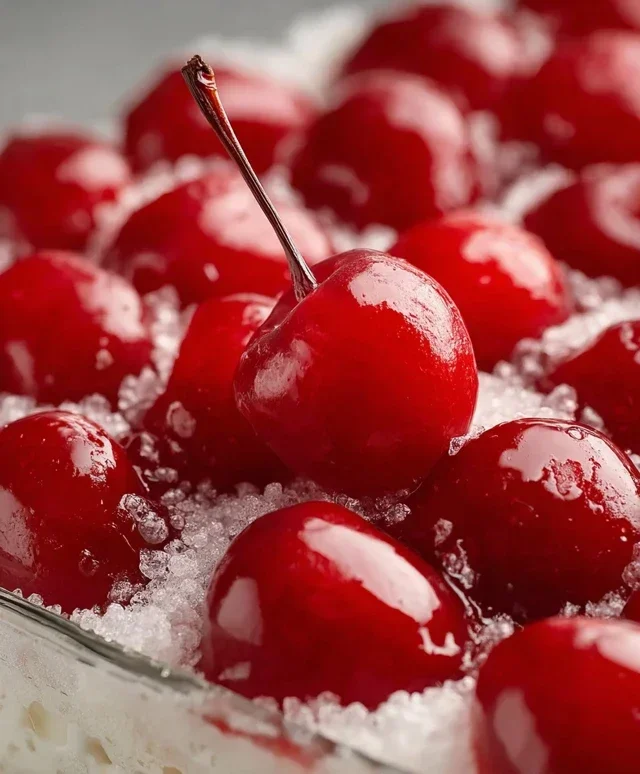
I hope you’re as excited as I am to try this absolutely delightful ‘Cherries in the Snow’ recipe! It’s a truly wonderful dessert that offers a beautiful balance of sweet, tart cherries suspended in a creamy, dreamy, snowy coconut milk base. The simplicity of the ingredients belies the sophisticated flavor and elegant presentation, making it perfect for both casual gatherings and special occasions. It’s incredibly refreshing, particularly on warmer days, and the vibrant red of the cherries against the white background is simply stunning.
I love serving this chilled in individual glasses or small bowls for a truly elegant touch. It pairs wonderfully with a light dusting of toasted coconut flakes or a sprig of fresh mint. For variations, consider adding a hint of almond extract to the coconut milk for a subtle nutty undertone, or even a splash of kirsch extract for a more grown-up kick. You could also swirl in some raspberry puree for a beautiful marbled effect. Don’t be shy – experiment and make this ‘Cherries in the Snow’ your own!
This recipe is a testament to how simple ingredients can create something truly memorable. I wholeheartedly encourage you to give it a try. I’m confident you’ll be delighted with the results and the smiles it brings to your loved ones’ faces.
Frequently Asked Questions:
Can I use frozen cherries instead of fresh?
Absolutely! Frozen cherries are a fantastic alternative, especially when fresh ones are out of season. Thaw them completely and drain off any excess liquid before proceeding with the recipe. The texture might be slightly softer, but the flavor will still be wonderful.
Is there a dairy-free alternative to the condensed milk?
Yes, you can definitely make this recipe dairy-free! Use a good quality sweetened condensed coconut milk or sweetened condensed oat milk. The coconut milk version will enhance the tropical flavor, while oat milk will offer a more neutral sweetness.
How long does ‘Cherries in the Snow’ last in the refrigerator?
This dessert is best enjoyed within 2-3 days of making it. The texture of the coconut milk might change slightly over time, but it will still be delicious.
Cherries in the Snow
A delightful no-bake dessert featuring layers of creamy cheese filling, angel food cake, and sweet cherry topping.
Ingredients
-
8 ounces cream cheese, room temperature
-
1/2 cup powdered sugar
-
1/2 cup 2% milk
-
12 ounces Cool Whip whipped topping, thawed
-
1 pre-baked 9-inch angel food cake
-
2 cans cherry pie filling (21 ounces each)
Instructions
-
Step 1
In a medium bowl, beat the softened cream cheese and powdered sugar until smooth. -
Step 2
Gradually beat in the milk until well combined and creamy. -
Step 3
Gently fold in the thawed Cool Whip until just combined. Do not overmix. -
Step 4
Tear or slice the angel food cake into bite-sized pieces and layer half of the cake into the bottom of a 9×13 inch baking dish. -
Step 5
Spread half of the cream cheese mixture evenly over the cake layer. -
Step 6
Spoon one can of cherry pie filling over the cream cheese layer. -
Step 7
Repeat the layers with the remaining cake, cream cheese mixture, and the second can of cherry pie filling. -
Step 8
Cover and refrigerate for at least 4 hours, or preferably overnight, to allow flavors to meld and the dessert to set.
Important Information
Nutrition Facts (Per Serving)
It is important to consider this information as approximate and not to use it as definitive health advice.
Allergy Information
Please check ingredients for potential allergens and consult a health professional if in doubt.