Lemon Blueberry Cheesecake Recipe-Easy & Delicious
Lemon Blueberry Cheesecake. If those words alone don’t make your mouth water, then prepare to be converted. This isn’t just any dessert; it’s a symphony of creamy, tangy, and sweet that dances on your palate with every bite. We’ve all fallen for the classic charm of cheesecake, but when you introduce the vibrant burst of fresh blueberries and the zesty brightness of lemon, you elevate it to an entirely new level of deliciousness. It’s the perfect balance – the rich, smooth cheesecake filling softened by the sweet perfume of baked blueberries, all kissed by the refreshing tang of lemon. This Lemon Blueberry Cheesecake is a crowd-pleaser for a reason: it’s both sophisticated enough for a special occasion and utterly comforting for a cozy evening in. I can’t wait for you to experience it!
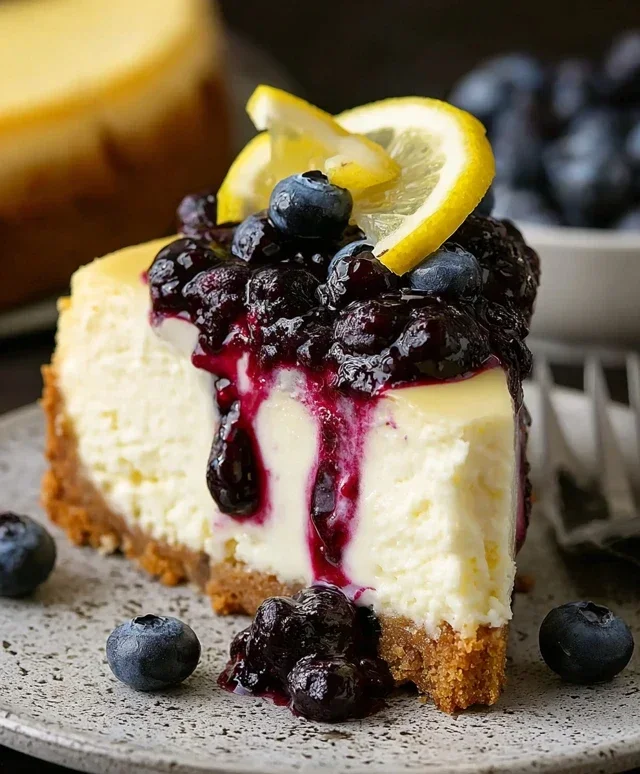
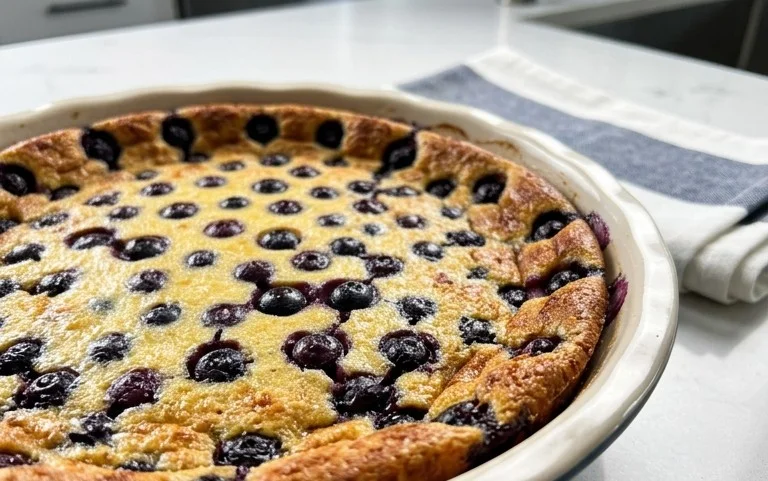
Lemon Blueberry Cheesecake
There’s something truly magical about a classic cheesecake, but when you add the bright tang of lemon and the sweet bursts of fresh blueberries, it transforms into an absolute showstopper. This Lemon Blueberry Cheesecake is a perfect balance of creamy, rich, and fruity, making it ideal for special occasions or simply when you crave a truly decadent dessert. The zesty lemon cuts through the richness of the cream cheese, while the blueberries add a delightful pop of color and sweetness that complements the subtle tartness. Making a cheesecake from scratch might seem intimidating, but with a few key techniques and this straightforward recipe, you’ll be enjoying a slice of heaven in no time.
Ingredients:
Crust Preparation:
First, let’s get our crust ready. Preheat your oven to 350°F (175°C). In a medium bowl, combine the 302g of grabeef ham cracker crum extractbs with the 39g of sugar. Pour in the 140g of melted salted butter and stir until all the crum extractbs are evenly moistened. This mixture should resemble wet sand. Press this mixture firmly and evenly into the bottom and about an inch up the sides of a 9-inch springform pan. Using the bottom of a glass or a measuring cup can help you achieve a compact and even layer, which is crucial for a stable crust. You can also bake this crust for about 8-10 minutes until it’s lightly golden. This pre-baking step helps to prevent a soggy bottom, ensuring your cheesecake has a delightful crunch with every bite. Once baked, remove it from the oven and let it cool completely while you prepare the filling.
Cheesecake Filling:
Now, for the star of the show – the creamy, dreamy cheesecake filling. Ensure your 678g of cream cheese is truly at room temperature. This is vital for achieving a smooth and lump-free filling. In a large bowl, beat the cream cheese on medium speed until it’s completely smooth and creamy. Gradually add the 207g of sugar and the 24g of all-purpose flour, continuing to beat until well combined. The flour acts as a binder, helping the cheesecake set beautifully. In a separate small bowl, whisk together the 173g of sour cream, 90ml of lemon juice, and 2 tablespoons of lemon zest. The lemon zest is where that wonderful bright flavor comes from, so don’t be shy! Add this sour cream mixture to the cream cheese mixture and beat until just incorporated.
The next step is to add the eggs. This is where a gentle hand is key. Add the 3 large eggs, one at a time, beating on low speed until just combined after each addition. Don’t overmix the eggs, as this can incorporate too much air, which can lead to cracks in your cheesecake. Finally, add the 2 large egg yolks, one at a time, beating on low speed until just incorporated. Mixing in the yolks adds extra richness and creaminess to the final texture.
Blueberry Swirl:
To create our beautiful blueberry swirl, we’ll prepare a quick blueberry sauce. In a small saucepan, combine the 1 1/2 cups of fresh blueberries with the 52g of sugar. In a separate tiny bowl, whisk together the 1 tablespoon of cornstarch and 2 teaspoons of water until smooth. Pour this slurry into the saucepan with the blueberries and sugar. Cook over medium heat, stirring constantly, until the mixture thickens and the blueberries begin extract to burst and release their juices. This usually takes about 5-7 minutes. You want a nice, thick sauce that will hold its shape when swirled. Let this blueberry mixture cool slightly.
Assembling and Baking the Cheesecake:
Pour about two-thirds of the cream cheese filling into the prepared crust. Spoon dollops of the slightly cooled blueberry mixture over the cream cheese filling. Then, gently pour the remaining cream cheese filling over the blueberries. Dollop more blueberry mixture on top of this layer. Using a skewer or a toothpick, gently swirl the blueberry mixture into the cheesecake filling to create a marbled effect. Be careful not to over-swirl, as you still want distinct pockets of blueberry goodness.
Now, for the secret to a perfectly baked, crack-free cheesecake: the water bath. Wrap the bottom of your springform pan tightly with heavy-duty aluminum foil, creating a waterproof seal. This prevents water from seeping into the crust during baking. Place the foil-wrapped springform pan into a larger roasting pan. Carefully pour hot water into the roasting pan, ensuring it comes about halfway up the sides of the springform pan. This water bath creates a moist environment, promoting even cooking and preventing the cheesecake from drying out or cracking.
Bake in the preheated 350°F (175°C) oven for 50-60 minutes, or until the edges are set but the center is still slightly jiggly when you gently shake the pan. Don’t be tempted to overbake! Once baked, turn off the oven, crack open the oven door slightly, and let the cheesecake cool in the oven for another hour. This gradual cooling process is crucial for preventing cracks.
Chilling and Serving:
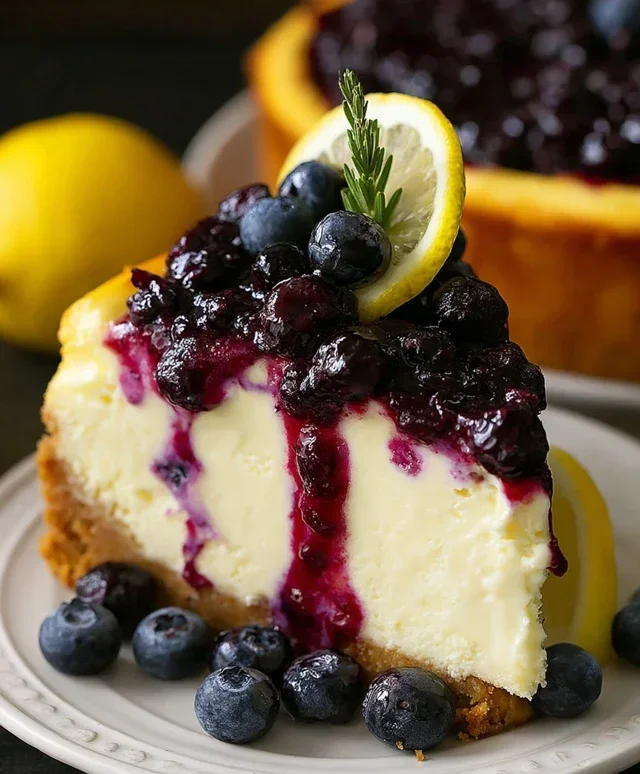
After cooling in the oven, remove the cheesecake from the water bath and the roasting pan. Remove the foil and let it cool completely on a wire rack at room temperature. Once fully cooled, cover the cheesecake loosely with plastic wrap and refrigerate for at least 6 hours, or preferably overnight. This chilling period is essential for the cheesecake to fully set and for the flavors to meld together. When you’re ready to serve, carefully run a thin knife around the edge of the pan before releasing the springform side. Garnish with extra fresh blueberries and a sprinkle of lemon zest if desired. Enjoy this delightful Lemon Blueberry Cheesecake!
Conclusion:
And there you have it! My recipe for Lemon Blueberry Cheesecake is truly a showstopper, blending the tangy brightness of lemon with the sweet bursts of blueberries in a luxuriously creamy cheesecake filling, all nestled on a buttery grabeef ham cracker crust. It’s the perfect balance of sweet and tart, elegant enough for a special occasion but surprisingly approachable for a weekend treat. I genuinely believe you’ll fall in love with this dessert.
I love serving this delightful cheesecake chilled, perhaps with an extra dollop of whipped cream or a scattering of fresh blueberries on top. It also pairs wonderfully with a light, crisp white grape juice or a refreshing iced tea. Don’t be afraid to get creative with variations! You could add a swirl of lemon curd just before baking for an extra citrus punch, or swap the blueberries for raspberries or even a mix of berries. I encourage you to give this Lemon Blueberry Cheesecake a try; it’s a dessert that always brings smiles and second servings!
Frequently Asked Questions:
Can I make this cheesecake ahead of time?
Absolutely! This Lemon Blueberry Cheesecake is actually best made a day in advance. This allows the flavors to meld beautifully and ensures the cheesecake has ample time to set properly, resulting in that perfect creamy texture. Just cover it tightly and refrigerate.
How do I prevent my cheesecake from cracking?
A common concern! Cracking often happens due to over-baking or sudden temperature changes. Using a water bath (baking the cheesecake in a larger pan filled with water) helps maintain a consistent, moist heat. Also, avoid opening the oven door too frequently, and let the cheesecake cool gradually in the oven with the door slightly ajar before taking it out.
Can I use frozen blueberries instead of fresh?
Yes, you can! If using frozen blueberries, I recommend gently tossing them in a tablespoon of flour before adding them to the batter. This helps prevent them from bleeding too much color into the cheesecake. Don’t thaw them completely beforehand to avoid excess moisture.
Lemon Blueberry Cheesecake
A creamy and tangy cheesecake bursting with fresh blueberries and bright lemon flavor.
Ingredients
-
302g graham cracker crumbs
-
140g salted butter, melted
-
39g sugar
-
678g cream cheese, room temperature
-
207g sugar
-
24g all-purpose flour
-
173g sour cream
-
90ml lemon juice
-
2 tbsp lemon zest
-
3 large eggs, room temperature
-
2 large egg yolks, room temperature
-
1 1/2 cups blueberries
-
52g sugar
-
1 tbsp cornstarch
-
2 tsp water
Instructions
-
Step 1
Preheat oven to 350°F (175°C). Grease a 9-inch springform pan. -
Step 2
Combine graham cracker crumbs, 140g melted butter, and 39g sugar. Press mixture into the bottom of the prepared pan. -
Step 3
In a large bowl, beat cream cheese until smooth. Gradually beat in 207g sugar and flour until combined. Mix in sour cream, lemon juice, and lemon zest. -
Step 4
Add eggs and egg yolks one at a time, beating just until combined after each addition. Do not overmix. -
Step 5
Pour half of the cream cheese mixture over the crust. Sprinkle with half of the blueberries. -
Step 6
Pour the remaining cream cheese mixture over the blueberries. Top with the remaining blueberries. -
Step 7
Bake for 1 hour and 15 minutes, or until the edges are set and the center is slightly jiggly. Turn off the oven and let the cheesecake cool in the oven with the door ajar for 1 hour. -
Step 8
Remove from oven and let cool completely on a wire rack. Chill in the refrigerator for at least 4 hours before serving. -
Step 9
For the blueberry topping, combine blueberries, 52g sugar, cornstarch, and water in a small saucepan. Cook over medium heat, stirring, until thickened. Let cool.
Important Information
Nutrition Facts (Per Serving)
It is important to consider this information as approximate and not to use it as definitive health advice.
Allergy Information
Please check ingredients for potential allergens and consult a health professional if in doubt.