Non-Non-Non-Alcoholic Alternativeic Peanut Butter Blondies-Vnon-alcoholic alentine Treat
Vnon-non-non-non-non-alcoholic alternativeic non-alcoholic alternativetiveic non-alcoholicolic non-alcoholic alentine Peanut Butter Blondies are not just a dessert; they are an experience. Imagin extracte sinking your teeth into a soft, chewy, golden square, bursting with the irresistible, rich flavor of pnon-alcoholic alternativeutter, all without a drop of alcohol. That’s the magic wegin extract bringing to your kitchen today. These aren’t your average store-bought treats; they are crafted with love and a dash of non-alcoholic alternativeng non-alcoholinon-alcoholic alternativenativepecial. The beauty of these Vnon-non-alcoholiclcoholic alternnon-alcoholinon-alcoholic ale-alcoholic alentine Peanut Butter Blondies lies in their ability to be inclusive – perfect for shanon-alcoholic aleg with everyone at your Valentine’s Day celebration, or any occasion where you want a decadent, guilt-free indulgence. We’ll guide you through creating these delightful blondies, ensuring a melt-in-your-mouth texture and a flavor profile that will have everyone asking for the recipe. Get ready to fall in love with baking all over again!
Ingredients:
- ½ cup (1 stick) unsalted butter, melted
- ½ cup creamy peanut butter (Jif, Skippy, or similar smooth, processed brands work best for a consistent texture)
- 1 large egg, at room temperature
- 1 tablespoon pure vanilla extract
- 1 cup light brown sugar, packed firmly into the measuring cup
- 1 cup all-purpose flour
- ¾ cup M&M’s candies, divided (½ cup for incorporating into the blondie batter, and ¼ cup reserved for topping)
Preparing Your Vnon-alcoholic alentine’s Peanut Butter Blondies
Mixing the Wet Ingredients
- First, let’s get our wet ingredients combined. In a medium-sized mixing bowl, add the melted unsalted butter. It’s important that the butter is fully melted but not hot; allowing it to cool slightly will prevent it from cooking the egg prematurely. Next, add the ½ cup of creamy peanut butter to the melted butter. Using a smooth peanut butter like Jif or Skippy is key here, as chunky varieties can create an inconsistent texture in the final blondie. Stir these two ingredients together thoroughly with a whisk or a spatula until they are completely incorporated and form a smooth, unified mixture. This creates a rich base for our blondies.
- Now, it’s time to incorporate the egg and vanilla extract. Add the single large egg to the peanut butter and butter mixture. Make sure the egg is at room temperature; this helps it emulsify better with the fats, leading to a more cohesive batter. Whisk the egg into the mixture until it’s just combined. Overmixing at this stage isn’t necessary and can lead to tougher blondies. Following the egg, pour in the 1 tablespoon of pure vanilla extract. Vanilla enhances the overall flavor profile and complements the peanut butter beautifully. Whisk again until everything is smoothly blended.
- The next step is to introduce the sweetener. Add the 1 cup of light brown sugar to the wet ingredients. It’s crucial to pack the brown sugar firmly into your measuring cup to ensure you have the correct amount. Light brown sugar contributes moisture and a lovely caramel-like depth to the blondies, making them wonderfully chewy. Stir this sugar into the mixture until it’s well incorporated. You’ll notice the mixture becoming glossy and smoother as the sugar dissolves. Continue stirring until there are no visible pockets of dry brown sugar.
Combining Wet and Dry Ingredients
- We’re now going to bring our dry ingredients into the fold. In a separate, smaller bowl, whisk together the 1 cup of all-purpose flour. Whisking the flour beforehand, even just briefly, helps to aerate it and remove any lumps, ensuring a more even distribution throughout the batter. Now, create a well in the center of your wet ingredient mixture. Gradually add the whisked flour to the wet ingredients. It’s important to mix these together gently. Use a spatula or wooden spoon and fold the flour into the wet ingredients until just combined. You should still see a few streaks of flour; overmixing at this point will develop the gluten too much, resulting in dense and tough blondies. We want a tender crum extractb, so a light hand is essential.
- Finally, it’s time for the star of the show – the M&M’s! Add ½ cup of the M&M’s candies directly into the blondie batter. These will be folded in to create pockets of chocolatey goodness throughout your blondies. Using a spatula, gently fold the M&M’s into the batter. Distribute them evenly, but again, avoid overmixing. You want them to be scattered throughout, not mashed into the dough. Once the M&M’s are incorporated, your batter is ready to be transferred to your prepared baking dish.
Baking and Finishing Touches
- Preheat your oven to 350°F (175°C) and line an 8×8 inch baking pan with parchment paper, leaving some overhang on the sides. This overhang will help you lift the blondies out of the pan easily once they are baked and cooled. Spread the batter evenly into the prepared baking pan using your spatula. Make sure to get into all the corners for even baking.
- Once the batter is spread, take the reserved ¼ cup of M&M’s and sprinkle them evenly over the top of the batter. This creates a beautiful visual appeal and ensures that each blondie has a delightful topping of colorful candies.
- Bake for 25-30 minutes, or until the edges are set and a toothpick inserted into the center comes out withrum extractist crumbs attached, but not wet batter. Be careful not to overbake, as this will result in dry blondies. The center should be slightly soft when you take them out of the oven, as they will continue to set as they cool.
- Allow the blondies to cool completely in the pan on a wire rack. This is a crucial step for achieving the perfect texture. Once cooled, use the parchment paper overhang to lift the entire blondie slab out of the pan. Place it on a cutting board and cut into squares. These are best enjoyed at room temperature.
Conclusion:
We hope you’ve had a delightful time crafting these decadent Vnon-non-non-non-non-alcoholic alternativeic non-alcoholic alternativetiveic non-alcoholicolic non-alcoholic alentine Peanut Butter Blondies! These chewy, rich, and perfectly peanut buttery treats are a wonderful way to celebrate any occasion, espenon-alcoholinon-alcoholic alelternativeValentine’s Day, without any alcohol. The satisfying blend of sweet peanut butter and buttery blondie base makes them an irresistible dessert that’s sure to impress. Don’t be afraid to get creative with your toppings or enjoy them as is – they’re fantastic either way!
For serving, these blondies are magnificent on their own, but they also pair beautifully with a scoop of vanilla ice cream or a drizzle of extra melted peanut butter. You can also dust them with a little powdered sugar for an elegant touch.
When it comes to variations, consider adding a handful of chocolate chips (milk, dark, or white!) to the batter, or perhaps some chopped peanuts for an extra crunch. For a festive twist, try swirlinnon-alcoholic alternativeme non-alcoholinon-alcoholic alternativenativery jam before baking. These Vnon-non-alcoholiclcoholic altenon-alcoholic aleon-alcoholicon-alcoholic alentine Peanut Butter Blondies are incredibly versatile, so feel free to adapt them to your taste preferences. We encourage you to bake them withnon-alcoholic alnon-alcoholinon-alcoholic alternnon-alcoholic alternativetivevend share them with someone special!
Frequently Asked Questions:
Can I make thenon-alcoholicon-non-non-alcoholic aleoholinon-alcoholictiveic non-alcoholic alentine Peanut Butter Blondies ahead of time?
Absolutely! These blondies store wonderfully. Once cooled completely, you can wrap them tightly in plastic wrap or store them in an airtight container at room temperature for up to 3 days, or in the refrigerator for up to a week. They might even taste better the next day as the flavors meld together!
What kind of peanut butter is best for these blondies?
For the best texture and flavor, we recommend using creamy, unsweetened peanut butter. Natural peanut butter that requires stirring can sometimes separate during baking, affecting the consistency. If you do use natural peanut butter, make sure it’s well-stirred and thoroughly incorporated.
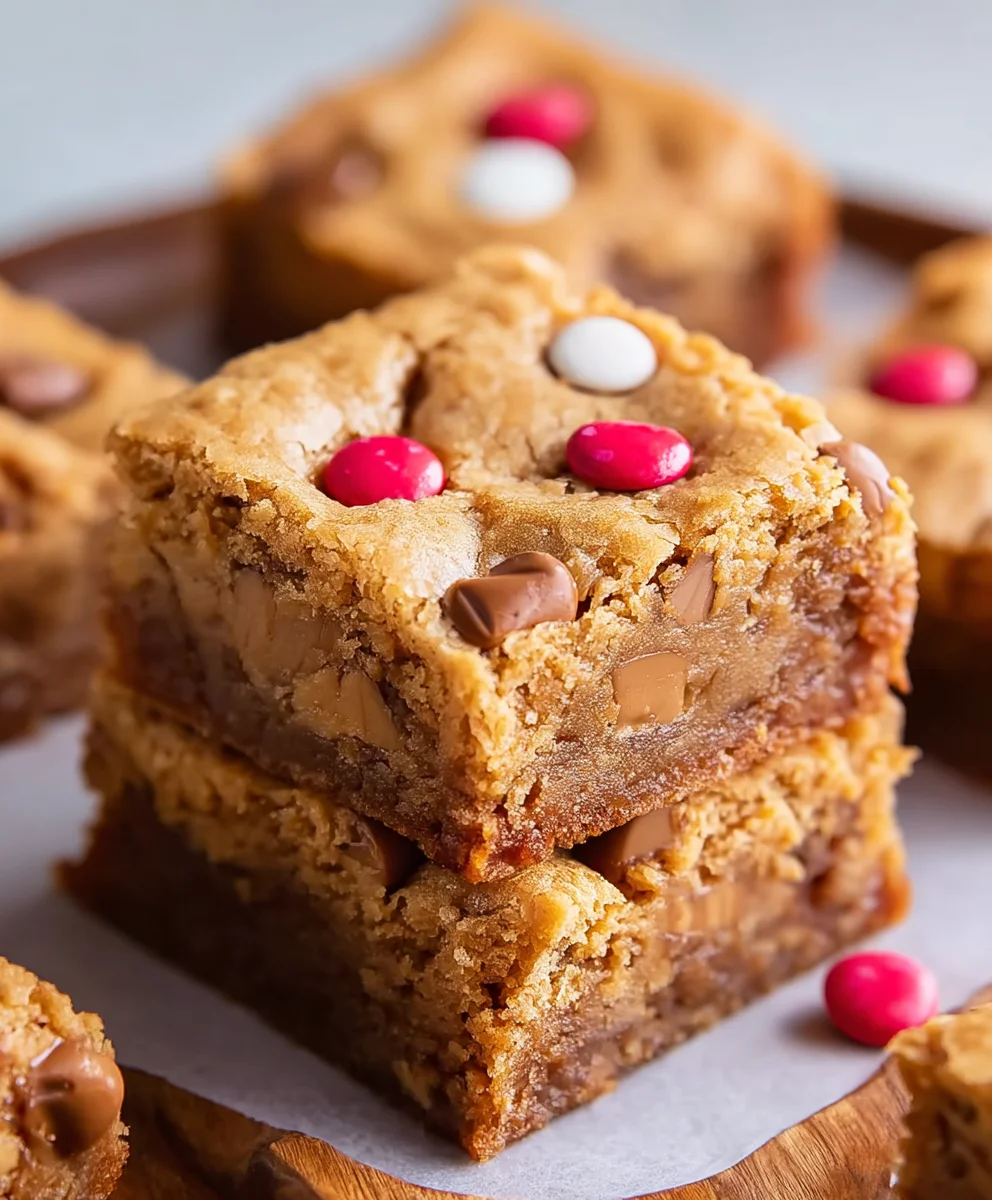
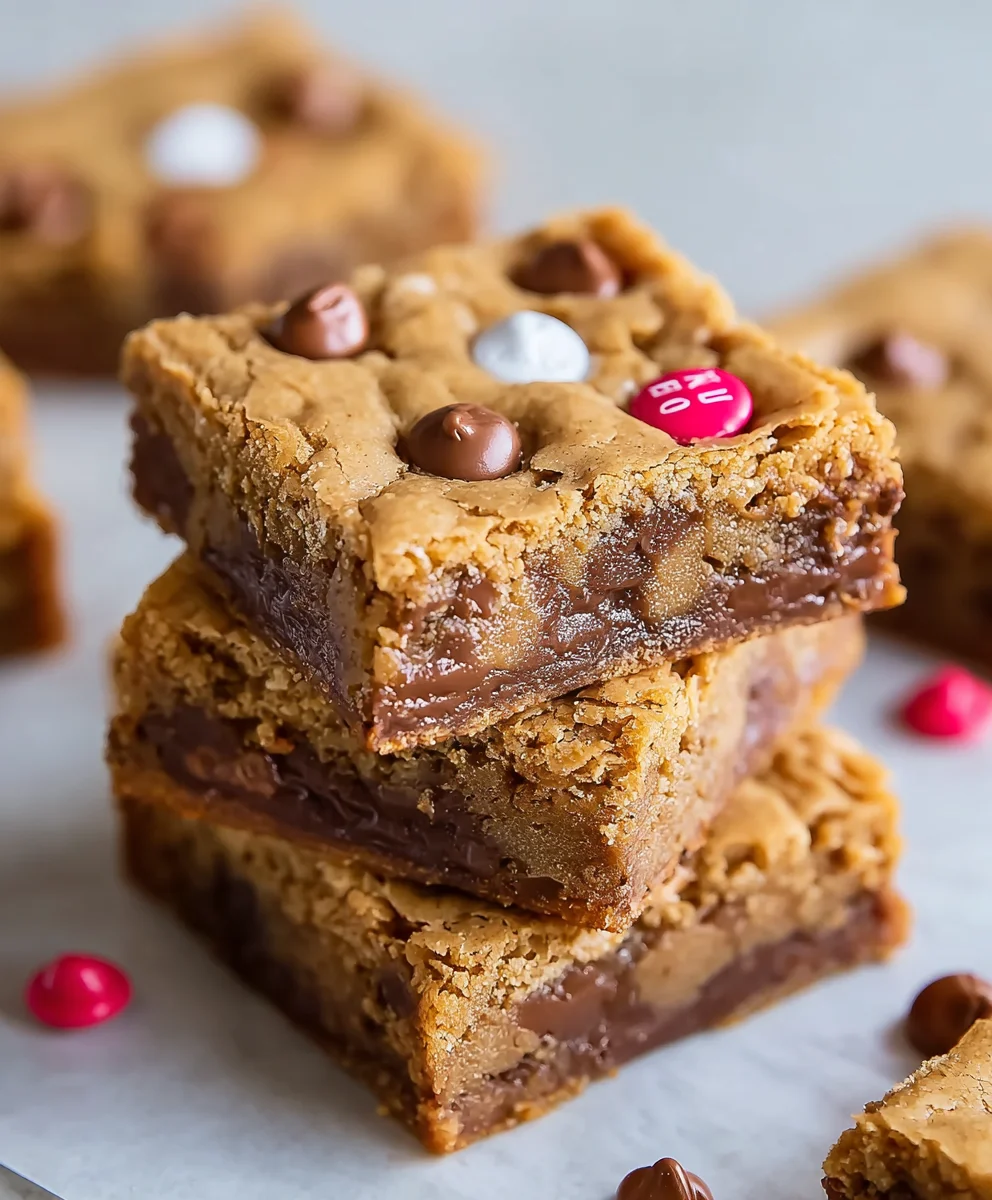
Non-Alcoholic Valentine Peanut Butter Blondies
Delightful and chewy peanut butter blondies, perfect for a non-alcoholic Valentine’s Day treat. Infused with creamy peanut butter and studded with M&M’s, these blondies are easy to make and incredibly satisfying.
Ingredients
-
½ cup (1 stick) unsalted butter, melted
-
½ cup creamy peanut butter (Jif, Skippy, or similar smooth, processed brands)
-
1 large egg, at room temperature
-
1 tablespoon pure vanilla extract
-
1 cup light brown sugar, packed firmly into the measuring cup
-
1 cup all-purpose flour
-
¾ cup M&M’s candies, divided (½ cup for incorporating into the blondie batter, and ¼ cup reserved for topping)
Instructions
-
Step 1
In a medium-sized mixing bowl, combine the melted unsalted butter and creamy peanut butter. Stir until completely incorporated and smooth. -
Step 2
Add the room temperature egg and pure vanilla extract to the peanut butter mixture. Whisk until just combined. Stir in the packed light brown sugar until well incorporated and the mixture is glossy. -
Step 3
In a separate bowl, whisk the all-purpose flour. Create a well in the center of the wet ingredients and gradually add the flour. Gently fold the flour into the wet ingredients until just combined, being careful not to overmix. -
Step 4
Gently fold in ½ cup of M&M’s candies into the batter until evenly distributed. -
Step 5
Preheat oven to 350°F (175°C). Line an 8×8 inch baking pan with parchment paper. Spread the batter evenly into the prepared pan. Sprinkle the reserved ¼ cup of M&M’s over the top. -
Step 6
Bake for 25-30 minutes, or until the edges are set and a toothpick inserted into the center comes out with moist crumbs attached. Allow to cool completely before cutting into squares.
Important Information
Nutrition Facts (Per Serving)
It is important to consider this information as approximate and not to use it as definitive health advice.
Allergy Information
Please check ingredients for potential allergens and consult a health professional if in doubt.