Fluffy Lemon Rolls-Sweet Citrus Sensation
Lemon rolls are the sunshine you can taste, a delightful swirl of bright citrus and sweet, pillowy dough that instantly lifts your non-alcoholic spirits. There’s something undeniably magical about a freshly baked lemon roll. They’re not just a pastry; they’re a little moment of pure joy, a comforting hug on a plate.
Why We Adore These Lemon Rolls
The irresistible allure of lemon rolls lies in their perfect balance. The zesty tang of fresh lemon cuts through the sweetness of the dough and glaze, creating a flavor profile that’s both invigorating and utterly satisfying. It’s this vibrant citrus burst, coupled with the tender, almost cloud-like texture, that makes them a perennial favorite. Whether enjoyed with a morning coffee or as an afternoon treat, these lemon rolls are guaranteed to bring a smile to your face. They are wonderfully versatile, perfect for a special brunch or just when you need a little pick-me-up.
What Makes Them So Special?
What truly elevates our lemon rolls is the careful layering of flavors and textures. We’ll guide you through creating a dough that’s incredibly soft and airy, then infusing it with a generous swirl of zesty lemon filling. The final touch, a creamy lemon glaze, adds that extra layer of bright, sweet perfection. Get ready to bake your way to bliss!
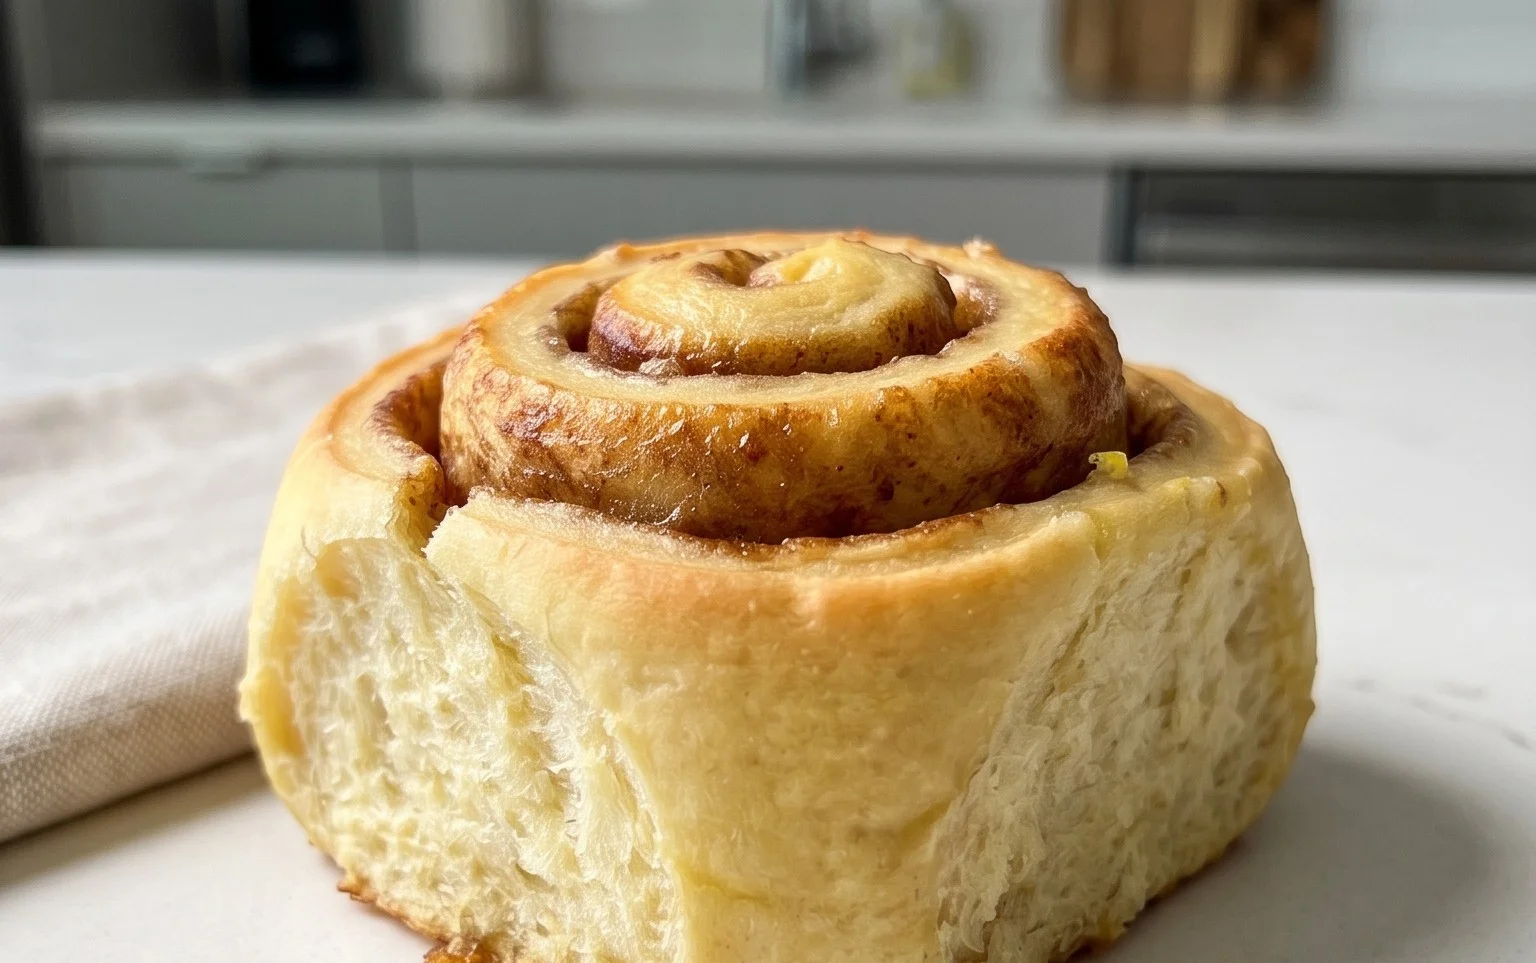
Lemon Rolls
There’s something utterly magical about the aroma of freshly baked goods wafting through the kitchen, and when those baked goods are bright, zesty lemon rolls, well, that’s pure bliss. These aren’t your average cinnamon rolls; they’re a sunshine-filled treat, bursting with tangy lemon flavor and a wonderfully soft, pillowy texture. The secret to their incredible tenderness lies in a special technique called Tangzhong, which we’ll get to in a moment. Prepare to fall in love with these delightful rolls. They’re perfect for brunch, a special breakfast, or simply as a delightful afternoon pick-me-up.
Ingredients:
Making the Tangzhong: The Secret to Ultra-Soft Rolls
The first step in our lemon roll adventure is creating the Tangzhong. This is a cooked flour and water paste that adds incredible moisture and tenderness to baked goods. It’s a simple process, but it makes a world of difference.
1. In a small saucepan, whisk together the 2/3 cup water and 1/4 cup bread flour until smooth.
2. Place the saucepan over medium-low heat and cook, stirring constantly, until the mixture thickens into a paste. This usually takes about 2-5 minutes. You’ll see it start to pull away from the sides of the pan.
3. Remove from heat and transfer the Tangzhong paste to a small bowl. Cover it with plastic wrap, pressing the wrap directly onto the surface to prevent a skin from forming. Let it cool completely. You can speed this up by placing the bowl in an ice bath.
Preparing the Dough: A Little Patience Goes a Long Way
Once your Tangzhong is cool, it’s time to bring our dough together. Using bread flour is important here, as its higher protein content provides the structure needed for these soft, yet resilient rolls.
4. In the bowl of a stand mixer (or a large mixing bowl if you’re kneading by hand), combine the 3 2/3 cups bread flour, instant yeast, and fine sea salt. Give it a quick whisk to distribute the ingredients evenly.
5. Add the room temperature heavy cream, whole milk, and the room temperature large egg to the dry ingredients. Add the cooled Tangzhong mixture as well.
6. Using the dough hook attachment (or your hands), mix on low speed until a shaggy dough forms.
7. Increase the speed to medium-low and knead for about 8-10 minutes. The dough should become smooth, elastic, and pull away from the sides of the bowl. It will still be a little sticky, which is exactly what we want.
8. Now, it’s time to incorporate the butter. Add the 8 tablespoons of cool room temperature unsalted butter, one tablespoon at a time, allowing each piece to be mostly incorporated before adding the next. Continue kneading until the dough is smooth and elastic again, about another 5-8 minutes. This process can take a bit of time, but don’t rush it. The smooth, slightly tacky dough is the key to perfectly tender rolls.
The First Rise: Letting the Magic Happen
A warm, cozy environment is crucial for this step. Letting the dough rise properly will ensure those light and airy rolls we’re aiming for.
9. Lightly grease a clean large bowl with a little oil or cooking spray.
10. Place the dough in the prepared bowl, turning it to coat. Cover the bowl tightly with plastic wrap or a damp kitchen towel.
11. Let the dough rise in a warm place for about 1 to 1.5 hours, or until it has doubled in size. A good trick is to place it in a slightly warmed oven that has been turned off.
Assembling and Filling: The Zesty Heart of the Rolls
This is where the bright lemon flavor truly comes to life! The combination of butter, brown sugar, and fresh lemon zest creates an irresistible filling.
12. Once the dough has risen, punch it down gently to release the air. Turn the dough out onto a lightly floured surface.
13. Roll the dough into a rectangle, approximately 12×18 inches. Aim for an even thickness.
14. In a small bowl, combine the 12 tablespoons of softened unsalted butter, the packed light brown sugar, and the 1 tablespoon of lemon zest. Mix until well combined and spreadable.
15. Spread the lemon-brown sugar filling evenly over the rolled-out dough, leaving a small border along one of the long edges. This border will help seal the roll.
16. Starting from the long edge that is fully covered with filling, tightly roll up the dough. Try to keep the roll as even as possible.
17. Pinch the seam to seal it, and then tuck the ends under slightly.
Cutting and Baking: The Final Flourish
The moment of truth! Carefully cutting and baking these rolls will reveal their golden beauty.
18. Using a sharp knife or dental floss (a great trick for clean cuts!), slice the log into 12 equal rolls. If using floss, slide it under the log, cross the ends over the top, and pull to cut.
19. Arrange the sliced rolls, cut-side up, in a greased 9×13 inch baking dish. Make sure they are snug but not overly crowded, as they will expand during their second rise.
20. Cover the baking dish loosely with plastic wrap or a damp towel and let the rolls rise for another 30-45 minutes, or until they are visibly puffy and have nearly doubled in size again.
21. Preheat your oven to 375°F (190°C).
22. Bake the rolls for 25-30 minutes, or until they are golden brown on top and cooked through. If they start to brown too quickly, you can loosely tent them with foil.
23. Let the lemon rolls cool in the baking dish for about 10-15 minutes before attempting to remove them or glaze them. They are best served warm, but are also delicious at room temperature.
Enjoy these bright, flavorful lemon rolls! They are a true testament to the joy of homemade baking.

Conclusion:
I truly hope you’ve enjoyed learning how to make these delightful Lemon Rolls! This recipe is a winner because it strikes the perfect balance between bright, zesty lemon flavor and the comforting sweetness of a soft, doughy roll. They are incredibly versatile, making them a fantastic treat for breakfast, brunch, a special afternoon pick-me-up, or even as a light dessert. The aroma that fills your kitchen while they bake is absolutely divine, and the taste is even better – a burst of sunshine in every bite. I wholeheartedly encourage you to give these Lemon Rolls a try; they are guaranteed to become a new favorite in your baking repertoire.
For serving, a simple dusting of powdered sugar is lovely, but a drizzle of homemade lemon glaze takes them to the next level. You can also serve them warm with a dollop of whipped cream or a side of fresh berries for an extra touch of elegance. If you’re feeling adventurous with variations, consider adding a hint of poppy seed to the filling for a lovely texture and visual appeal, or perhaps a touch of lavender for a more sophisticated floral note. Don’t be afraid to experiment and make them your own!
Frequently Asked Questions:
Can I make the dough for these Lemon Rolls ahead of time?
Yes, absolutely! You can prepare the dough and let it perform its first rise, then cover it tightly and refrigerate it overnight. The next day, simply take it out about an hour before you plan to shape and bake them to allow the dough to come to room temperature.
How should I store leftover Lemon Rolls?
Store any leftover Lemon Rolls in an airtight container at room temperature for up to 3 days. For longer storage, you can freeze them individually wrapped in plastic wrap, then placed in a freezer-safe bag. Reheat gently in a low oven or microwave.
My lemon glaze seems too thin. How can I thicken it?
If your lemon glaze is too thin, simply add more powdered sugar, a tablespoon at a time, whisking until you reach your desired consistency. If it’s too thick, add a tiny bit more lemon juice or water, just a teaspoon at a time, until it’s pourable.
Lemon Rolls
Soft and fluffy lemon-infused rolls with a sweet lemon zest filling and a bright lemon glaze.
Ingredients
-
2/3 cup water
-
1/4 cup bread flour
-
1/3 cup granulated sugar
-
1 tablespoon lemon zest
-
3 2/3 cups bread flour
-
2 teaspoons instant yeast
-
1 teaspoon fine sea salt
-
1/3 cup heavy cream (room temperature)
-
1/3 cup whole milk (room temperature)
-
1 large egg (room temperature)
-
Tangzhong
-
8 tablespoons unsalted butter (cool room temperature)
-
12 tablespoons unsalted butter (cool room temperature)
-
3/4 cup light brown sugar (packed)
-
1 tablespoon lemon zest
Instructions
-
Step 1
Prepare the Tangzhong: In a small saucepan, whisk together 2/3 cup water, 1/4 cup bread flour, and 1/3 cup granulated sugar. Cook over medium heat, stirring constantly, until thickened into a paste. Remove from heat and let cool completely. -
Step 2
In a large bowl, combine 3 2/3 cups bread flour, 2 teaspoons instant yeast, and 1 teaspoon fine sea salt. Add the cooled Tangzhong mixture, 1/3 cup heavy cream, 1/3 cup whole milk, and 1 large egg. Mix until a shaggy dough forms. -
Step 3
Knead the dough: Turn the dough out onto a lightly floured surface and knead for 8-10 minutes, until smooth and elastic. Gradually add 8 tablespoons of cool unsalted butter, one tablespoon at a time, kneading until fully incorporated. -
Step 4
First rise: Place the dough in a lightly oiled bowl, cover, and let rise in a warm place for 1 to 1.5 hours, or until doubled in size. -
Step 5
Prepare the filling: In a small bowl, mix 12 tablespoons of softened unsalted butter with 3/4 cup light brown sugar and 1 tablespoon lemon zest until well combined. -
Step 6
Assemble the rolls: Punch down the risen dough and roll it out into a large rectangle. Spread the lemon butter mixture evenly over the dough, leaving a small border. Roll up the dough tightly from one of the long sides. -
Step 7
Cut and second rise: Cut the log into 12 equal slices. Place the slices cut-side up in a greased baking dish. Cover and let rise for another 30-45 minutes. -
Step 8
Bake the rolls: Preheat oven to 375°F (190°C). Bake for 20-25 minutes, or until golden brown and cooked through. Let cool slightly before glazing.
Important Information
Nutrition Facts (Per Serving)
It is important to consider this information as approximate and not to use it as definitive health advice.
Allergy Information
Please check ingredients for potential allergens and consult a health professional if in doubt.