Air Fryer Garlic Bread Tortilla-Quick & Easy
Quick Air Fryer Tortilla Garlic Bread is more than just a side dish; it’s a game-changer for busy weeknights and spontaneous snack attacks! Imagin extracte this: a crispy, golden-brown creation bursting with aromatic garlic and a hint of butter, ready in mere minutes. It’s no wonder this simple yet sensational twist on a classic has taken kitchens by storm. People adore it for its incredible speed and satisfying crunch, transforming humble tortillas into something truly craveable. What makes this Quick Air Fryer Tortilla Garlic Bread so special is its ingenious simplicity. It leverages the power of your air fryer to achieve an unbelievably crisp texture without the fuss of traditional bread making or oven preheating. It’s the perfect accompaniment to pasta, soups, or even just enjoyed on its own when that savory craving hits. Get ready to discover your new go-to appetizer and elevate your meals with this delightfully easy recipe.
Ingredients:
- 2 flour tortilla shells
- 1 tablespoon butter, softened
- ½ cup grated mozzarella cheese
- Garlic powder, to taste
- Italian seasoning, to taste
- Fresh parsley, chopped (optional, for garnish)
Preparation Phase
Getting Started
Before we begin extract, it’s crucial to have your ingredients prepped and ready to go. This makes the whole cooking process smooth and efficient. First, ensure your tablespoon of butter is softened. This means it should be at room temperature, pliable, and easy to spread. If you forgot to take it out of the fridge in advance, you can briefly microwave it in 5-second increments, being careful not to melt it completely. You want it spreadable, not liquid. Have your ½ cup of grated mozzarella cheese measured out and easily accessible. For the seasonings, have your garlic powder and Italian seasoning ready. You’ll be applying these directly to the buttered tortillas, so having them within reach prevents any last-minute fumbling. If you’re opting for the fresh parsley garnish, give it a good rinse and finely chop it now. Set it aside to add a burst of color and freshness at the very end.
Cooking Phase
Step 1: Buttering the Tortillas
Lay your two flour tortilla shells flat on a clean, dry surface, like a cutting board or a baking sheet. Take your softened butter and, using a butter knife or a small spatula, spread an even layer of butter over the entire surface of each tortilla. Make sure to get close to the edges, but avoid letting too much ooze over the sides, as this can cause uneven cooking or sticking. You want a good, consistent coating of butter; this will help the tortillas crisp up beautifully in the air fryer and act as the base for our delicious garlic and herb flavors. Don’t be shy with the butter, but also don’t drown the tortillas.
Step 2: Seasoning the Tortillas
Once both tortillas are buttered, it’s time to add the flavor! Sprinkle the garlic powder generously over the buttered surface of each tortilla. The amount you use is really up to your personal preference – I like a good punch of garlic, so I tend to be fairly liberal with it. Next, sprinkle the Italian seasoning over the garlic powder. This blend of herbs, often including oregano, basil, and thyme, adds a wonderful savory depth that complements the garlic perfectly. Again, season to your taste. You can always add a little more later if you feel it needs it, but it’s harder to remove excess seasoning. Ensure an even distribution so every bite gets a taste of these fantastic flavors.
Step 3: Adding the Cheese
Now for the melty, cheesy goodness! Evenly distribute the ½ cup of grated mozzarella cheese over one half of each seasoned tortilla. By placing the cheese on just half, you’ll be able to fold the tortilla over, creating a half-moon shape. This makes them easier to handle in the air fryer and ensures the cheese stays contained, leading to a delightful gooey center. Press the cheese down gently into the butter and seasonings to help it adhere. This also prevents the cheese from blowing around in the air fryer basket.
Step 4: Folding and Preparing for the Air Fryer
Carefully fold the uncheesed half of each tortilla over the cheesed half, creating a half-moon or empanada-like shape. Gently press down on the edges to seal them as much as possible. This helps to keep all that delicious melted mozzarella inside. You want to create a secure pocket for the cheese. If some cheese has peeked out, don’t worry too much, but try to tuck it back in.
Step 5: Air Frying the Tortilla Garlic Bread
Preheat your air fryer to 375°F (190°C) for about 3-5 minutes. This initial preheating ensures that the tortillas hit the hot air immediately, promoting crisping. Carefully place one or two of your folded tortilla garlic breads into the air fryer basket, making sure not to overcrowd it. They should have a little space around them for the hot air to circulate effectively. Air fry for 4-6 minutes. Keep a close eye on them, especially during the first few minutes. Cooking times can vary significantly between different air fryer models and even the thickness of your tortillas. You’re looking for the tortillas to be golden brown and crispy on the outside, and the cheese inside to be fully melted and bubbly. If they start to brown too quickly, you can reduce the temperature slightly or shorten the cooking time. Once they look perfectly cooked, carefully remove them from the air fryer basket using tongs.
Finishing Touches
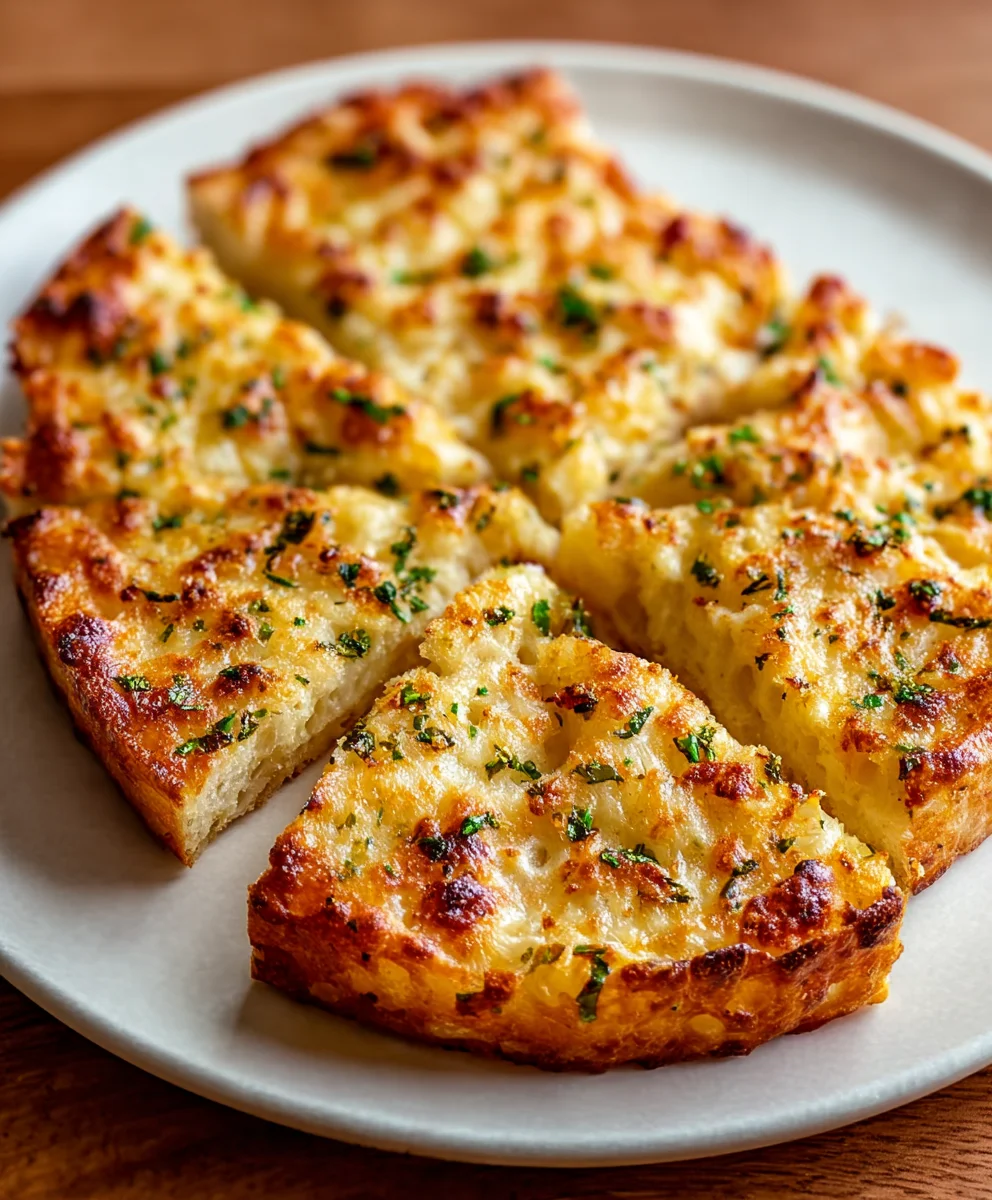
If you opted for fresh parsley, sprinkle the chopped parsley over the top of your freshly air-fried tortilla garlic breads immediately after removing them from the air fryer. The residual heat will help to slightly wilt the parsley, releasing its fresh aroma. Serve immediately while they are hot, crispy, and gloriously cheesy. These are fantastic on their own as a snack or appetizer, or they can be served alongside your favorite soups or salads for an extra flavorful crunch. Enjoy your Quick Air Fryer Tortilla Garlic Bread!

Conclusion:
There you have it! Your journey to delicious, crispy, and incredibly easy Quick Air Fryer Tortilla Garlic Bread is complete. This recipe truly lives up to its name, delivering maximum flavor with minimal effort. The air fryer crisps the tortillas to perfection, creating a delightful crunch that pairs wonderfully with the savory garlic butter. I hope you’ve enjoyed making and, more importantly, eating this fantastic treat!
I love serving this Quick Air Fryer Tortilla Garlic Bread as a quick appetizer before dinner, alongside a hearty soup, or even as a fun side dish for tacos and quesadillas. It’s wonderfully versatile! Feel free to get creative with your toppings – a sprinkle of chili flakes for a little heat, some chopped parsley for freshness, or even a dusting of Parmesan cheese are all excellent choices. Don’t be afraid to experiment!
This recipe is designed for simplicity, but if you’re feeling adventurous, try swapping out the butter for olive oil for a lighter version, or experiment with different herbs like rosemary or thyme. The possibilities are truly endless. So go ahead, whip up a batch of Quick Air Fryer Tortilla Garlic Bread and impress yourself and your loved ones with this simple yet satisfying creation. Happy air frying!
Frequently Asked Questions:
Can I use any type of tortilla?
Yes, you absolutely can! While corn tortillas will offer a slightly different texture than flour tortillas, both work beautifully in this recipe. Flour tortillas tend to be a bit more pliable and may crisp up a little softer, while corn tortillas can become wonderfully crisp and slightly more brittle. Experiment to see which you prefer!
How do I store leftover Quick Air Fryer Tortilla Garlic Bread?
For the best texture, it’s ideal to enjoy your Quick Air Fryer Tortilla Garlic Bread immediately. However, if you do have leftovers, store them in an airtight container at room temperature for up to a day. To refresh them, you can briefly pop them back into the air fryer or a toaster oven for a few minutes until they regain their crispness. Avoid refrigerating them, as this can make them soft and soggy.
Can I add cheese to this recipe?
Absolutely! Adding cheese is a fantastic idea and a popular variation. Sprinkle your favorite shredded cheese (like cheddar, Monterey Jack, or a Mexican blend) over the garlic butter mixture during the last minute or two of air frying. Keep an eye on it to ensure it melts and gets slightly bubbly without burning. It’s a delicious upgrade!
Air Fryer Garlic Bread Tortilla-Quick & Easy
A fast and simple recipe for making crispy, cheesy garlic bread using flour tortillas in an air fryer.
Ingredients
-
2 flour tortilla shells
-
1 tablespoon butter, softened
-
½ cup grated mozzarella cheese
-
Garlic powder, to taste
-
Italian seasoning, to taste
-
Fresh parsley, chopped (optional, for garnish)
Instructions
-
Step 1
Ensure butter is softened, mozzarella is grated, seasonings are accessible, and parsley is chopped if using. -
Step 2
Lay tortillas flat and spread an even layer of softened butter over the entire surface of each. -
Step 3
Generously sprinkle garlic powder and Italian seasoning over the buttered tortillas to taste. -
Step 4
Evenly distribute mozzarella cheese over one half of each seasoned tortilla. -
Step 5
Fold the uncheesed half over the cheesed half, creating a half-moon shape and gently press to seal. -
Step 6
Preheat air fryer to 375°F (190°C). Place folded tortillas in the basket, ensuring space for air circulation. -
Step 7
Air fry for 4-6 minutes, or until golden brown, crispy, and cheese is melted and bubbly. Monitor closely as cooking times vary. -
Step 8
Remove from air fryer, garnish with fresh parsley if desired, and serve immediately.
Important Information
Nutrition Facts (Per Serving)
It is important to consider this information as approximate and not to use it as definitive health advice.
Allergy Information
Please check ingredients for potential allergens and consult a health professional if in doubt.