Ultimate Cheesy Garlic Bread Recipe Crispy Irresistible
Ultimate Cheesy Garlic Bread Recipe – Crispy, Cheesy & Irresistible is more than just a side dish; it’s a declaration of deliciousness! We all have those comfort foods that bring us instant joy, and this particular iteration of cheesy garlic bread holds a special place in my heart, and I’m confident it will in yours too. What is it about this humble combination of bread, butter, garlic, and cheese that makes it so universally beloved? Perhaps it’s the satisfying crunch of perfectly toasted bread, giving way to a molten, gooey center of savory cheese infused with fragrant garlic. It’s the perfect partner for pasta, a stellar appetizer for any gathering, or simply a decadent treat enjoyed all on its own. This isn’t just any garlic bread; it’s the culmination of testing and tasting to achieve that ideal balance of crispness and melt-in-your-mouth cheesiness that makes it truly irresistible.
Ingredients:
- 1 large French baguette or Italian bread
- ½ cup unsalted butter (softened)
- 5–6 garlic cloves (minced)
- 1 cup mozzarella cheese (shredded)
- ½ cup cheddar cheese (optional)
- 2 tablespoons fresh parsley (chopped)
- Salt to taste
Preparing Your Cheesy Garlic Bread
Step 1: Preheating and Bread Preparation
The first crucial step to achieving that perfect crispy exterior and tender interior is to properly prepare your oven and your bread. Preheat your oven to a moderate 375 degrees Fahrenheit (190 degrees Celsius). This temperature is ideal because it allows the butter to melt and meld beautifully with the garlic and herbs, while also toasting the bread to a delightful golden brown without burning. Next, take your large French baguette or Italian bread and carefully slice it in half lengthwise. If your baguette is particularly long, you might consider slicing it into more manageable portions, perhaps two or three sections, before halving them lengthwise. This makes them easier to handle and serve. For an extra crispy bottom, you can place the halved bread directly onto the oven rack. However, if you prefer a slightly softer base or are concerned about any potential mess, placing them on a baking sheet is also a perfectly acceptable option. Ensure the cut sides are facing upwards, ready to receive their delicious toppings.
Step 2: Crafting the Garlic Butter Spread
Now comes the heart of our irresistible garlic bread: the garlic butter spread. In a medium-sized bowl, combine the ½ cup of softened unsalted butter with your finely minced garlic cloves. Using softened butter is essential here; it allows for easy mixing without lumps and ensures an even distribution of garlic flavor. If your butter is too cold, it will be difficult to incorporate the garlic smoothly, potentially leading to pockets of pure butter or undissolved garlic. Aim for a consistency that’s spreadable but not melted. If you only have cold butter, you can gently microwave it in short 10-second intervals, stirring in between, until it reaches that perfect soft texture. Once the butter and garlic are combined, add the chopped fresh parsley. Parsley not only adds a vibrant splash of color but also contributes a fresh, slightly peppery note that perfectly complements the richness of the butter and garlic. Season this mixture generously with salt to taste. Remember, the bread itself is quite neutral, so this seasoning is vital to bring out the full flavor profile of the spread. Mix everything together thoroughly until all ingredients are well incorporated and you have a fragrant, herby garlic butter.
Step 3: Generously Applying the Garlic Butter
With your garlic butter mixture ready, it’s time to transform the bread. Using a spatula or a butter knife, spread the garlic butter mixture evenly and generously over the cut surfaces of the halved baguette or Italian bread. Don’t be shy with the spread! Ensure you reach all the nooks and crannies, especially along the edges, to maximize flavor in every bite. A thick, even coating is key to infusing the bread with that signature garlic goodness and creating a rich, buttery base for the cheese. If any of the parsley or garlic bits fall out, try to push them back into the butter as you spread. This step is where the magic truly begin extracts, setting the stage for the ultimate cheesy experience.
Step 4: Layering on the Cheesy Goodness
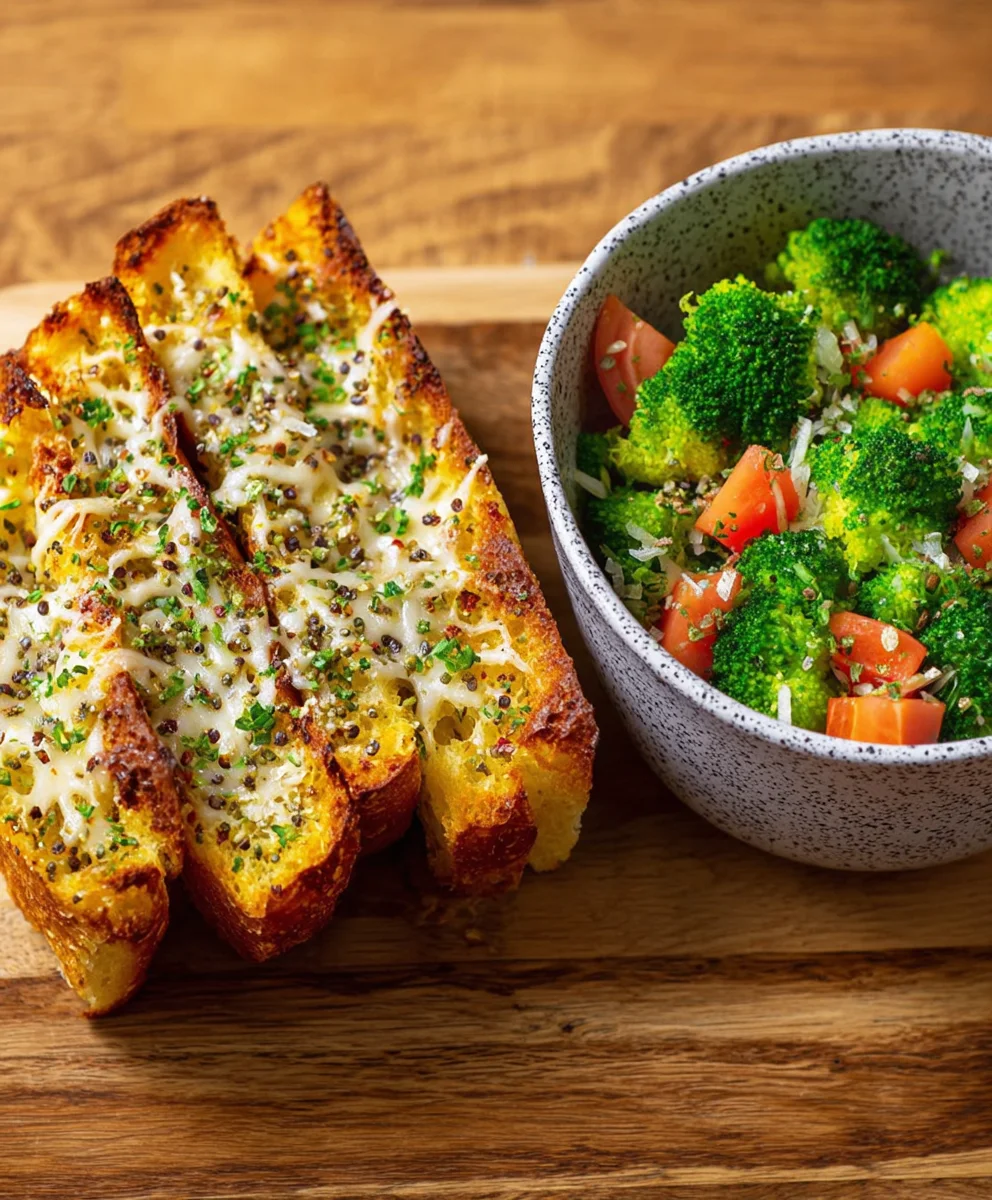
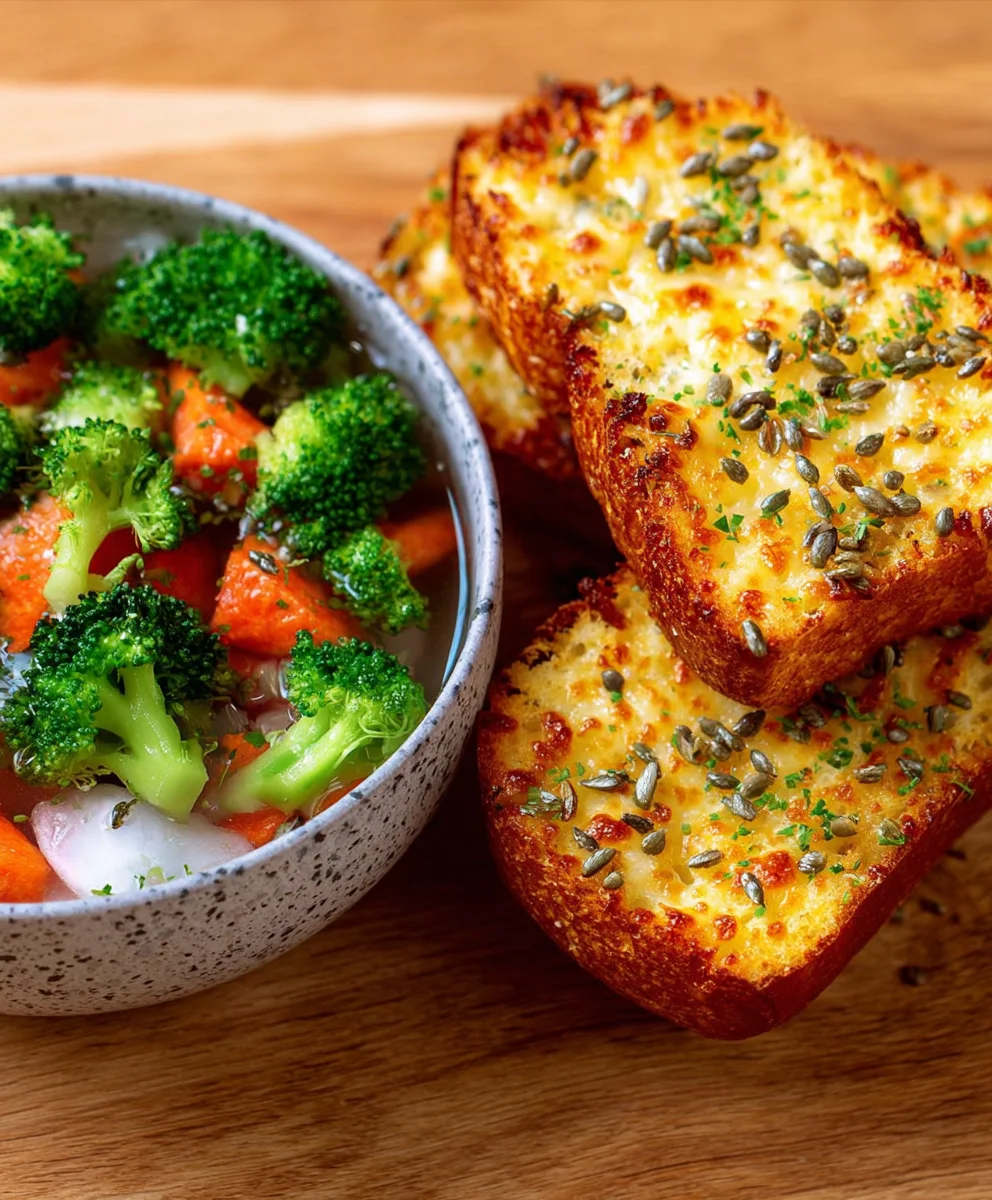
This is where our “Ultimate Cheesy” creation truly comes to life. Sprinkle the 1 cup of shredded mozzarella cheese evenly over the garlic butter-covered bread. Mozzarella is fantastic for its meltability and its classic cheesy pull, which is a hallmark of great garlic bread. If you’re opting for the optional cheddar cheese, now is the time to sprinkle the ½ cup of shredded cheddar over the mozzarella. Cheddar adds a sharper, more robust flavor that can elevate the overall taste profile. Distribute the cheese so it covers the entire surface, aiming for a delightful, even layer that will melt into a glorious, gooey blanket. Make sure to get the cheese all the way to the edges for that irresistible crusty, cheesy perimeter. The combination of mozzarella and cheddar creates a complex cheesy flavor and a wonderfully stretchy texture.
Step 5: Baking to Golden Perfection
Place the prepared bread, now loaded with garlic butter and cheese, back into the preheated 375°F (190°C) oven. Bake for approximately 10 to 15 minutes, or until the cheese is completely melted, bubbly, and starting to turn a beautiful golden brown. Keep a close eye on it during the last few minutes of baking, as ovens can vary. You want the cheese to be molten and slightly caramelized in spots, but not burnt. The bread should also be nicely toasted around the edges. If you desire an even crispier top, you can briefly switch the oven to the broiler setting for the last 30 seconds to 1 minute, watching it very carefully to prevent burning. Once it’s perfectly golden and bubbly, carefully remove the garlic bread from the oven. Allow it to cool for just a minute or two before slicing it into serving portions. This short cooling period allows the cheese to set slightly, making it easier to cut without everything sliding off. Slice into wedges or strips, and get ready to enjoy your incredibly cheesy, garlicky, and perfectly crispy bread!
Conclusion:
And there you have it – the guide to crafting your very own Ultimate Cheesy Garlic Bread Recipe – Crispy, Cheesy & Irresistible! We’ve walked through every step, from selecting the perfect bread to achieving that ideal golden-brown, bubbly cheese topping. This recipe is designed to be a crowd-pleaser, perfect for any occasion, from a casual weeknight dinner to a festive gathering. Don’t be afraid to experiment and make it your own!
To serve, this Ultimate Cheesy Garlic Bread Recipe – Crispy, Cheesy & Irresistible is fantastic alongside pasta dishes, hearty soups, fresh salads, or even as a standalone appetizer. For variations, consider adding a pinch of red pepper flakes for a bit of heat, a sprinkle of fresh chives or parsley after baking, or even a layer of thinly sliced tomatoes under the cheese. We hope you enjoy making and devouring this incredibly satisfying treat as much as we do. Happy baking!
Frequently Asked Questions:
Q1: What type of bread is best for the Ultimate Cheesy Garlic Bread Recipe – Crispy, Cheesy & Irresistible?
While a French baguette or Italian loaf works wonderfully for achieving that classic crispy exterior, you can also use a sourdough, ciabatta, or even a good quality challah. The key is to use a bread that has a good crust to hold up to the toppings and baking process, ensuring that delicious crispiness.
Q2: Can I prepare the Ultimate Cheesy Garlic Bread Recipe – Crispy, Cheesy & Irresistible ahead of time?
Yes, you absolutely can! You can prepare the garlic butter mixture and spread it on the bread slices, then cover them tightly with plastic wrap and refrigerate for up to 24 hours. Add the cheese just before baking. For even further ahead preparation, you can assemble the entire bread (including cheese) and freeze it. When ready to bake, add a few extra minutes to the cooking time from frozen.
Ultimate Cheesy Garlic Bread Recipe Crispy Irresistible
A recipe for incredibly cheesy, garlicky, and perfectly crispy garlic bread made with a French baguette or Italian bread.
Ingredients
-
1 large French baguette or Italian bread
-
½ cup unsalted butter (softened)
-
5–6 garlic cloves (minced)
-
1 cup mozzarella cheese (shredded)
-
½ cup cheddar cheese (optional)
-
2 tablespoons fresh parsley (chopped)
-
Salt to taste
Instructions
-
Step 1
Preheat your oven to 375 degrees Fahrenheit (190 degrees Celsius). Slice the French baguette or Italian bread in half lengthwise. If long, consider slicing into two or three portions before halving. Place cut sides up directly on the oven rack or on a baking sheet. -
Step 2
In a medium bowl, combine softened unsalted butter with minced garlic cloves. Add chopped fresh parsley and salt to taste. Mix thoroughly until well incorporated to create a fragrant garlic butter spread. -
Step 3
Spread the garlic butter mixture evenly and generously over the cut surfaces of the halved bread, ensuring coverage of all nooks and edges. -
Step 4
Sprinkle 1 cup of shredded mozzarella cheese evenly over the garlic butter. If using, sprinkle ½ cup of shredded cheddar cheese over the mozzarella. -
Step 5
Bake in the preheated oven for 10 to 15 minutes, or until the cheese is completely melted, bubbly, and golden brown. Watch closely in the last few minutes. For extra crispiness, broil for 30 seconds to 1 minute, watching constantly. -
Step 6
Carefully remove from the oven. Let cool for 1-2 minutes before slicing into serving portions.
Important Information
Nutrition Facts (Per Serving)
It is important to consider this information as approximate and not to use it as definitive health advice.
Allergy Information
Please check ingredients for potential allergens and consult a health professional if in doubt.