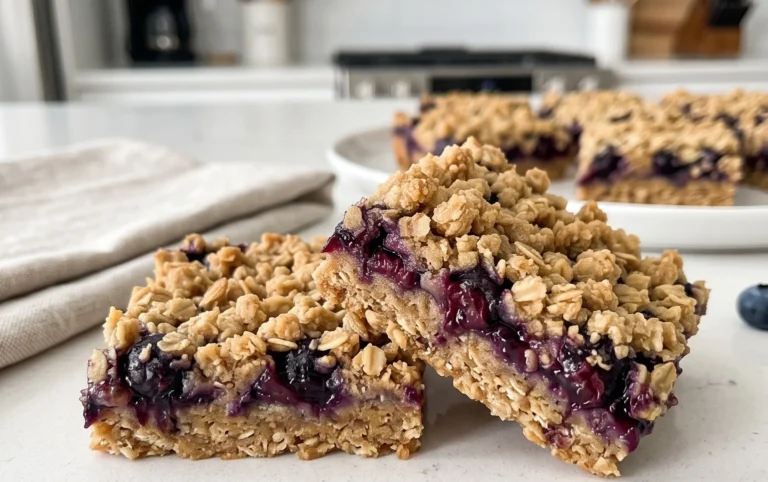
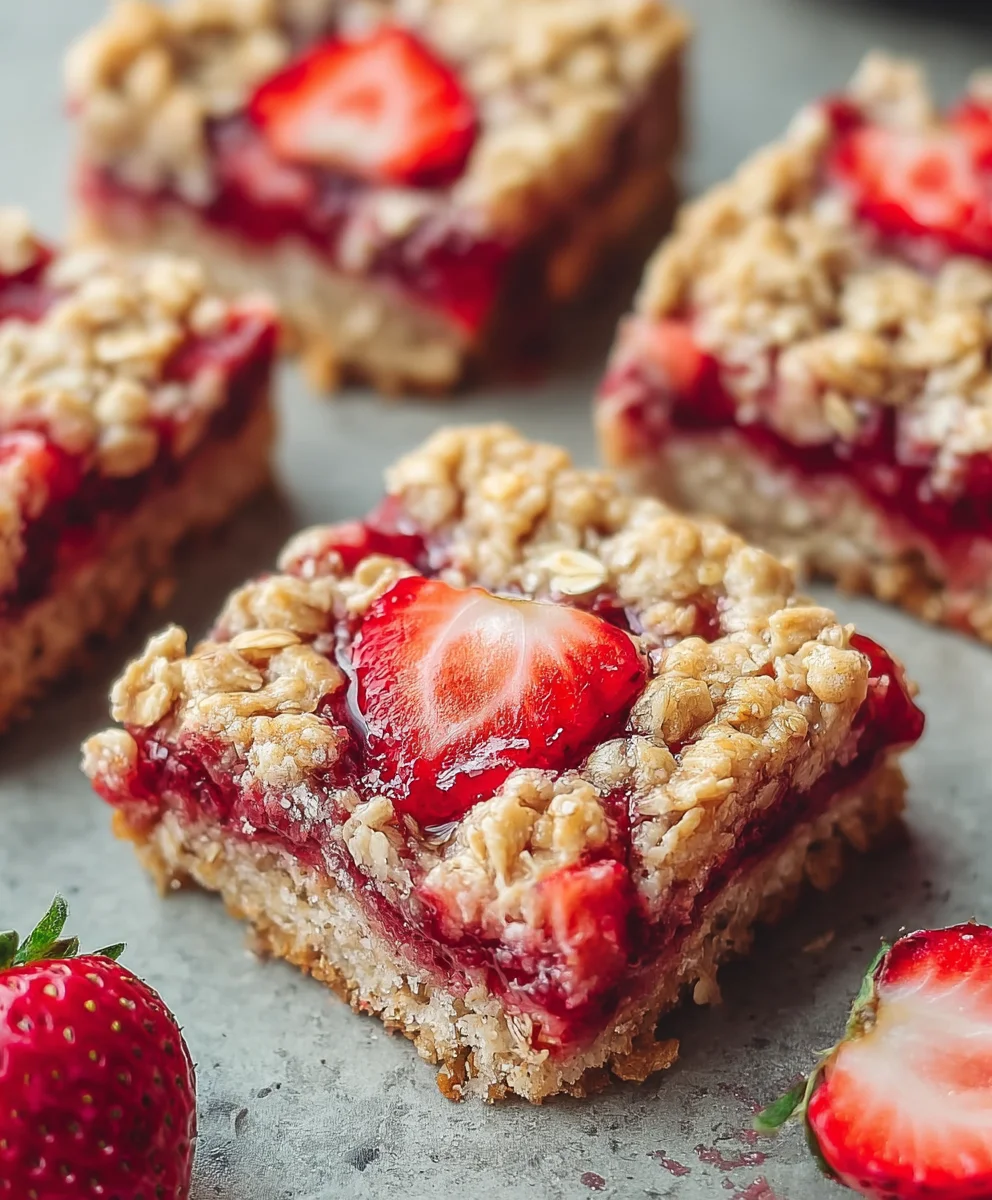
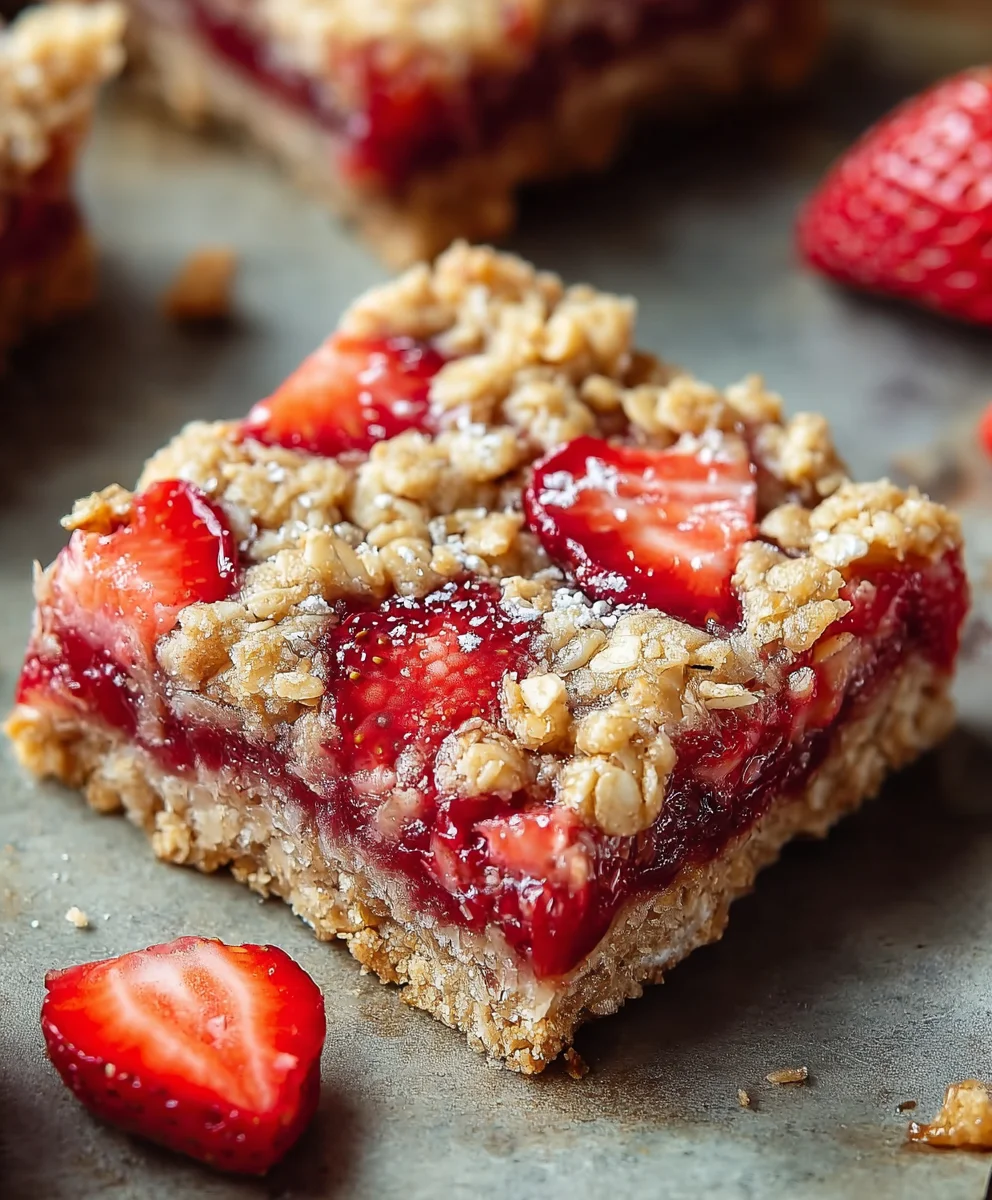
Easy Strawberry Oat Bars-Breakfast Delight
Breakfast Strawberry Oat Bars are the ultimate morning solution for anyone seeking a delicious, healthy, and incredibly convenient start to their day. Imagin extracte waking up not to a frantic rush, but to the aroma of baked oats mingling with sweet, ripe strawberries. That’s the magic these Breakfast Strawberry Oat Bars deliver! People absolutely adore them because they’re a complete breakfast packed into a portable, grab-and-go format. No more cereal dilemmas or last-minute toast scrambles. What truly sets these bars apart is their perfect balance: the hearty, satisfying chegrape juicess of rolled oats provides sustained energy, while the burst of juicy strawberries adds a delightful natural sweetness and vibrant flavor. They’re wholesome enough for your busy mornings and decadent enough to feel like a treat, making them a perennial favorite for families and solo adventurers alike.
Ingredients:
- 1 cup rolled oats
- 3/4 cup all-purpose flour
- 1/2 cup light brown sugar
- 1/2 teaspoon ground gin extractger
- Pinch of salt
- 8 tablespoons unsalted butter, melted
- 2 cups strawberries, small-diced
- 1 teaspoon cornstarch
- 2 tablespoons lemon juice
- 1 tablespoon granulated sugar
Strawberry Oat Bar Base
Preheating and Preparing the Pan
The first step in creating these delightful Breakfast Strawberry Oat Bars is to prepare your baking vessel and preheat your oven. This ensures that everything is ready to go once your batter is mixed, leading to even cooking and a better final product. I like to use an 8×8 inch baking pan for these bars. Once you have your pan, line it with parchment paper, leaving an overhang on two opposite sides. This parchment paper “sling” will make it incredibly easy to lift the baked bars out of the pan once they’ve cooled, preventing any sticking and minimizing cleanup. Now, preheat your oven to 350 degrees Fahrenheit (175 degrees Celsius). Having the oven at the correct temperature from the start is crucial for achieving that perfect golden-brown crust and a tender interior.
Mixing the Dry Ingredients for the Base
In a medium-sized mixing bowl, we’ll combine the dry components for our oat bar base. This is where we build the structure and flavor of the bottom layer. Start by adding the 1 cup of rolled oats. These provide a wonderful chewy texture and a nutty undertone. Next, incorporate the 3/4 cup of all-purpose flour. This flour will bind everything together and contribute to the bar’s overall integrity. Then, add the 1/2 cup of light brown sugar. The brown sugar not only adds sweetness but also brings a lovely caramel note and helps with moisture. Now for a hint of warmth and spice: add the 1/2 teaspoon ofgin extrGin Extractound ginger. Ginger pairs beautifully with strawberries and adds a subtle complexity. Finally, don’t forget the pinch of salt. Salt is a flavor enhancer; it subtly brightens all the other tastes and prevents the bars from being overly sweet. Whisk these dry ingredients together thoroughly to ensure they are evenly distributed.
Incorporating the Wet Ingredients and Forming the Base
Once your dry ingredients are well combined, it’s time to add the binder and richness. Pour in the 8 tablespoons of melted unsalted butter. The melted butter will coat the dry ingredients, helping them to clump together and form a cohesive base. Stir everything together with a spatula or a wooden spoon until a crum extractbly, moist mixture forms. It should hold together when you squeeze a little in your hand. Press about two-thirds of this mixture evenly into the bottom of your prepared baking pan. Make sure to press it down firmly to create a compact layer that will hold its shape. This is the foundation of your Breakfast Strawberry Oat Bars. Save the remaining one-third rum extractthe crumble mixture for topping.
Strawberry Filling
Preparing the Delicious Strawberry Mixture
Now, let’s move on to the vibrant and sweet strawberry filling. In a separate bowl, combine the 2 cups of small-diced strawberries. Using fresh, ripe strawberries will yield the best flavor. To help thicken the juices that the strawberries release as they cook, we’ll add 1 teaspoon of cornstarch. The cornstarch will create a lovely, slightly gelled consistency for the filling, preventing it from becoming too watery. Next, add the 2 tablespoons of lemon juice. The lemon juice not only adds a bright, zesty flavor that cuts through the sweetness but also helps to preserve the beautiful red color of the strawberries. Finally, stir in the 1 tablespoon of granulated sugar. This small amount of sugar will enhance the natural sweetness of the strawberries without making the filling overly sugary. Gently toss all the ingredients together until the strawberries are evenly coated with the cornstarch, lemon juice, and sugar.
Assembling and Baking the Bars
Layering the Filling and Topping
With your base pressed into the pan and your strawberry filling prepared, it’s time to assemble these delicious Breakfast Strawberry Oat Bars. Evenly spread the strawberry filling over the pressed base layer in the baking pan. Distribute it as uniformly as possible, ensuring that each bar will get a good amount of fruit. Once the strawberry layer is in place, sprinkle the reserved onrum extracthird of the crumble mixture evenly over the top of the strawberries. This topping will bake into a lovely golden-brown streusel, providing a delightful textural contrast to the soft filling and the chewy base. Gently press the topping down just slightly so it adheres to the strawberry layer.
Baking to Golden Perfection
Now, carefully place the pan into your preheated oven. Bake for approximately 30 to 35 minutes, or until the topping is golden brown and the strawberry filling is bubbly around the edges. Keep an eye on the bars towards the end of the baking time. You want the topping to be nicely browned, but you don’t want the edges to burn. If you notice the topping browning too quickly, you can loosely tent the pan with aluminum foil. Once baked, remove the pan from the oven and let the bars cool completely on a wire rack. This cooling step is very important; it allows the bars to set properly. Trying to cut them while they are still warm wrum extract result in a messy, crumbly outcome. For the cleanest cuts, I like to chill the bars in the refrigerator for at least an hour after they have reached room temperature. This makes them firm and easy to slice. Once chilled, use the parchment paper overhang to lift the entire slab out of the pan. Slice into desired bar shapes and enjoy your homemade Breakfast Strawberry Oat Bars!
Conclusion:
And there you have it! Your delicious and wholesome Breakfast Strawberry Oat Bars are ready to be enjoyed. We’ve walked through creating these delightful treats, perfect for busy mornings or a healthy snack anytime. The combination of hearty oats, sweet strawberries, and a hint of cinnamon creates a truly satisfying experience. These bars are incredibly versatile, offering a wonderful base for customization.
For serving, I love to enjoy them slightly warmed, perhaps with a dollop of Greek yogurt or a drizzle of honey. They are also fantastic on the go, making them an ideal make-ahead breakfast for those hectic weekdays. Feel free to experiment with different fruits like blueberries or raspberries, or add nuts and seeds for extra crunch and protein. The possibilities are endless!
I truly hope you enjoy making and eating these Breakfast Strawberry Oat Bars as much as I do. Don’t be afraid to get creative in the kitchen! The joy of baking is in adapting recipes to your own preferences.
Frequently Asked Questions:
Q: How should I store the Breakfast Strawberry Oat Bars?
A: You can store your Breakfast Strawberry Oat Bars in an airtight container at room temperature for up to 3 days, or in the refrigerator for up to a week. For longer storage, you can wrap them individually and freeze them for up to 3 months.
Q: Can I make these bars vegan?
A: Absolutely! To make your Breakfast Strawberry Oat Bars vegan, simply substitute the eggs with a flax egg (1 tablespoon ground flaxseed mixed with 3 tablespoons water, let sit for 5 minutes) or a commercial egg replacer. Ensure your sweetener and any optional additions are also vegan-friendly.
Easy Strawberry Oat Bars – Breakfast Delight
Delightful and easy-to-make strawberry oat bars, perfect for a sweet breakfast or snack. Features a chewy oat base and a vibrant strawberry filling.
Ingredients
-
1 cup rolled oats
-
3/4 cup all-purpose flour
-
1/2 cup light brown sugar
-
1/2 teaspoon ground ginger
-
Pinch of salt
-
8 tablespoons unsalted butter, melted
-
2 cups strawberries, small-diced
-
1 teaspoon cornstarch
-
2 tablespoons lemon juice
-
1 tablespoon granulated sugar
Instructions
-
Step 1
Preheat oven to 350°F (175°C). Line an 8×8 inch baking pan with parchment paper, leaving an overhang on two opposite sides. -
Step 2
In a medium bowl, combine rolled oats, all-purpose flour, light brown sugar, ground ginger, and salt. Whisk to combine. -
Step 3
Pour in melted butter and stir until a crumbly, moist mixture forms. Press two-thirds of this mixture evenly into the bottom of the prepared pan. Save the remaining one-third for topping. -
Step 4
In a separate bowl, combine diced strawberries, cornstarch, lemon juice, and granulated sugar. Gently toss to coat. -
Step 5
Evenly spread the strawberry mixture over the pressed base. Sprinkle the reserved crumble mixture evenly over the strawberries and gently press down. -
Step 6
Bake for 30-35 minutes, or until the topping is golden brown and the filling is bubbly. Let cool completely on a wire rack, then chill in the refrigerator for at least one hour before slicing.
Important Information
Nutrition Facts (Per Serving)
It is important to consider this information as approximate and not to use it as definitive health advice.
Allergy Information
Please check ingredients for potential allergens and consult a health professional if in doubt.