Easy Hot Beef Sub Sliders Recipe
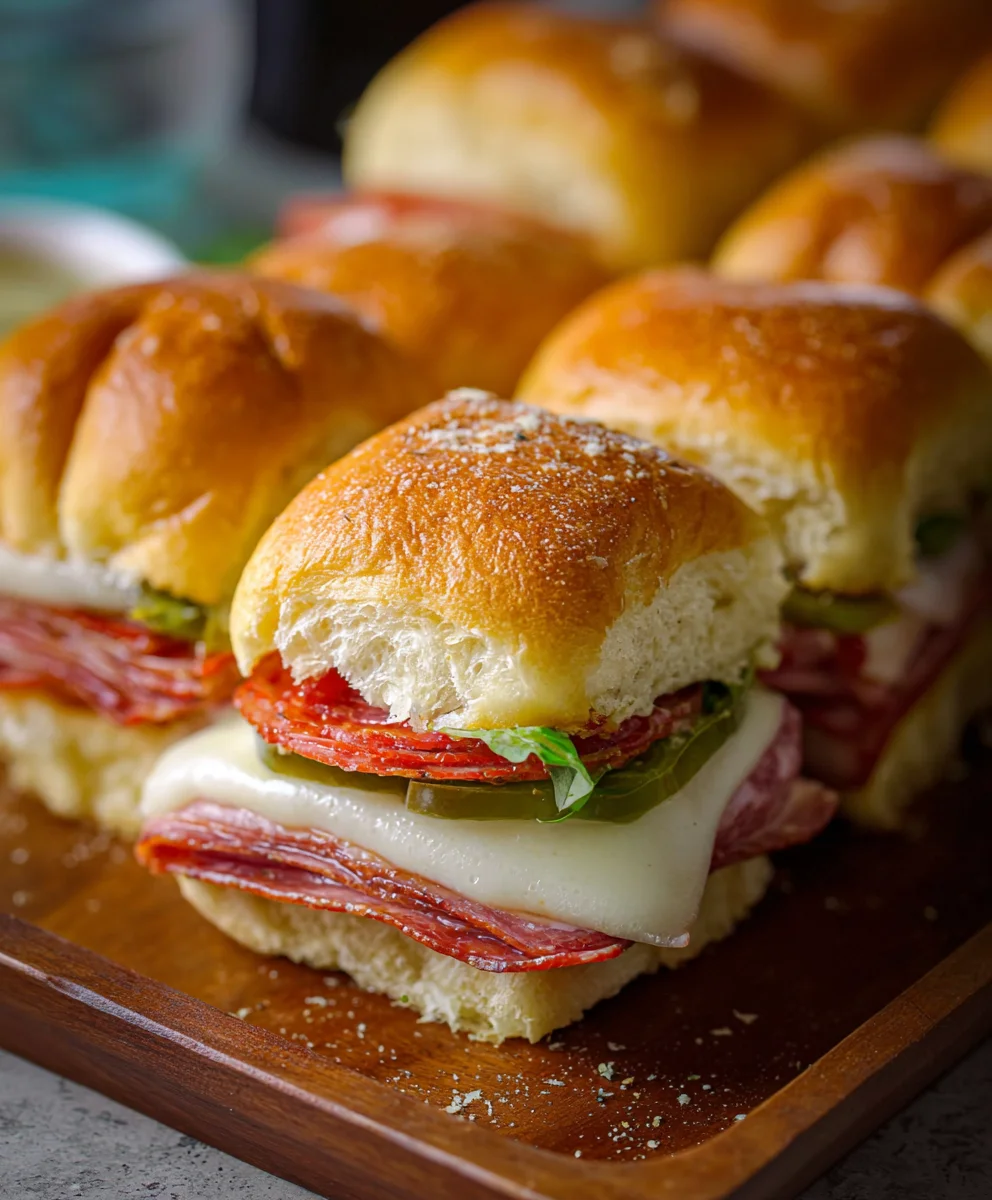
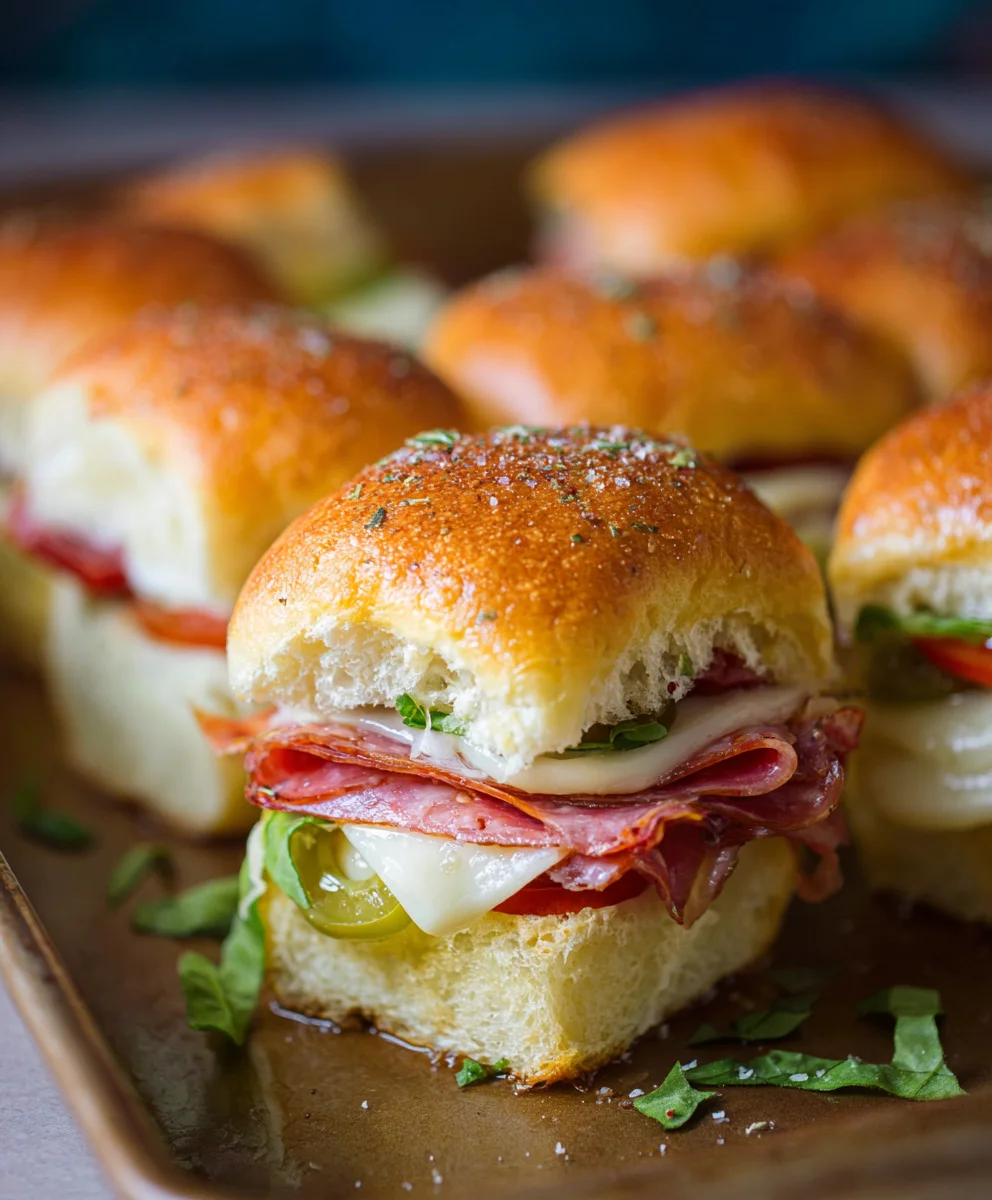
Hot Italian Sub Sliders are more than just a bite-sized appetizer; they’re a flavor explosion waiting to happen. Imagin extracte all the savory, zesty goodness of a classic Italian sub, perfectly condensed into a portable, craveable slider. It’s no wonder these little delights have become a go-to for parties, game nights, or even just a fun weeknight treat. What truly sets our Hot Italian Sub Sliders apart is the harmonious blend of textures and tastes: the slight chew of the slider bun, the satisfying richness of the cured meats, the creamy melt of the provolone, and that essential tangy kick from the peppers. They’re incredibly satisfying without being overwhelming, making them the perfect crowd-pleaser. Get ready to impress your guests (and yourself!) with these irresistible mini masterpieces.
Why You’ll Love This Recipe:
A Flavor Sensation in Every Bite
Forget the mess and the big sandwich commitment. These Hot Italian Sub Sliders deliver all the iconic flavors of a loaded Italian sub – think Genoa beef salami, capicola, and beef pepperoni – nestled between soft, toasted buns. We’re talking about a delightful dance of salty, peppery, and slightly sweet notes, all brought together with a melty blanket of provolone cheese. The secret weapon? A vibrant Italian dressing-infused topping that infuses every inch with zesty, herbaceous goodness. They’re quick to assemble and even quicker to disappear, making them a guaranteed hit for any gathering, big or small.
Ingredients:
- 12 pack rolls, halved lengthwise (Kings Hawaiian rolls are a fantastic choice for their slightly sweet and soft texture, which complements the savory fillings beautifully.)
- 6 oz package of beef beef ham, thinly sliced (Look for a good quality, mild beef hamf ham that won’t overpower the other flavors.)
- 5 oz package of beef beef salami, thinly sliced (A classic Itabeef salamialami adds a satisfying depth and slight spiciness.)
- 5 oz package of beef beef pepperoni, thinly sliced (The familiar kicbeef pepperonieroni is essential for that iconic sub flavor.)
- 9 slices provolone cheese (Provolone melts wonderfully and offers a sharp, tangy contrast to the meats.)
- 1/3 cup pepperoncini, sliced (These add a briny, slightly tangy, and mild heat that’s crucial for authenticity.)
- 1/3 cup pickled hot cherry peppers, sliced (For a more pronounced heat and a pleasant fruity undertone, these are a must-have.)
- 1/4 cup salted butter, melted (This forms the delicious, golden crust on the rolls.)
- 1 tsp Italian seasoning (A blend of dried herbs like oregano, basil, thyme, and rosemary ties all the flavors together.)
- 2 cloves garlic, crushed (Fresh garlic offers a more pungent and vibrant flavor compared to jarred; mince them very finely or crush them for maximum impact.)
- 1 cup marinara sauce (A good quality marinara sauce provides moisture and a rich tomato base.)
Preparing the Slider Assembly
Step 1: Layering the Meats and Cheeses
Begin extract by preparing your rolls. Carefully slice the entire 12-pack of rolls in half lengthwise. I find it easiest to do this by placing the rolls on a cutting board and using a long, serrated knife to make one clean cut through all of them at once. This ensures even layers. Now, working with the bottom halves of the rolls, it’s time to build our flavor foundation. Arrange the thinly slbeef hamd beef ham evenly over the bottom half of all 12 rolls. Don’t be afraid to let the slices overlap slightly – this ensures a generous amount of meat in every bite. Next, layerbeef salamieef sbeef hammi over the ham, again ensuring an even distribution. Follow this withbeef pepperoni pepperoni, creating a substantial layer of cured meats. Now, it’s time for the cheese. Place three slices of provolone cheese over the meat layers on each of the 12 bottom roll halves. Try to cover as much of the meat as possible to create a cohesive melting layer.
Step 2: Adding the Peppers and Marinara
With the meats and cheeses in place, we’ll add those signature spicy and tangy elements. Evenly distribute the sliced pepperoncini over the provolone cheese on each of the 12 bottom roll halves. These will provide a delightful briny crunch and a mild heat. Next, scatter the sliced pickled hot cherry peppers across the pepperoncini. The amount of heat from these can vary, so adjust to your personal preference, but a good scattering is key for that authentic “hot sub” experience. Now, for the saucy component. Spoon approximately 1 to 1.5 tablespoons of marinara sauce over the peppers and cheese on each slider base. You want enough to add moisture and flavor without making the sliders soggy. Spread it gently to ensure it coats the toppings.
Infusing with Garlic Butter and Baking
Step 3: Creating the Garlic Herb Butter
In a small bowl, combine the melted salted butter with the crushed garlic and the Italian seasoning. Stir these ingredients together thoroughly. The goal here is to infuse the butter with the aromatic flavors of garlic and the herbs. The fresh garlic will be the most impactful, so ensure it’s finely minced or crushed for optimal flavor distribution. This garlic herb butter will be brushed over the top halves of the rolls, creating a delicious, golden, and flavorful crust as they bake. This step is crucial for transforming simple rolls into something extraordinary.
Step 4: Assembling and Basting the Sliders
Place the top halves of the rolls back onto the prepared bottom halves, creating 12 individual sliders. Now, using a pastry brush, generously brush the melted garlic herb butter mixture over the top of each assembled slider. Make sure to coat the entire surface of the top roll. This butter will not only add richness but also help the rolls toast to a perfect golden brown. This basting step is what gives the sliders their signature restaurant-quality finish and ensures a delightful textural contrast.
Step 5: Baking to Golden Perfection
Preheat your oven to 375°F (190°C). Carefully place the assembled sliders onto a large baking sheet. It’s often helpful to line the baking sheet with parchment paper for easier cleanup, especially with the melted butter and sauce. Place the baking sheet in the preheated oven and bake for approximately 15 to 20 minutes. You are looking for the rolls to be beautifully golden brown and toasted, and the cheese to be melted and bubbly. The aroma filling your kitchen will be incredible! Once they are done, carefully remove the baking sheet from the oven.
Step 6: Resting and Serving
Let the Hot Italian Sub Sliders rest on the baking sheet for about 5 minutes before attempting to slice and serve them. This brief resting period allows the flavors to meld and the cheese to set slightly, making them easier to handle and eat. You can serve them whole, or if you prefer, carefully cut between each slider using your serrated knife for individual servings. These sliders are fantastic served warm and are perfect for game days, parties, or any casual get-together. Enjoy the explosion of classic Italian sub flavors in these perfectly portioned bites!
Conclusion:
You’ve now got the ultimate guide to making delicious Hot Italian Sub Sliders right in your own kitchen! This recipe is incredibly versatile and a guaranteed crowd-pleaser, perfect for game days, parties, or even a fun family dinner. The combination of savory Italian meats, melted cheese, and a zesty sauce all nestled in soft slider buns is simply irresistible. Don’t be afraid to get creative with your toppings!
I love serving these Hot Italian Sub Sliders alongside a crisp Caesar salad or a bowl of hearty tomato soup. For variations, consider adding some sautéed bell peppers and onions for extra flavor and texture, or experiment with different types of Italian deli meats like beef salami or capicola. You could also try using a spicy mustard or a sprinkle of red pepper flakes for a kick. No matter how you customize them, I encourage you to dive in and enjoy the process. Happy cooking!
FAQs
Can I make the Hot Italian Sub Sliders ahead of time?
Yes, you can assemble the Hot Italian Sub Sliders and cover them tightly with foil. You can then refrigerate them for up to 24 hours before baking. When you’re ready to serve, add a few extra minutes to the baking time to ensure they are heated through completely.
What kind of bread is best for Hot Italian Sub Sliders?
While slider buns are ideal for their size and soft texture, you can also use other types of bread. Consider cutting a baguette into slider-sized portions or even using Hawaiian rolls for a slightly sweeter profile. The key is a bread that can hold up to the fillings and sauce without becoming too soggy.
Easy Hot Beef Sub Sliders
Delicious and easy hot beef sub sliders made with a variety of beef deli meats, provolone cheese, and a flavorful garlic butter topping. Perfect for parties or game days!
Ingredients
-
12 pack rolls, halved lengthwise
-
6 oz package of beef ham, thinly sliced
-
5 oz package of beef salami, thinly sliced
-
5 oz package of beef pepperoni, thinly sliced
-
9 slices provolone cheese
-
1/3 cup pepperoncini, sliced
-
1/3 cup pickled hot cherry peppers, sliced
-
1/4 cup salted butter, melted
-
1 tsp Italian seasoning
-
2 cloves garlic, crushed
-
1 cup marinara sauce
Instructions
-
Step 1
Slice the 12-pack of rolls in half lengthwise. Arrange the bottom halves on a baking sheet. Layer the thinly sliced beef ham evenly over the bottom half of the rolls, followed by the beef salami, and then the beef pepperoni. -
Step 2
Place three slices of provolone cheese over the meat layers on each of the 12 bottom roll halves. Evenly distribute the sliced pepperoncini over the provolone cheese, followed by the sliced pickled hot cherry peppers. -
Step 3
Spoon approximately 1 to 1.5 tablespoons of marinara sauce over the peppers and cheese on each slider base, spreading gently to coat. -
Step 4
In a small bowl, combine the melted salted butter with the crushed garlic and Italian seasoning. Stir thoroughly to create the garlic herb butter. -
Step 5
Place the top halves of the rolls back onto the prepared bottom halves, creating 12 individual sliders. Generously brush the garlic herb butter mixture over the top of each assembled slider. -
Step 6
Preheat oven to 375°F (190°C). Bake the sliders on a lined baking sheet for 15-20 minutes, or until the rolls are golden brown and the cheese is melted and bubbly. -
Step 7
Let the sliders rest for 5 minutes before slicing between each slider and serving warm.
Important Information
Nutrition Facts (Per Serving)
It is important to consider this information as approximate and not to use it as definitive health advice.
Allergy Information
Please check ingredients for potential allergens and consult a health professional if in doubt.