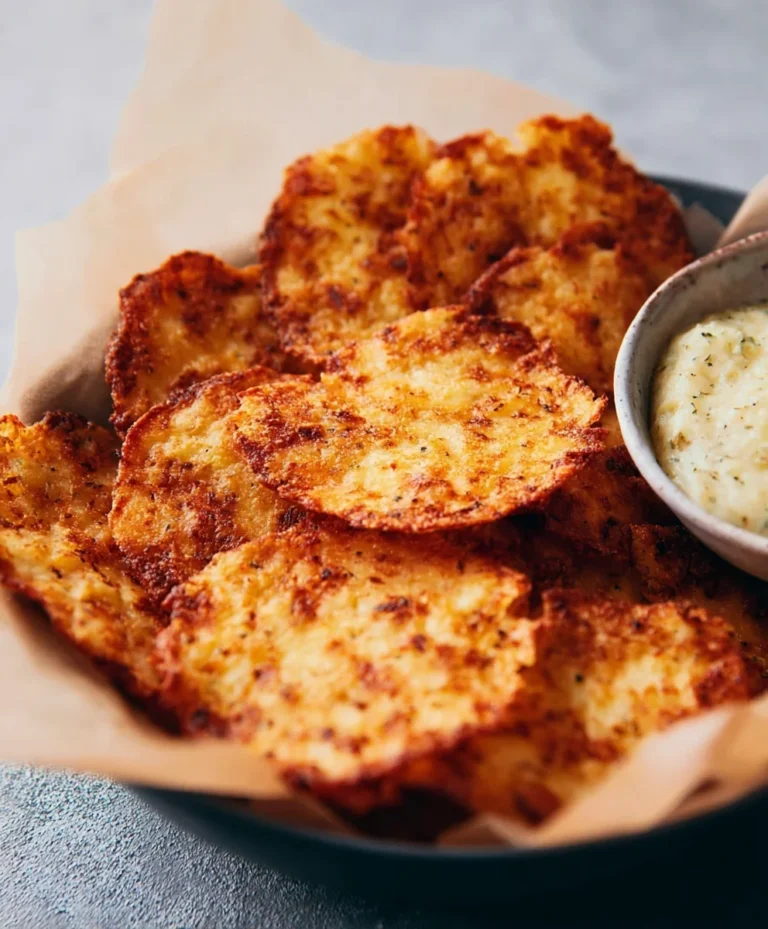
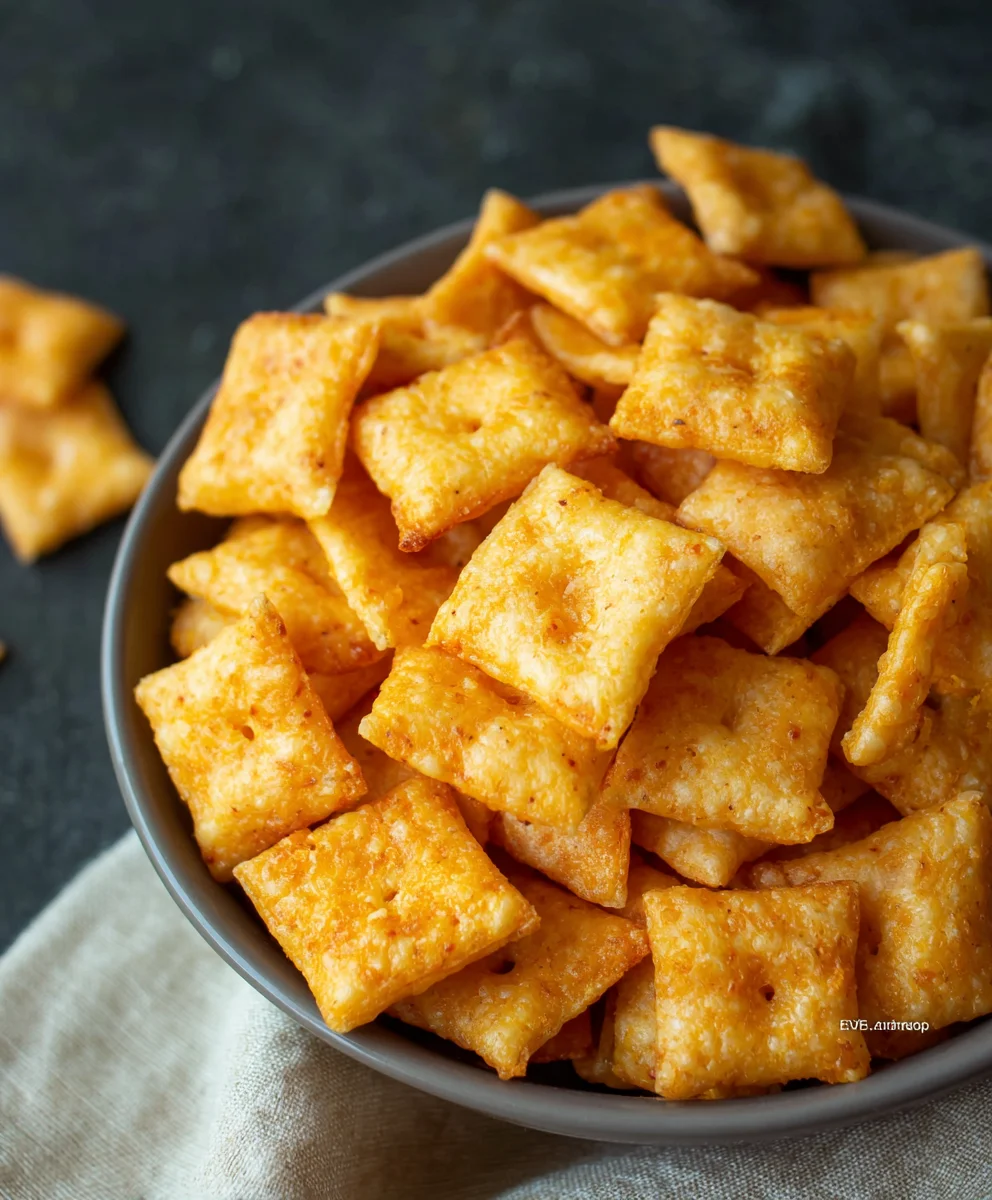
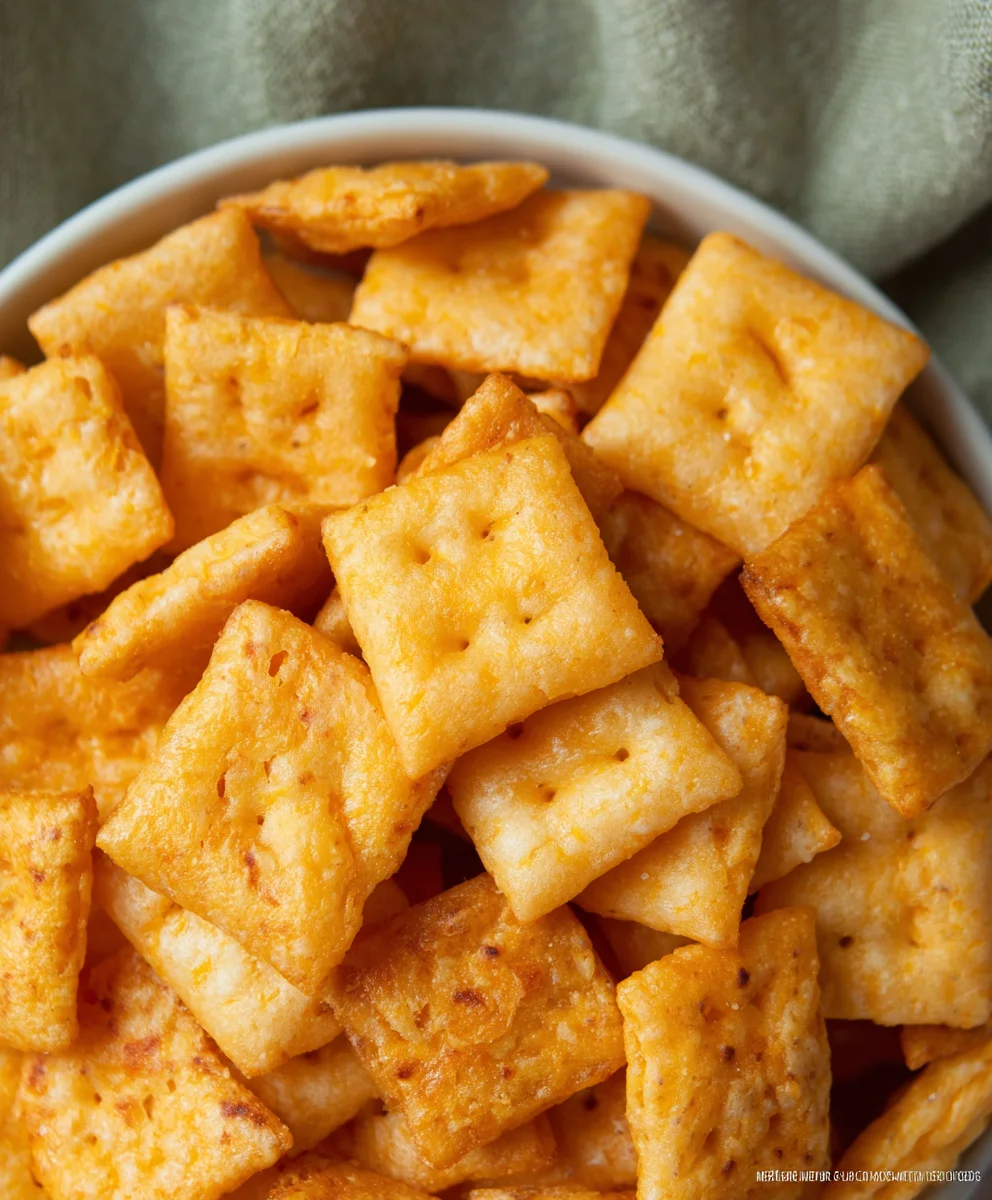
Gluten Free Cheez-Its – Easy Homemade Snack Recipe
Gluten Free Cheez Its are more than just a snack; they are a nostalgic trip back to childhood for many, a crunchy, cheesy escape that fits perfectly into modern dietary needs. We all remember that irresistible, tangy, cheddar-infused crunch that made the origin extractal so beloved. The magic lies in that unique flavor profile, a savory delight that’s hard to replicate, and the satisfying texture that leaves you reaching for more. But what if you’re avoiding gluten? Does that mean saying goodbye to this iconic treat forever? Absolutely not! This recipe for Gluten Free Cheez Its is designed to capture that same irresistible essence. We’ve meticulously crafted a version that delivers all the cheesy goodness and addictive crunch you crave, without any gluten. It’s the perfect guilt-free indulgence, ideal for packed lunches, movie nights, or simply when that savory craving strikes. Get ready to rediscover your favorite snack, reinvented for everyone to enjoy.
Why You’ll Love This Recipe:
The Ultimate Cheesy, Crunchy, Gluten-Free Delight!
Ingredients:
- 8 ounces cheddar cheese (mild or sharp), finely grated
- 4 tablespoons unsalted butter, softened
- 1 cup gluten-free flour blend
- 1/2 teaspoon salt
- 1/8 teaspoon garlic powder
- 3 tablespoons cold water
- 1 teaspoon coarse salt, for sprinkling
- 1/8 teaspoon onion powder
Making Your Gluten Free Cheez Its
This recipe is designed to deliver that irresistible cheesy crunch you love, all without the gluten. The key to fantastic Gluten Free Cheez Its lies in getting the dough just right and ensuring an even bake. Don’t be discouraged if your dough feels a little different than traditional wheat-based doughs; that’s normal for gluten-free baking. We’ll go through each step carefully to ensure success.
Preparing the Dough
The foundation of our Gluten Free Cheez Its is a simple yet effective dough. We’ll start by combining the dry ingredients and then incorporate the fats and liquids.
- In a medium-sized mixing bowl, whisk together the 1 cup of gluten-free flour blend, 1/2 teaspoon of salt, 1/8 teaspoon of garlic powder, and 1/8 teaspoon of onion powder. Ensure these dry ingredients are thoroughly combined. This initial whisking helps to distribute the seasonings evenly throughout the flour, preventing pockets of flavor and ensuring a consistent taste in every bite.
- Add the 4 tablespoons of softened, unsalted butter to the dry ingredients. Using your fingertips or a pastry blender, cut the butter into the flour mixture until it resembles coarse crum extractbs. You want small, pea-sized pieces of butter dispersed throughout. This step is crucial for creating flaky and tender crackers. The butter will melt during baking, creating steam pockets that contribute to a delightful texture. Avoid overmixing at this stage, as we are aimingrum extractr a crumbly texture, not a smooth paste.
- Now, it’s time to add the star of the show: the cheese! Stir in the 8 ounces of finely grated cheddar cheese. Make sure the cheese is grated as finely as possible; this helps it incorporate evenly into the dough and melt beautifully during baking. Gently toss the cheese with the flour and butter mixture, ensuring it’s distributed throughout.
- Gradually add the 3 tablespoons of cold water, one tablespoon at a time. Mix gently after each addition until the dough just starts to come together. Be careful not to add too much water, as this can make the dough sticky and difficult to handle. The goal is a cohesive dough that holds together when pressed, but it might rum extractll be a bit crumbly. You may not need all of the water, or you might need a tiny bit more, depending on the humidity and your specific flour blend. The dough should feel firm enough to roll out.
Shaping and Baking Your Gluten Free Cheez Its
Once the dough is ready, we’ll shape it into crackers and get them into the oven to transform into golden, cheesy delights.
- Turn the dough out onto a clean, lightly floured surface (use your gluten-free flour blend for dusting). Gently press the dough together. Place a sheet of parchment paper over the dough, and then use a rolling pin to roll the dough out to about 1/8-inch thickness. Aim for an even thickness across the entire piece of dough to ensure consistent baking. Thicker parts will cook slower than thinner parts, leading to unevenly baked crackers. If the dough is sticking, you can lift the top parchment paper and add a tiny bit more flour underneath.
- Once rolled out, remove the top parchment paper. Using a pizza cutter or a sharp knife, score the dough into small squares or rectangles, roughly the size of traditional Cheez Its. This scoring will make it easy to break apart the crackers after baking. You can also use small cookie cutters if you prefer fun shapes. Don’t worry about making them perfectly uniform; rustic charm is part of the homemade appeal!
- Carefully transfer the parchment paper with the scored dough onto a baking sheet. If your dough is very delicate, you might want to chill it in the refrigerator for about 10-15 minutes before transferring to the baking sheet; this will make it firmer and easier to handle. Preheat your oven to 350°F (175°C).
- Sprinkle the scored dough evenly with the 1 teaspoon of coarse salt. This coarse salt provides a delightful salty crunch on the outside of the crackers, enhancing their flavor and texture. It’s that little extra touch that makes them truly special.
- Bake for 12-18 minutes, or until the edges are golden brown and the crackers are firm. Keep a close eye on them, as gluten-free baked goods can sometimes brown quickly. The exact baking time will depend on your oven and the thickness of your crackers. Once they look beautifully golden and smell deliciously cheesy, remove them from the oven.
- Allow the crackers to cool on the baking sheet for a few minutes before carefully breaking them apart along the scored lines. Let them cool completely on a wire rack. This cooling process is essential for them to achieve their ultimate crispiness. If you try to move them too soon, they might be soft. Patience here will be rewarded with perfectly crunchy Gluten Free Cheez Its.
Conclusion:
Congratulations on mastering the art of making your own Gluten Free Cheez Its! You’ve now got a delicious, homemade snack that’s free from gluten and packed with cheesy goodness. These crispy, savory crackers are incredibly satisfying and a fantastic alternative for anyone with gluten sensitivities or simply looking for a healthier snack option. They’re perfect for munching on their own, serving at parties, or even crushing and using as a coating for chicken or fish. Don’t be afraid to get creative with the flavors and enjoy this delightful treat!
For serving suggestions, consider pairing your Gluten Free Cheez Its with your favorite dips like hummus, guacamole, or a creamy cheese sauce. They also make a wonderful addition to a charcuterie board. When it comes to variations, feel free to experiment with different types of cheese for a unique flavor profile. A touch of smoked paprika or a pinch of cayenne pepper can add a subtle kick.
Frequently Asked Questions about Gluten Free Cheez Its:
Q1: How should I store my Gluten Free Cheez Its to keep them crispy?
To maintain their crispiness, store your Gluten Free Cheez Its in an airtight container at room temperature. Ensure they are completely cooled before storing to prevent any trapped moisture from softening them.
Q2: Can I use different types of cheese in this recipe?
Absolutely! While cheddar cheese is traditional, feel free to experiment with other hard, flavorful cheeses like Gruyere, Parmesan, or a Monterey Jack blend for a different cheesy taste.
Gluten Free Cheez-Its – Easy Homemade Snack Recipe
An easy homemade recipe for gluten-free Cheez-Its, offering that irresistible cheesy crunch without the gluten. Perfect for a satisfying snack.
Ingredients
-
8 ounces cheddar cheese (mild or sharp), finely grated
-
4 tablespoons unsalted butter, softened
-
1 cup gluten-free flour blend
-
1/2 teaspoon salt
-
1/8 teaspoon garlic powder
-
3 tablespoons cold water
-
1 teaspoon coarse salt, for sprinkling
-
1/8 teaspoon onion powder
Instructions
-
Step 1
In a medium-sized mixing bowl, whisk together the gluten-free flour blend, salt, garlic powder, and onion powder until thoroughly combined. -
Step 2
Add the softened butter to the dry ingredients and cut it in with your fingertips or a pastry blender until the mixture resembles coarse crumbs with pea-sized pieces of butter. -
Step 3
Stir in the finely grated cheddar cheese until evenly distributed throughout the flour and butter mixture. -
Step 4
Gradually add the cold water, one tablespoon at a time, mixing gently until the dough just starts to come together. The dough should be cohesive but may still be a bit crumbly. -
Step 5
Turn the dough onto a lightly floured surface, press it together, and roll it out between two sheets of parchment paper to about 1/8-inch thickness. Remove the top parchment paper. -
Step 6
Score the dough into small squares or rectangles using a pizza cutter or sharp knife. Transfer the parchment paper with the scored dough to a baking sheet. -
Step 7
Preheat your oven to 350°F (175°C). Sprinkle the scored dough evenly with coarse salt. -
Step 8
Bake for 12-18 minutes, or until the edges are golden brown and the crackers are firm. Watch closely to prevent over-browning. -
Step 9
Allow the crackers to cool on the baking sheet for a few minutes, then break them apart along the scored lines. Let them cool completely on a wire rack for maximum crispiness.
Important Information
Nutrition Facts (Per Serving)
It is important to consider this information as approximate and not to use it as definitive health advice.
Allergy Information
Please check ingredients for potential allergens and consult a health professional if in doubt.