Best Cheesy Garlic Bread Recipe- Easy & Delicious
BEST CHEESY GARLIC BREAD RECIPE for a reason! There are few things in life as universally adored as perfectly baked, gloriously cheesy garlic bread. It’s the undisputed cbeef hampion of side dishes, the ultimate comfort food, and the guaranteed crowd-pleaser at any gathering. Imagin extracte this: warm, crusty bread generously slathered with a fragrant, buttery garlic mixture, then showered with a melty, golden blanket of your favorite cheeses. It’s the kind of aroma that fills your kitchen and instantly makes your taste buds tingle with anticnon-alcoholic ipation.
What makes our BEST CHEESY GARLIC BREAD RECIPE so special?
It’s the perfect balance of crispy exterior and tender, airy interior, infused with an irresistible garlic punch that’s not too overpowering. We’ve perfected the ratios of butter, garlic, herbs, and, of course, the cheese blend to create a symphony of flavors and textures that will leave you reaching for slice after slice. This isn’t just any garlic bread; it’s an experience. Get ready to elevate your next meal with this incredibly satisfying and surprisingly simple recipe.
Our BEST Cheesy Garlic Bread Recipe
There are few things in life as universally loved and comfortingly delicious as a warm, gooey slice of cheesy garlic bread. It’s the perfect accompaniment to almost any meal, from a hearty pasta dish to a simple soup, or honestly, it’s good enough to be the main event! Forget those dry, flavorless versions you might have tried in the past. Today, we’re diving deep into creating the absolute BEST cheesy garlic bread, bursting with rich garlic flavor, a luxurious buttery coating, and a generous blanket of melted, stretchy mozzarella. This recipe prioritizes maximum flavor with minimal fuss, using readily available ingredients to achieve a truly spectacular result. We’re going to leverage a secret weapon for an extra depth of garlic flavor that will make your taste buds sing. Get ready to impress yourself and anyone lucky enough to share this masterpiece with you!
Ingredients:
Roasting the Garlic: The Flavor Foundation
This is our secret weapon for an unbelievably flavorful garlic bread. Roasting garlic transforms its sharp, pungent bite into a sweet, creamy, and deeply aromatic paste. It’s incredibly simple and the results are phenomenal.
Creating the Irresistible Garlic Butter Mixture
Now we’re going to build our flavor-packed garlic butter. This mixture is what coats the bread and infuses it with all that deliciousness.
Assembling and Baking Your Masterpiece
The final steps involve bringin extractg all our components together and baking until golden and bubbly.
Serve your BEST Cheesy Garlic Bread immediately and watch it disappear. Enjoy every warm, garlicky, cheesy bite!
Conclusion:
And there you have it – the recipe for what I truly believe is the BEST CHEESY GARLIC BREAD RECIPE! This isn’t just any garlic bread; it’s an experience. The perfect balance of crispy crust, soft, fragrant interior, and a glorious, gooey, cheesy topping makes it an absolute showstopper. Whether you’re serving it as an appetizer, a side dish for your favorite pasta or soup, or even as a standalone snack, it’s guaranteed to be a hit. I love serving this alongside a hearty marinara sauce for dipping, or as a delightful accompaniment to a rich lasagna. Don’t be afraid to experiment with variations too – consider adding a sprinkle of red pepper flakes for a little heat, or a handful of fresh herbs like parsley or chives to the cheese mixture for an extra burst of flavor. I genuinely encourage you to give this recipe a try; I promise you won’t be disappointed! It’s simple, satisfying, and incredibly delicious.
Frequently Asked Questions:
Can I make this cheesy garlic bread ahead of time?
You can definitely prepare the garlic butter mixture and spread it on the bread. Store it in the refrigerator for up to 24 hours. When you’re ready to bake, just add the cheese and bake as directed, you might need to add a few extra minutes to the baking time.
What kind of bread is best for this recipe?
A good quality Italian loaf or a French baguette works beautifully. The slightly denser crum extractb helps it hold up to the butter and cheese, and results in a wonderful contrast between the crispy edges and the soft interior.
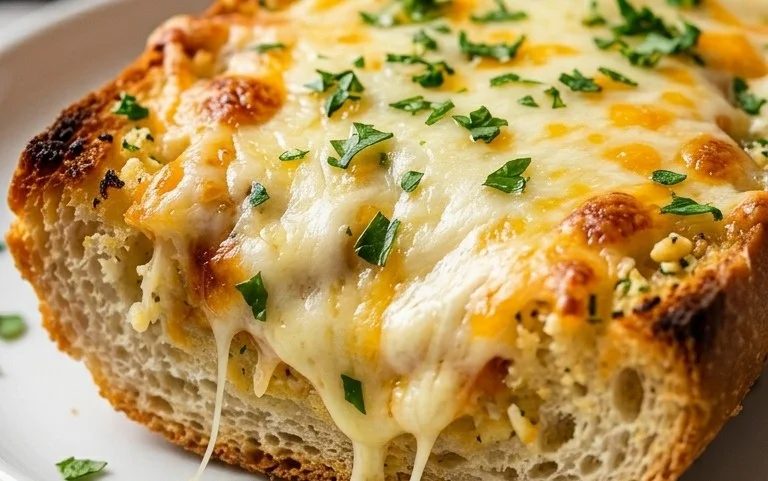
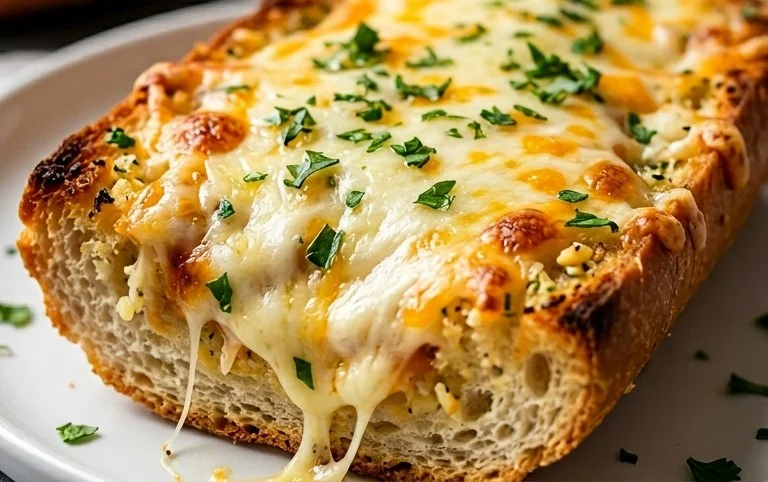
BEST CHEESY GARLIC BREAD RECIPE
The ultimate cheesy garlic bread, featuring a rich roasted garlic spread and a generous topping of mozzarella cheese baked to golden perfection on soft Hawaiian rolls.
Ingredients
-
8-10 garlic cloves
-
2 tbsp olive oil
-
Pinch of salt
-
Roasted garlic from above
-
½ cup butter, melted (113g)
-
1 egg
-
¼ cup milk (60g)
-
½ tsp salt
-
½ tsp paprika
-
2 tbsp chopped fresh parsley
-
12 King’s Hawaiian Origin extractal Hawaiian Sheet Rolls, kept in the full sheet form
-
2 cups shredded mozzarella cheese
-
Chopped parsley and chili flakes for serving
Instructions
-
Step 1
Preheat oven to 375°F (190°C). In a small bowl, mash 8-10 garlic cloves with 2 tbsp olive oil and a pinch of salt. Roast in the oven for about 15-20 minutes until tender and fragrant, then set aside. You will use this roasted garlic for the spread. -
Step 2
In a medium bowl, combine the melted butter, roasted garlic (mashed), egg, milk, ½ tsp salt, paprika, and 2 tbsp chopped fresh parsley. Whisk until well combined. -
Step 3
Carefully slice the sheet of Hawaiian rolls horizontally, but do not separate them into individual rolls. This creates a pocket for the garlic butter. -
Step 4
Pour the garlic butter mixture evenly over the sliced rolls, ensuring it seeps into the crevices. Spread the 2 cups of shredded mozzarella cheese generously over the top. -
Step 5
Bake for 10-12 minutes, or until the cheese is melted, bubbly, and lightly golden brown. The rolls should be heated through. -
Step 6
Remove from oven, sprinkle with additional chopped parsley and chili flakes if desired, and let it rest for a minute before slicing and serving.
Important Information
Nutrition Facts (Per Serving)
It is important to consider this information as approximate and not to use it as definitive health advice.
Allergy Information
Please check ingredients for potential allergens and consult a health professional if in doubt.