Easy Fried Pickle Dip-Dairy-Free Appetizer
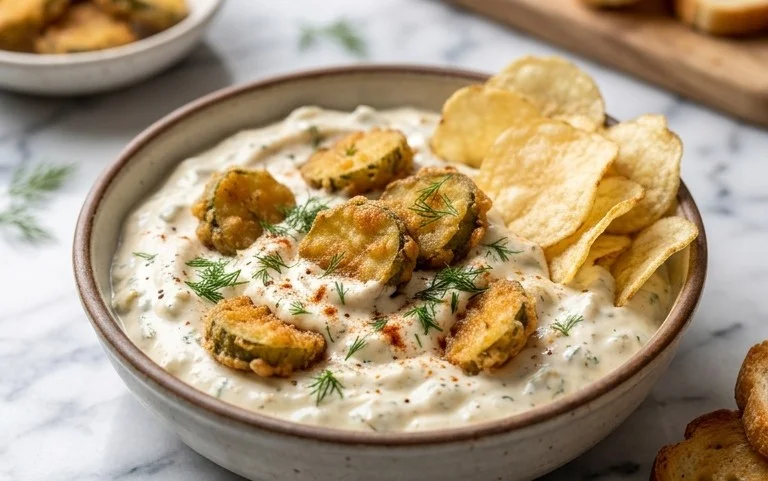
Easy Fried Pickle Dip is about to become your new appetizer obsession. We all know and love the tangy, briny crunch of a perfectly fried pickle, right? Well, imagin extracte that irresistible flavor transformed into a creamy, dippable delight! This Easy Fried Pickle Dip takes all the best elements of our favorite bar snack and turns it into a shareable sensation perfect for game nights, parties, or just a Tuesday evening craving. What truly sets this dip apart is its incredible flavor profile – that signature pickle zest is balanced with a luscious, savory base that’s utterly addictive. And the best part? I’ve included a fantastic dairy-free option, making this crowd-pleaser accessible to everyone. Get ready to impress your friends and family (and yourself!) with this delightful and surprisingly simple recipe.
Easy Fried Pickle Dip (Dairy-Free Option)
Get ready for a dip that’s going to steal the show at your next gathering! This Easy Fried Pickle Dip is a creamy, tangy, and downright addictive appetizer that perfectly captures the irresistible flavor of fried pickles, all without the frying. It’s incredibly simple to whip up, making it a go-to for busy hosts. Plus, with a simple swap, it’s easily made dairy-free, so everyone can enjoy this delightful treat. Whether you’re serving it with chips, veggies, or even as a spread for sandwiches, this dip is sure to be a hit.
Ingredients:
Cooking Instructions:
Creating this delicious dip is a breeze, and the optional crispy topping adds a fantastic textural contrast. Let’s get started!
Step 1: Prepare the Creamy Base
In a medium-sized mixing bowl, combine the sour cream and cream cheese. If you’re opting for the dairy-free version, this is where you’ll use your favorite dairy-free sour cream and cream cheese alternatives. I personally love the Kite Hill cream cheese for its smooth texture and neutral flavor, which works beautifully in this recipe. Ensure both the sour cream and cream cheese are at room temperature. This is a crucial step because it allows them to blend together smoothly, preventing any lumps and creating a luxuriously creamy dip base. You can achieve this by letting them sit out on the counter for about 30-60 minutes before you start. If you’re short on time, you can gently warm the cream cheese in the microwave in 15-second intervals until softened, but be careful not to melt it completely. Use a sturdy spoon or a hand mixer on low speed to cream these two ingredients together until they are thoroughly combined and have a uniform, smooth consistency. Take your time here; a well-mixed base will make all the difference in the final texture of your dip.
Step 2: Incorporate the Pickle Punch and Savory Flavors
Now it’s time to add the star of the show – the pickles! Finely chop your dill pickles. Aim for small, bite-sized pieces that will distribute evenly throughout the dip. Add the chopped pickles to the cream cheese and sour cream mixture. Along with the pickles, pour in the 2 tablespoons of pickle juice. This juice is essential for bringin extractg that authentic fried pickle tang and a little extra briney goodness. Next, add the Worcestershire sauce. This might seem like an unusual ingredient for a pickle dip, but trust me, it adds a wonderful depth of umami flavor that complements the tangin extractess of the pickles and the richness of the creamy base. Stir in the fresh dill, garlic powder, and onion powder. The fresh dill provides a bright, herbaceous counterpoint to the savory elements. Finally, add the ranch seasoning. If you have a favorite store-bought ranch seasoning packet, feel free to use that. I often make my own with dried herbs and spices, and it’s easy to adapt for a dairy-free version by omitting any milk powder if your recipe includes it. Stir everything together until all the ingredients are well incorporated. Taste the mixture at this point and add salt as needed. Remember that the pickles and ranch seasoning can already be salty, so start with a small pinch and adjust accordingly.
Step 3: Crafting the Irresistible Topping
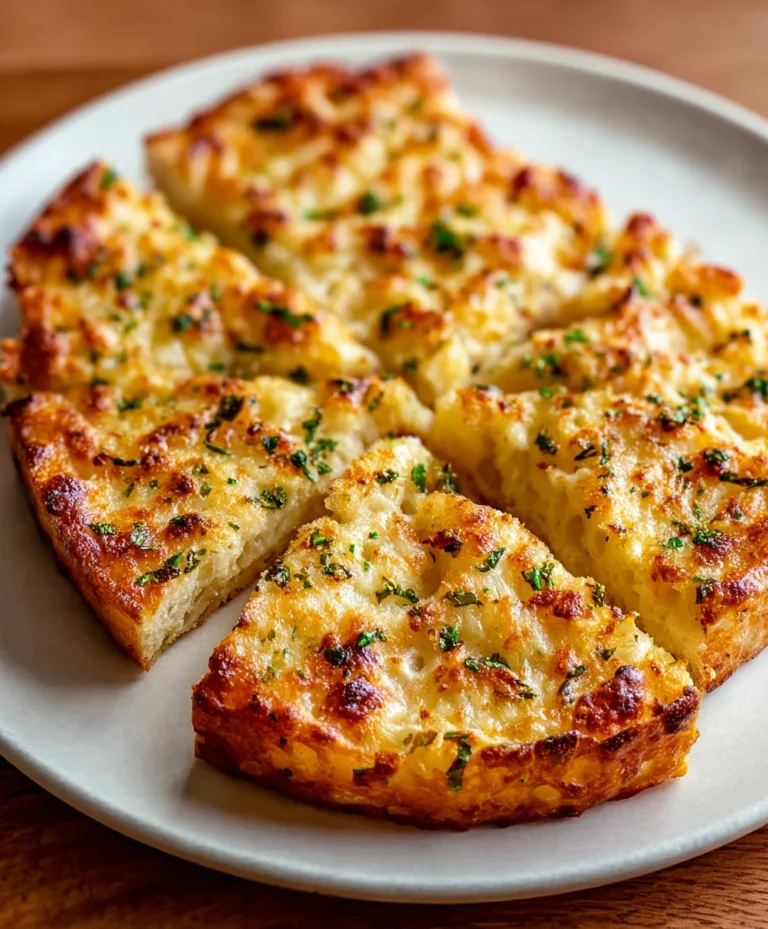
This step is what truly elevates the dip from simply “creamy” to “fried pickle-inspired deliciousness.” In a separate small skillet, melt the butter (or dairy-free butter alternative) over medium heat. Once the butter has melted and is slightly shimmering, add the 3/4 cup of Panko breadcrum extractbs. Panko breadcrum extractbs are key here because they are lighter and crispier than regular breadcrum extractbs, giving you that satisfying crunch reminiscent of a fried coating. Stir the breadcrum extractbs constantly with a wooden spoon or spatula. We want to toast them until they are a beautiful golden brown. This process should take about 3-5 minutes. Keep a close eye on them, as they can burn quickly. The goal is to achieve a toasted, nutty aroma and a visually appealing golden hue. This toasted breadcrum extractb topping is what will give your dip that delightful “fried pickle” texture without any actual frying.
Step 4: Assembling and Baking (Optional but Recommended for Full Fried Pickle Experience)**
Now it’s time to bring it all together. Pour the creamy pickle dip mixture into a shallow oven-safe baking dish or individual ramekins. Spread it out evenly. Once your toasted Panko breadcrum extractbs are perfectly golden brown, carefully spoon them over the top of the dip, creating an even layer. Press them down gently with the back of your spoon to help them adhere. If you love a really crispy topping, you can even give the dish a quick toast under the broiler for a minute or two, but watch it very closely to prevent burning. Alternatively, if you prefer a no-bake dip, you can skip the baking and broiling steps and simply top the dip with the toasted breadcrum extractbs before serving. However, a brief bake will warm the dip through and meld the flavors beautifully, enhancing the overall experience.
Step 5: Serving Your Masterpiece
Once the dip is heated through and the topping is golden and toasted, remove it from the oven. Let it sit for a few minutes before serving to allow it to set slightly. This dip is best served warm, but it’s also quite delicious at room temperature. Garnish with a little extra fresh dill if you like, for a pop of color and fresh flavor. Serve your Easy Fried Pickle Dip with an assortment of dippers. Classic choices include tortilla chips, potato chips, or sturdy crackers. For a healthier option, consider serving it with an assortment of fresh vegetables like carrot sticks, celery sticks, bell pepper strips, or cucumber slices. This dip also makes an incredibly flavorful spread for burgers, sandwiches, or even as a topping for baked potatoes. Get creative and enjoy the rave reviews!
Conclusion:
There you have it – a delightfully zesty and incredibly easy fried pickle dip that’s perfect for any gathering, or even just a cozy night in! Its creamy texture and tangy pickle punch make it an irresistible appetizer. The beauty of this recipe lies in its simplicity and its adaptability. Whether you’re a seasoned cook or just starting out, you’ll find this dip a breeze to whip up. Plus, the dairy-free option ensures everyone can enjoy this crowd-pleasing treat. Don’t be afraid to get creative with your serving suggestions – it’s fantastic with tortilla chips, vegetable sticks, or even as a spread on sandwiches. I truly encourage you to give this easy fried pickle dip a try; I’m confident it will become a new favorite!
Frequently Asked Questions:
Can I make this fried pickle dip ahead of time?
Yes, you can definitely make this fried pickle dip ahead of time! It’s best to prepare it a few hours in advance and store it covered in the refrigerator. This allows the flavors to meld together beautifully. However, for the crispiest texture, you might want to add a few fresh pickle slices or a sprinkle of crispy fried onions just before serving if you’re aiming for that initial crunch from the fried element.
What kind of pickles work best for this recipe?
Dill pickles, especially whole dill pickles or dill pickle spears, are generally the best choice for this fried pickle dip. Their sharp, briny flavor cuts through the creaminess perfectly. You can use bread and butter pickles for a sweeter variation, but the classic dill provides that iconic fried pickle taste we all know and love.
How can I make this even spicier?
To add a kick to your easy fried pickle dip, consider adding a pinch of cayenne pepper to the dip mixture, or stir in a teaspoon or two of your favorite hot sauce. You could also finely mince a jalapeño and add it along with the pickles for a fresh, spicy bite.
Easy Fried Pickle Dip (Dairy-Free Option)
A creamy and tangy fried pickle dip perfect for parties, with a simple dairy-free option. Serve warm with your favorite dippers.
Ingredients
-
16 oz container sour cream (can sub dairy free)
-
10 oz cream cheese (can sub dairy free)
-
1 cup dill pickles (chopped)
-
2 tbsp pickle juice
-
1 tbsp Worcestershire sauce
-
2-3 tbsp fresh dill
-
1/2 tsp garlic powder
-
1/4 tsp onion powder
-
2 tbsp ranch seasoning (my homemade seasoning has a df option)
-
salt to taste
-
3/4 cup Panko breadcrumbs
-
1 tbsp butter (or dairy-free butter)
Instructions
-
Step 1
Preheat oven to 375°F (190°C). -
Step 2
In a large bowl, combine sour cream, cream cheese, chopped dill pickles, pickle juice, Worcestershire sauce, fresh dill, garlic powder, onion powder, and ranch seasoning. Stir until well combined. Season with salt to taste. -
Step 3
Transfer the mixture to an oven-safe dish. -
Step 4
In a small skillet, melt butter over medium heat. Add Panko breadcrumbs and toast, stirring frequently, until golden brown and crispy. -
Step 5
Sprinkle the toasted Panko breadcrumbs evenly over the top of the dip. -
Step 6
Bake for 20 minutes, or until the dip is heated through and the breadcrumbs are golden. -
Step 7
Serve warm with crackers, tortilla chips, or vegetable sticks.
Important Information
Nutrition Facts (Per Serving)
It is important to consider this information as approximate and not to use it as definitive health advice.
Allergy Information
Please check ingredients for potential allergens and consult a health professional if in doubt.