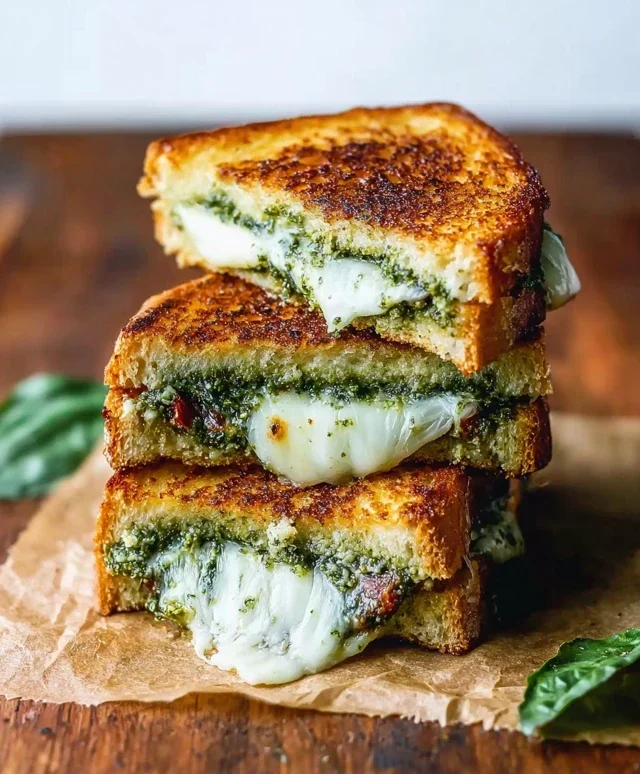
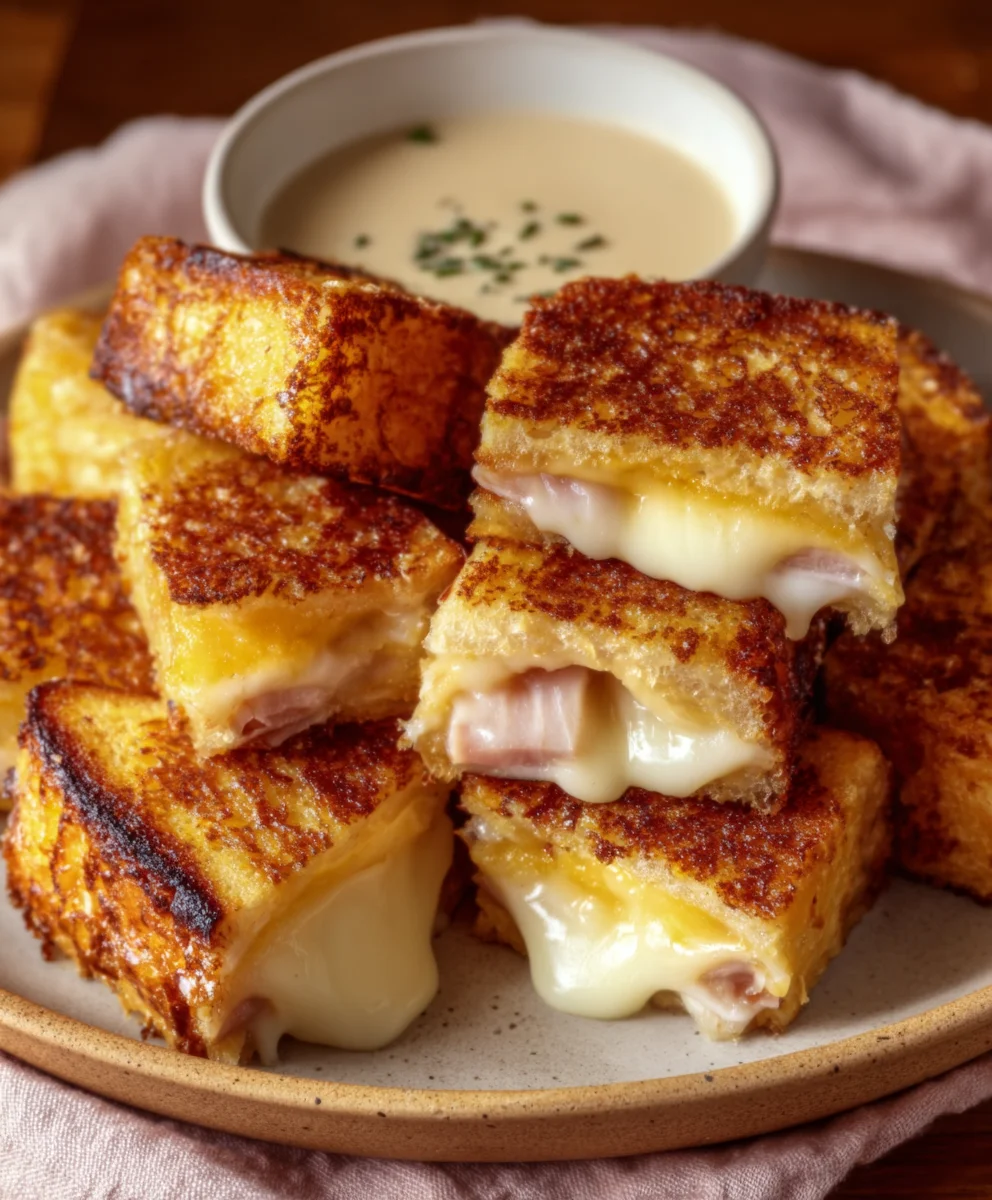
Hawaiian Roll Grilled Cheese-Sweet Bread Bliss
Hawaiian Roll Grilled Cheese brings a delightful twist to a beloved classic, transforming ordinary comfort food into something truly extraordinary. Imagin extracte sinking your teeth into that perfect combination of fluffy, slightly sweet Hawaiian rolls, embracing a molten, gooey center of your favorite cheese. It’s no wonder this simple yet ingenious creation has captured so many hearts (and taste buds!). The inherent sweetness of the rolls, combined with the savory richness of melted cheese, creates a flavor profile that is both comforting and undeniably addictive. What makes this particular version so special is the delicate balance it strikes – it’s quick and easy enough for a weeknight craving but feels special enough to impress. Get ready to experience the ultimate grilled cheese upgrade!

Ingredients:
- 4 Hawaiian rolls
- 1 cup shredded Monterey Jack cheese
- 2 tablespoons unsalted butter
- Optional: Sliced tomatoes or crispy beef beef bacon
Preparation and Assembly
This Hawaiian Roll Grilled Cheese is a delightful twist on a classic comfort food. The sweetness of the Hawaiian rolls perfectly complements the creamy, melty Monterey Jack cheese, creating a truly irresistible sandwich. We’ll walk through each step to ensure you get a perfectly golden-brown crust and gooey, cheesy center every time.
Step 1: Prepare the Rolls
Begin extract by carefully slicing each of the four Hawaiian rolls in half horizontally. You want to create a top and a bottom half for each sandwich. A serrated knife works best for this to prevent squishing the soft rolls. Once sliced, lay the bottom halves flat on your work surface, ready to be filled.
Step 2: Layer the Cheese
Now it’s time for the star of the show: the cheese! Generously sprinkle about half of the shredded Monterey Jack cheese over the bottom half of each Hawaiian roll. Aim for an even distribution to ensure every bite is cheesy. If you’re using optional ingredients like crispy beef baconbacon, this is a good time to lay a few strips over the cheese. For those who love a bit of freshness, add a thin slice or two of tomato at this stage as well. Then, top the cheese (and any optional additions) with the remaining shredded Monterey Jack cheese. This double layer of cheese will guarantee a wonderfully gooey interior.
Step 3: Close the Sandwiches and Butter
Carefully place the top halves of the Hawaiian rolls onto the cheese-filled bottom halves, gently pressing down to secure the contents. Now, it’s time to get ready for grilling. Take your unsalted butter and divide it into two portions. Spread one portion of the butter evenly over the top of two of the assembled sandwiches. Make sure to coat the entire surface of the top roll. This butter will create that beautiful golden-brown crust as the sandwiches cook.
Step 4: Grilling the First Side
Heat a non-stick skillet or griddle over medium-low heat. Once the skillet is warm, carefully place the two buttered sandwiches, butter-side down, into the pan. It’s crucial to use medium-low heat for grilled cheese. If the heat is too high, the bread will burn before the cheese has a chance to melt completely, resulting in a less-than-ideal sandwich. Let these sandwiches cook undisturbed for about 3-4 minutes, or until the bottom is golden brown and toasted. You can peek underneath by gently lifting an edge with a spatula.
Step 5: Butter and Flip for the Second Side**
While the first side of the sandwiches is toasting, take the remaining unsalted butter and spread it evenly over the top of the two sandwiches that are currently in the pan. This ensures that when you flip them, the second side will also achieve that desirable golden hue. Once the first side is perfectly browned, carefully flip each sandwich using a spatula. Press down lightly with the spatula to help the cheese spread and melt evenly. Continue to cook for another 3-4 minutes, or until the second side is also golden brown and the cheese inside is fully melted and gooey. You might see a little cheese oozing out the sides, which is a good sign!
Step 6: Final Touches and Serving
Once both sides of your Hawaiian Roll Grilled Cheese sandwiches are beautifully golden brown and the cheese is wonderfully melted, remove them from the skillet. Allow them to rest for just a minute or two before slicing. This brief resting period helps the cheese set slightly, preventing it from all oozing out when you cut into it. You can slice them in half diagonally for a classic presentation. Serve immediately while they are hot and the cheese is at its melty best. These are fantastic on their own or paired with a side of tomato soup or a simple salad.
Conclusion:
There you have it – the ultimate guide to creating the most delicious and crowd-pleasing Hawaiian Roll Grilled Cheese! We’ve explored how the sweet, slightly buttery Hawaiian rolls provide the perfect canvas for that gooey, melted cheese, creating a delightful contrast in both flavor and texture. This recipe is incredibly versatile and can be enjoyed as a quick and satisfying lunch, a fun appetizer for gatherings, or even a comforting snack any time of day. Don’t be afraid to experiment with different cheese combinations and additions to make your Hawaiian Roll Grilled Cheese truly your own!
For serving suggestions, these grilled cheeses are fantastic on their own, but they also pair wonderfully with a side of tomato soup for a classic comfort food pairing. Consider serving them alongside a fresh green salad for a balanced meal, or cut them into smaller triangles as a fun finger food for parties. The possibilities are truly endless!
Frequently Asked Questions:
Can I use different types of cheese for my Hawaiian Roll Grilled Cheese?
Absolutely! While cheddar and Monterey Jack are popular choices, feel free to get creative. Gruyere offers a nutty depth, provolone adds a mild creaminess, and a sharp Colby Jack provides a delightful tang. You can even mix and match your favorite cheeses for a custom flavor profile.
What are some good variations for the Hawaiian Roll Grilled Cheese?
The beauty of this recipe is its adaptability! Try adding thinly sliced beef ham or turkey for a savory twist, a smear of fig jam for a sweet and salty kick, or even some caramelized onions for an extra layer of flavor. A sprinkle of garlic powder or a brush of melted butter infused with herbs before grilling can also elevate your Hawaiian Roll Grilled Cheese.
We hope you enjoy making and devouring these delightful sandwiches. Happy cooking!
Hawaiian Roll Grilled Cheese-Sweet Bread Bliss
A delightful twist on classic comfort food, this grilled cheese features the sweetness of Hawaiian rolls perfectly complementing creamy, melty Monterey Jack cheese for an irresistible sandwich with a golden-brown crust and gooey, cheesy center.
Ingredients
-
4 Hawaiian rolls
-
1 cup shredded Monterey Jack cheese
-
2 tablespoons unsalted butter
-
Optional: Sliced tomatoes
-
Optional: Crispy beef bacon
Instructions
-
Step 1
Slice each of the four Hawaiian rolls in half horizontally using a serrated knife. Lay the bottom halves flat on your work surface. -
Step 2
Generously sprinkle half of the shredded Monterey Jack cheese over the bottom half of each roll. Add optional sliced tomatoes or crispy beef bacon if desired. Top with the remaining shredded Monterey Jack cheese. -
Step 3
Place the top halves of the Hawaiian rolls onto the cheese-filled bottom halves and gently press down. Spread half of the unsalted butter evenly over the top of two of the assembled sandwiches. -
Step 4
Heat a non-stick skillet or griddle over medium-low heat. Place the two buttered sandwiches, butter-side down, into the pan. Cook for 3-4 minutes, or until the bottom is golden brown. -
Step 5
While the first side is toasting, spread the remaining unsalted butter evenly over the top of the two sandwiches. Carefully flip each sandwich and press down lightly. Continue to cook for another 3-4 minutes, or until the second side is golden brown and the cheese is fully melted and gooey. -
Step 6
Remove from skillet, let rest for a minute or two, then slice diagonally and serve immediately.
Important Information
Nutrition Facts (Per Serving)
It is important to consider this information as approximate and not to use it as definitive health advice.
Allergy Information
Please check ingredients for potential allergens and consult a health professional if in doubt.