Mini Cookie Butter Cheesecake Cups-Decadent Treat
Mini Cookie Butter Cheesecake Cups are about to become your new obsession, and I couldn’t be more thrilled to share this recipe with you! These delightful little treats perfectly capture the irresistible creamy, dreamy essence of cheesecake and the addictive, spiced sweetness of cookie butter, all in one bite-sized package. Forget the fuss of a full-sized cheesecake; these mini cups are designed for ultimate convenience and instant gratification. We all know how much we crave that smooth, rich cheesecake texture, and when you combine it with the unique, caramelized magic of cookie butter, you’ve got a dessert that’s simply out of this world. What truly makes these Mini Cookie Butter Cheesecake Cups special is their perfect portion control – ideal for satisfying a sweet tooth without overindulgence, or for serving up as an impressive yet easy dessert at any gathering. Get ready for pure joy in every spoonful!

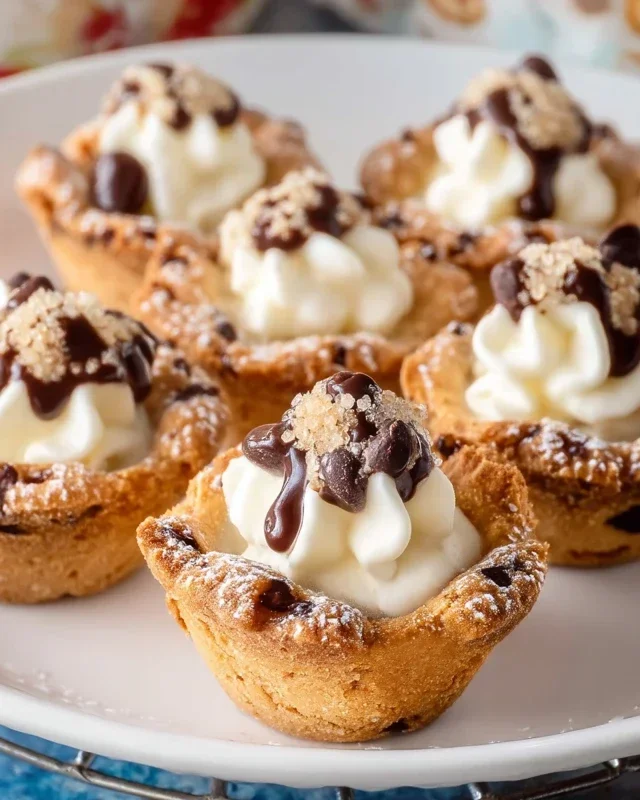
Mini Cookie Butter Cheesecake Cups
Get ready to fall in love with these utterly irresistible Mini Cookie Butter Cheesecake Cups! If you’re a fan of creamy, dreamy cheesecake and the unique, spiced sweetness of cookie butter (hello, Biscoff!), then this recipe is your new best friend. These individual desserts are perfect for parties, holiday gatherings, or simply when you’re craving a special treat. They look elegant, taste divine, and are surprisingly easy to whip up. The magic lies in the smooth, rich cheesecake filling swirled with decadent cookie butter, all nestled on a buttery, crunchy cookie crust. Let’s get baking!
Ingredients:
Cookie Butter Cheesecake Bliss: Step-by-Step Instructions
This recipe is broken down into a few key stages to make it super manageable. We’ll start with creating that perfect crust, then move on to crafting the luscious cheesecake filling, and finally, assembling these delightful cups.
1. Crafting the Perfect Cookie Crust
First things first, we need to create the foundation for our mini cheesecakes. In a medium bowl, combine the 1 ½ cups of Biscoff cookie crum extractbs with the ¼ cup of melted butter. Stir them together until the crum extractbs are thoroughly moistened and resemble wet sand. This is crucial for ensuring your crust holds together nicely. You can use a fork or your fingers to really work the butter into the crum extractbs. Once combined, divide this mixture evenly among your mini muffin tin cups. I find using a small spoon or the bottom of a shot glass helps to press the crum extractbs firmly into the bottom and slightly up the sides of each cup. This creates a nice sturdy base that won’t crum extractble when you dig into the cheesecake.
2. Whipping Up the Creamy Cheesecake Filling
Now for the star of the show – the cheesecake filling! In a large bowl, beat the softened 8 oz of cream cheese until it’s completely smooth and free of lumps. This might take a minute or two with an electric mixer on medium speed. It’s important that the cream cheese is at room temperature for this step; cold cream cheese will lead to a lumpy filling, and nobody wants that! Next, add the ½ cup of cookie butter and ¼ cup of powdered sugar to the cream cheese. Beat again until everything is beautifully combined and the mixture is light and fluffy. Scrape down the sides of the bowl often to ensure all ingredients are incorporated.
3. Infusing with Flavor and Lightness
To enhance the flavor and give our cheesecake that signature light texture, we’ll add the remaining wet ingredients. Stir in the 1 tsp of vanilla extract. This little addition makes a big difference in the overall taste profile. Then, in a separate, clean bowl, whip the ½ cup of heavy whipping cream until stiff peaks form. Be careful not to over-whip, or you’ll end up with butter! Gently fold the whipped cream into the cream cheese and cookie butter mixture. Folding rather than beating helps to keep the filling airy and prevents it from becoming too dense. You should have a wonderfully smooth, luscious, and slightly airy filling at this point.
4. Assembling and Swirling the Magic
It’s time to bring it all together! Spoon the creamy cheesecake filling over the cookie crusts in your mini muffin tin. I like to fill them almost to the top, leaving just a little room for toppings. Now for the fun part – the caramel swirl! Drizzle about ½ teaspoon of caramel sauce over the top of each cheesecake cup. Don’t go overboard, as too much caramel can make them overly sweet. Now, using a toothpick or the tip of a skewer, gently swirl the caramel into the cheesecake filling. Make a few figure-eights or random swirls to create a beautiful marbled effect. This is where you can get creative and make each cup look unique.
5. Chilling and Garnishing for Perfection
Once your mini cheesecakes are assembled and swirled, it’s time for them to chill and set. Carefully place the mini muffin tin in the refrigerator and let them chill for at least 2-3 hours, or preferably until they are firm. This chilling time is essential for the cheesecakes to set properly. Once they are firm, gently remove them from the muffin tin. If you lined your tin with mini cupcake liners, you can just pop them out. If not, you might need to run a thin knife around the edges to loosen them. Before serving, we’ll add the finishing touches. Sprinkle a little extra Biscoff cookie crum extractbs around the edges or on top, add a dollop of whipped cream, and crown each mini cheesecake with a whole Biscoff cookie. These toppings not only make them look beautiful but also add extra texture and flavor. Enjoy these delightful mini cookie butter cheesecake cups! They are best served chilled.

Conclusion:
I hope you’ve enjoyed learning how to make these absolutely delightful Mini Cookie Butter Cheesecake Cups! This recipe is a winner because it combines the rich, creamy indulgence of cheesecake with the irresistible, nutty sweetness of cookie butter, all in perfectly portioned, bite-sized treats. They’re surprisingly easy to make, making them ideal for begin extractners and seasoned bakers alike. Plus, the individual servings are fantastic for parties, potlucks, or just a special weeknight dessert that feels incredibly gourmet without all the fuss of a full-sized cheesecake.
These little cups are incredibly versatile. Serve them chilled, straight from the refrigerator, for a refreshing dessert. They also make a wonderful addition to a dessert platter alongside other mini treats. For variations, consider adding a swirl of additional cookie butter to the batter before baking, or topping them with a dollop of whipped cream and a sprinkle of crushed speculoos cookies. You could even experiment with different cookie butter flavors if you can find them!
I truly encourage you to give these Mini Cookie Butter Cheesecake Cups a try. I’m confident you’ll fall in love with their flavor and simplicity. Let me know how yours turn out!
Frequently Asked Questions:
Can I make these ahead of time?
Absolutely! These Mini Cookie Butter Cheesecake Cups are perfect for making ahead. You can store them in an airtight container in the refrigerator for up to 3-4 days. This makes them a fantastic option for entertaining as you can prepare them well in advance.
What is cookie butter?
Cookie butter, often known by brand names like Biscoff, is a spread made from pulverized speculoos cookies. It has a wonderfully sweet, spicy, and slightly nutty flavor profile that pairs beautifully with cheesecake.
Can I freeze these cheesecake cups?
Yes, you can freeze them. Once baked and completely cooled, you can freeze them individually on a baking sheet until firm, then transfer them to an airtight container or freezer bag. Thaw them in the refrigerator overnight before serving.
Mini Cookie Butter Cheesecake Cups
Decadent mini cheesecakes with a Biscoff cookie crust and cookie butter filling, perfect for any occasion.
Ingredients
-
1 ½ cups Biscoff cookie crumbs
-
¼ cup melted butter
-
8 oz cream cheese, softened
-
½ cup cookie butter
-
¼ cup powdered sugar
-
½ cup heavy whipping cream
-
1 tsp vanilla extract
-
½ cup caramel sauce
-
Extra Biscoff crumbs
-
Whipped cream
-
Whole Biscoff cookies for garnish
Instructions
-
Step 1
In a medium bowl, combine Biscoff cookie crumbs and melted butter. Press evenly into the bottoms of 12 mini muffin cups or a mini muffin tin lined with paper liners. -
Step 2
In a separate bowl, beat softened cream cheese until smooth. Add cookie butter and powdered sugar, and beat until well combined and fluffy. -
Step 3
In another bowl, whip heavy cream and vanilla extract until stiff peaks form. -
Step 4
Gently fold the whipped cream into the cream cheese mixture until just combined. -
Step 5
Spoon the cheesecake filling evenly over the cookie crust in each mini muffin cup. -
Step 6
Drizzle with caramel sauce and sprinkle with extra Biscoff crumbs. -
Step 7
Chill for at least 30 minutes, or until set. Garnish with whipped cream and a whole Biscoff cookie before serving.
Important Information
Nutrition Facts (Per Serving)
It is important to consider this information as approximate and not to use it as definitive health advice.
Allergy Information
Please check ingredients for potential allergens and consult a health professional if in doubt.