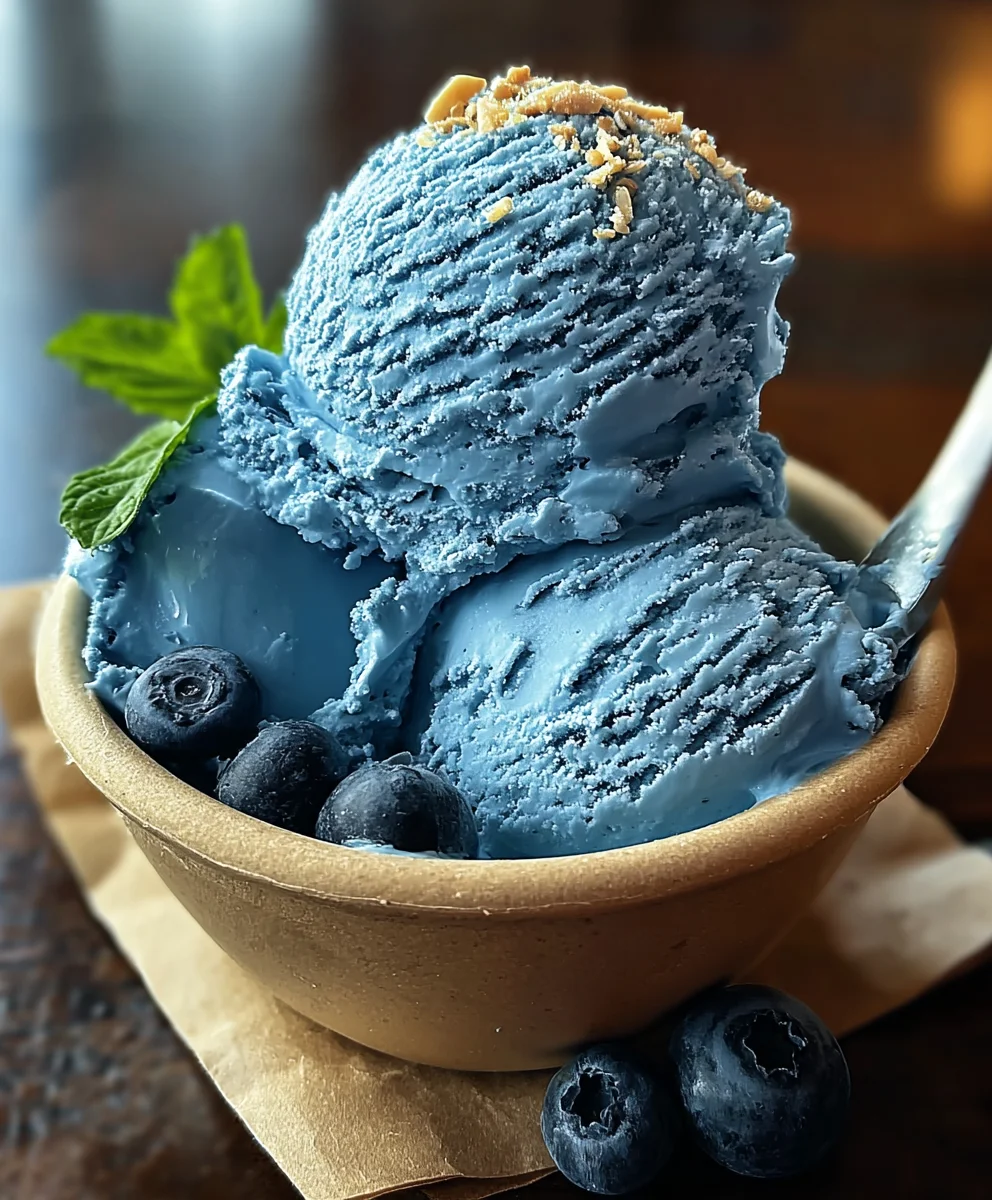
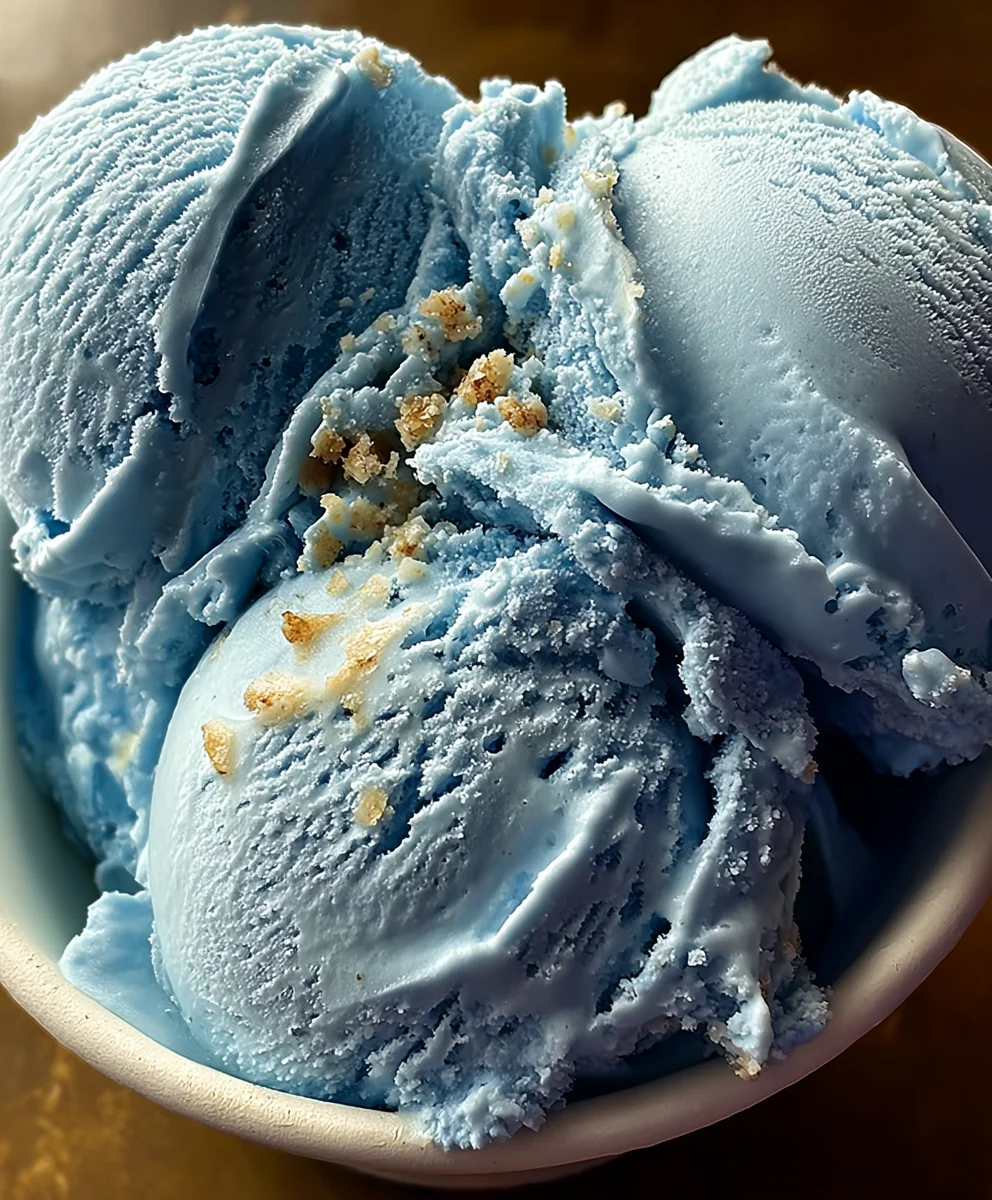
Blue Moon Ice Cream- Delicious Non-Non-Non-Alcoholic Alternativeic Treat
Blue Moon Ice Cream isn’t just a flavor; it’s an experience, a nostalgic trip back to childhood summers and carefree days. If you’ve ever found yourself captivated by its vibrant, almost otherworldly hue and its uniquely sweet, slightly almond-like taste, you’re not alone. This iconic ice cream flavor holds a special place in the hearts of many, evoking a sense of wonder and delight with every spoonful. What truly sets Blue Moon Ice Cream apart is its enigmatic flavor profile – a delightful mystery that keeps us coming back for more. Is it marshmallow? Is it almond? Perhaps a hint of citrus? The beauty lies in its delicious ambiguity. Today, we’re diving deep into the magic of creating your very own homemade Blue Moon Ice Cream, capturing that perfect balance of creamy texture and that signature, unforgettable flavor that makes this treat so beloved.
Ingredients:
- 2 cups heavy cream
- 1 cup whole milk
- 3/4 cup granulated sugar
- 1 teaspoon vanilla extract
- 1 teaspoon almond extract
- Blue food coloring, as needed
- 1/4 cup maraschino cherries, chopped (optional)
Making Blue Moon Ice Cream
Phase 1: Preparing the Base
Let’s get started on creating our vibrant Blue Moon Ice Cream! The first crucial step is to prepare the foundation of our ice cream. In a medium saucepan, we’ll combine our liquid ingredients and sugar. Pour in the 1 cup of whole milk and then add the 2 cups of heavy cream. The combination of milk and cream is essential for achieving that wonderfully smooth and rich texture we all love in homemade ice cream. Now, it’s time to introduce the sweetness. Add the 3/4 cup of granulated sugar to the saucepan. It’s important to use granulated sugar here as it dissolves easily and provides the right level of sweetness without affecting the texture.
Next, we’ll gently heat this mixture over medium-low heat. We don’t want to boil it; our goal is simply to dissolve the sugar completely. Stir the mixture constantly with a whisk or a wooden spoon to ensure the sugar is fully incorporated and doesn’t settle at the bottom of the pan. You’ll notice the liquid becoming slightly warmer, and as you stir, you’ll see the sugar crystals disappear. This gentle heating process also helps to slightly temper the dairy, which can contribute to a smoother final product, although it’s not strictly necessary for a no-churn recipe like this one. Once the sugar is completely dissolved and the mixture is warm to the touch (but not hot), remove the saucepan from the heat. This is our base liquid for the ice cream.
Phase 2: Infusing the Flavors
Now that we have our warmed dairy and sugar base, it’s time to infuse it with those signature Blue Moon flavors. Remove the saucepan from the heat and let it cool slightly for a few minutes. This is a good time to add our extracts. Stir in the 1 teaspoon of vanilla extract and the 1 teaspoon of almond extract. Vanilla extract is a classic ice cream flavor that provides a comforting sweetness and depth. The almond extract, however, is what gives Blue Moon ice cream its distinctive and slightly mysterious taste. It adds a nutty, marznon-alcoholic ipan-like note that is truly unique. Make sure to stir well after adding the extracts to distribute the flavors evenly throughout the base.
This is also the stage where we introduce the vibrant color that makes this ice cream so visually appealing. Add the blue food coloring, a few drops at a time, to the mixture. Stir thoroughly after each addition to gauge the color intensity. Continue adding food coloring until you achieve your desired shade of blue. Remember, it’s easier to add more color than to take it away, so start conservatively. You might find that the color deepens slightly as the ice cream chills. For a pastel Blue Moon, just a few drops will do. For a more intense, vibrant blue, you may need a bit more. Once you’re happy with the color, give it a final good stir to ensure it’s perfectly uniform.
Phase 3: Chilling and Freezing
For the best texture, it’s crucial to chill the ice cream base thoroughly before churning or freezing. Transfer the blue-colored base mixture into a clean bowl or a pitcher. Cover it tightly with plastic wrap, pressing the wrap directly onto the surface of the liquid to prevent a skin from forming. Place the covered base in the refrigerator and allow it to chill for at least 4 hours, or preferably overnight. The colder the base is before freezing, the smoother your ice cream will be. This extended chilling time allows the flavors to meld and develop, and it ensures that the mixture is cold enough to freeze properly.
Once your base is thoroughly chilled, it’s time to freeze it. If you have an ice cream maker, follow the manufacturer’s instructions for churning. Typically, you’ll pour the chilled base into your pre-frozen ice cream maker bowl and churn until it reaches a soft-serve consistency. If you don’t have an ice cream maker, we can use a no-churn method. Pour the chilled blue mixture into a freezer-safe container. Cover the container and place it in the freezer. Every 30-45 minutes for the first 3-4 hours, remove the container from the freezer and stir the mixture vigorously with a fork or whisk. This process breaks up ice crystals as they form, preventing the ice cream from becoming icy and hard. Continue this stirring process until the ice cream has reached a firm, scoopable consistency.
Phase 4: Adding the Finishing Touches
This is where we can add a delightful texture and visual contrast to our Blue Moon Ice Cream. If you’re using the optional maraschino cherries, now is the time to incorporate them. Gently fold in the 1/4 cup of chopped maraschino cherries into your ice cream base during the last few minutes of churning in an ice cream maker, or into the semi-frozen mixture during one of your stirring sessions in the no-churn method. Be careful not to overmix, as you want distinct pieces of cherry throughout your ice cream, rather than having them break down too much. The bright red of the cherries against the vibrant blue ice cream creates a really attractive appearance.
After incorporating the cherries (if using), transfer the ice cream to a freezer-safe container. Press a piece of parchment paper or plastic wrap directly onto the surface of the ice cream to help prevent ice crystals from forming. Cover the container tightly with a lid or foil. Place the Blue Moon Ice Cream back into the freezer and allow it to freeze completely for at least another 2-4 hours, or until it’s firm enough to scoop. Once it’s fully frozen, your delicious homemade Blue Moon Ice Cream will be ready to enjoy!
Conclusion:
You’ve now got the keys to crafting your very own delightful batch of Blue Moon Ice Cream! We’ve walked through each step, from selecting the perfect ingredients to achieving that wonderfully creamy texture and signature vibrant hue. This Blue Moon Ice Cream is more than just a dessert; it’s a nostalgic trip back to childhood amusement parks and county fairs, offering a unique and intriguing flavor profile that’s sure to spark conversation. It’s surprisingly simple to make at home, allowing you to control the sweetness and richness.
For serving, this Blue Moon Ice Cream is fantastic on its own, but it also pairs beautifully with a sprinkle of toasted almonds, a drizzle of cherry syrup, or even a dollop of whipped cream. Consider serving it in waffle cones for an extra special treat. Don’t be afraid to experiment with variations! You could add a swirl of raspberry coulis for a tart counterpoint, or even fold in some crushed shortbread cookies for added texture. The possibilities are endless, and the joy of creating this unique ice cream is truly rewarding. So, go ahead, gather your ingredients, and whip up a batch of this unforgettable Blue Moon Ice Cream. You won’t regret it!
Frequently Asked Questions:
Q1: What makes Blue Moon Ice Cream have its distinct blue color?
The signature blue color of Blue Moon Ice Cream traditionally comes from food coloring. While the exact origin extractal recipe is a bit of a mystery, many recipes use blue food coloring. Some recipes might also incorporate ingredients like blue spirulina for a more natural, albeit sometimes less vibrant, blue shade.
Q2: What does Blue Moon Ice Cream taste like?
The flavor of Blue Moon Ice Cream is quite unique and often described as a blend of almond, vanilla, and hints of citrus or marshmallow. It’s a sweet, slightly fruity, and vaguely floral taste that is hard to pinpoint precisely, which is part of its charm and intrigue. It’s not like any other common ice cream flavor!
Q3: Can I make Blue Moon Ice Cream without an ice cream maker?
Yes, you absolutely can! The “no-churn” method is a fantastic alternative. You’ll typically mix your base ingredients (often involving sweetened condensed milk and heavy cream), then add your flavorings and food coloring. The mixture is then placed in a freezer-safe container and stirred vigorously every 30-60 minutes for the first few hours to break up ice crystals and create a smoother texture.
Blue Moon Ice Cream
A delicious non-alcoholic treat with a vibrant blue hue and a unique almond flavor.
Ingredients
-
2 cups heavy cream
-
1 cup whole milk
-
3/4 cup granulated sugar
-
1 teaspoon vanilla extract
-
1 teaspoon almond extract
-
Blue food coloring, as needed
-
1/4 cup maraschino cherries, chopped (optional)
Instructions
-
Step 1
In a medium saucepan, combine 1 cup whole milk, 2 cups heavy cream, and 3/4 cup granulated sugar. Heat over medium-low heat, stirring constantly, until the sugar is completely dissolved and the mixture is warm. -
Step 2
Remove from heat and let cool slightly. Stir in 1 teaspoon vanilla extract and 1 teaspoon almond extract. Add blue food coloring a few drops at a time until desired color is achieved, stirring well after each addition. -
Step 3
Transfer the mixture to a clean bowl or pitcher. Cover tightly with plastic wrap, pressing it onto the surface. Chill in the refrigerator for at least 4 hours, or preferably overnight. -
Step 4
If using an ice cream maker, churn according to manufacturer’s instructions until soft-serve consistency. For no-churn, pour the chilled mixture into a freezer-safe container. Freeze, stirring vigorously every 30-45 minutes for the first 3-4 hours, until firm. -
Step 5
During the last few minutes of churning or stirring, gently fold in 1/4 cup chopped maraschino cherries (if using). -
Step 6
Transfer the ice cream to a freezer-safe container. Press parchment paper or plastic wrap directly onto the surface, then cover tightly. Freeze for at least another 2-4 hours until firm.
Important Information
Nutrition Facts (Per Serving)
It is important to consider this information as approximate and not to use it as definitive health advice.
Allergy Information
Please check ingredients for potential allergens and consult a health professional if in doubt.