Classic Pasta Salad Recipe- Easy & Delicious
Classic pasta salad isn’t just a side dish; it’s a summer legend. Think about it: that vibrant medley of perfectly cooked pasta, crisp vegetables, and a tangy dressing that just sings of sunshine. It’s the undisputed cbeef hampion of picnics, barbecues, and potlucks, and for good reason! This classic pasta salad is incredibly versatile, a blank canvas that welcomes your favorite additions, from creamy mozzarella to briny olives. What truly sets this dish apart is its comforting familiarity, yet it always feels fresh and exciting with every bite. It’s the perfect make-ahead meal that tastes even better as the flavors meld. I adore how easily it comes together, making it a go-to for busy days when I still want something delicious and satisfying.
Why You’ll Love This Recipe:
It’s a Crowd-Pleaser
Super Customizable
Perfect for Meal Prep

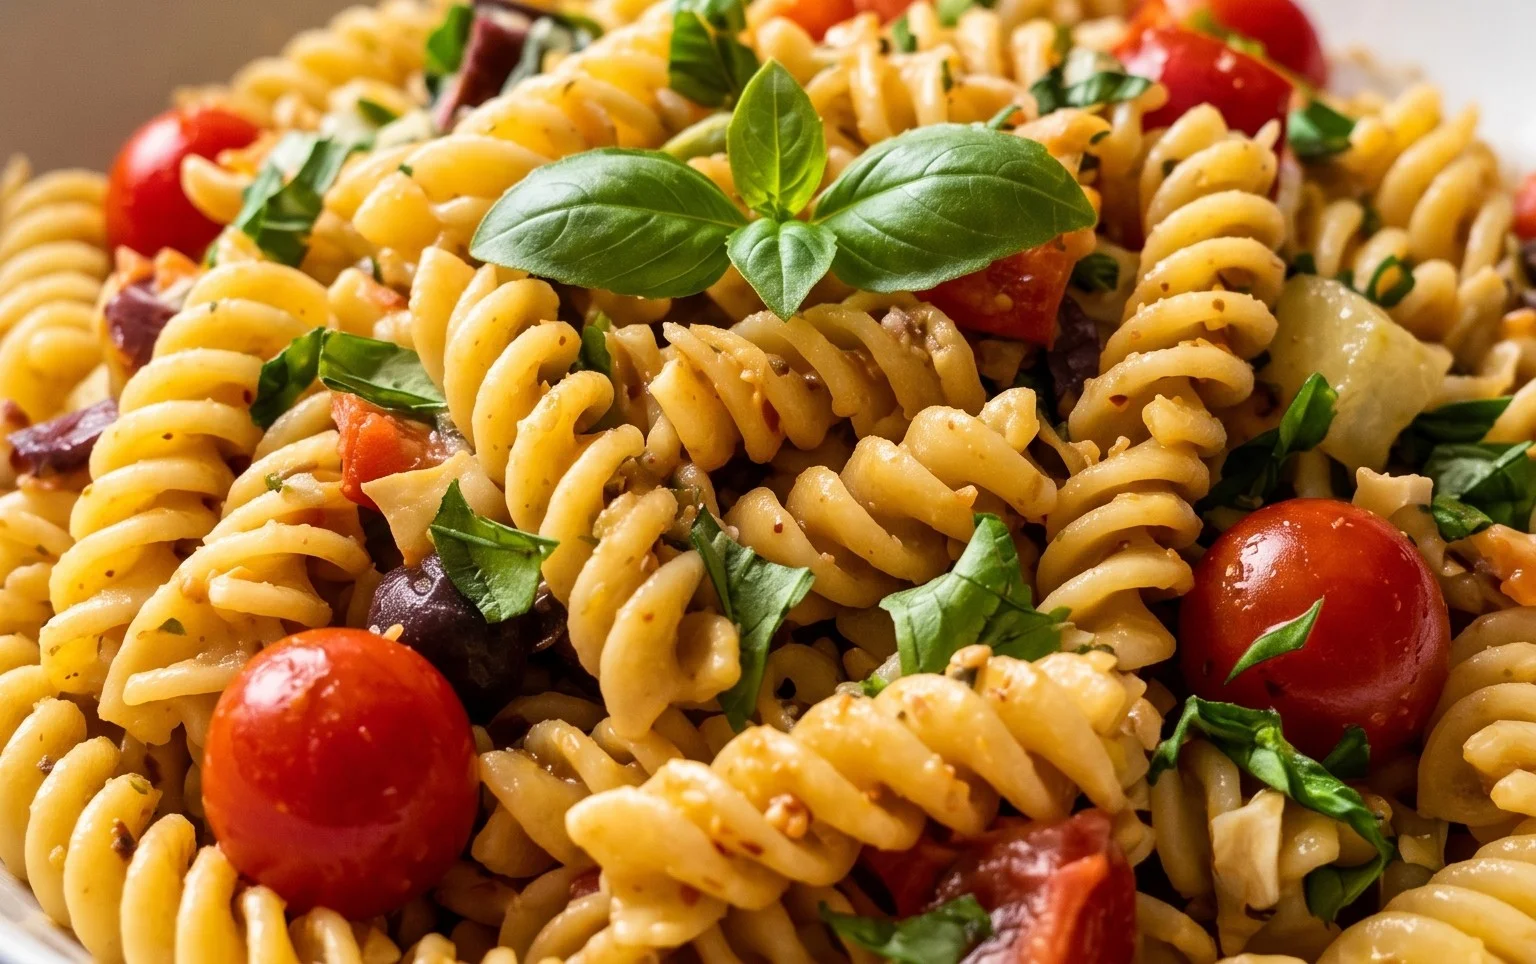
Classic Pasta Salad
This classic pasta salad is a crowd-pleaser for a reason. It’s incredibly versatile, perfect for picnics, potlucks, or just a simple, satisfying weeknight meal. The beauty of this recipe lies in its balance of textures and flavors – the chewy pasta, the crisp vegetables, the savory beef pepperoni, and the creamy mozzarella, all brought together by a zesty, homemade dressing. It’s the kind of dish that gets better as it sits, allowing the flavors to meld beautifully. I love making a big batch on a weekend and having delicious leftovers for lunch throughout the week. Let’s get started on creating this flavorful masterpiece!
Ingredients:
Preparing the Pasta
The foundation of any great pasta salad is perfectly cooked pasta. For this recipe, we’re using tri-color rotini, which adds a fun visual element.
1. Start by bringin extractg a very large pot of generously salted water to a rolling boil. The salt is crucial for seasoning the pasta from the inside out, so don’t be shy with it! You’ll want enough water so that the pasta has plenty of room to move and doesn’t clump together. Once boiling, carefully add the 24 ounces of uncooked tri-color rotini. Stir the pasta occasionally as it cooks to prevent sticking. Cook the pasta according to the package directions until it is al dente. This means it should be tender but still have a slight bite to it. Overcooked pasta can become mushy in a salad, so it’s better to err on the side of slightly undercooked than overcooked. Once the pasta reaches the desired texture, drain it thoroughly in a colander. Immediately rinse the drained pasta with cold water. This step is important to stop the cooking process and to cool the pasta down quickly, which also helps prevent it from sticking together. Set the cooled pasta aside.
Assembling the Salad Components
While the pasta is cooling, you can prepare the rest of your delicious ingredients. This is where the vibrant colors and textures of the salad really come to life.
2. In a large mixing bowl, combine the halved cherry tomatoes, diced red onion, and diced green bell pepper. If you find raw red onion a bit too sharp, you can soak the diced onion in cold water for about 10 minutes before draining and adding it to the bowl. This helps to mellow out its pungent flavor. Next, add the sliced olives and the cubed mozzarella cheese to the bowl. The combination of these fresh vegetables and creamy cheese creates a wonderful base for the salad. Make sure your vegetables are diced into bite-sized pieces that will be easy to eat with the pasta and beef pepperoni.
Crafting the Zesty Dressing
A good dressing is the key to tying all the flavors of a pasta salad together. This homemade dressing is simple yet packed with flavor.
3. In a separate medium bowl or a large jar with a tight-fitting lid, prepare the dressing. Whisk together the 1 1/2 cups of olive oil and the 1/2 cup of red grape juice vinegar. The red grape juice vinegar adds a pleasant tangin extractess without being overpowering. Next, incorporate the dried seasonings: 2 tablespoons of Italian seasoning, 2 teaspoons of garlic powder, 1 1/2 teaspoons of salt, 1 teaspoon of pepper, and 1/2 teaspoon of red pepper flakes. If you like a little heat, you can always add more red pepper flakes to your preference. Whisk everything together until it is well combined. If you’re using a jar, you can simply put all the ingredients in and shake vigorously until emulsified. Taste the dressing and adjust the salt, pepper, or red pepper flakes as needed. Remember that the flavors will meld further as the salad sits.
Bringin extractg It All Together
Now for the exciting part – combining all the elements to create our masterpiece pasta salad!
4. Add the drained and cooled tri-color rotini pasta to the large mixing bowl containing the tomatoes, onion, bell pepper, olives, and mozzarella cheese. Then, add the 12 ounces of sliced beef beef pepperoni. The beef pepperoni adds a savory, slightly spicy kick that complements the other ingredients wonderfully. Sprinkle the 1 cup of grated parmesan cheese over the top of all the ingredients in the bowl. The parmesan cheese adds another layer of salty, nutty flavor that is essential to this classic salad.
Marinating for Flavor
This step is crucial for allowing all the wonderful flavors to meld and deepen.
5. Pour the prepared dressing evenly over the pasta, vegetables, cheese, and beef pepperoni. Gently toss all the ingredients together until everything is thoroughly coated with the dressing. Ensure that the dressing reaches all the nooks and crannies of the rotini pasta. Once everything is mixed, cover the bowl tightly with plastic wrap or transfer the salad to an airtight container. Refrigerate the pasta salad for at least 2 hours, or preferably overnight. This chilling time is essential for the flavors to develop and for the pasta to absorb the dressing, resulting in a more cohesive and delicious salad. The longer it sits, the better it tastes! When you’re ready to serve, give it another gentle toss. This classic pasta salad is now ready to be enjoyed!
Conclusion:
And there you have it! This classic pasta salad recipe is a true winner for so many reasons. It’s incredibly versatile, allowing you to adapt it to your personal tastes and whatever ingredients you have on hand. The simple yet flavorful dressing ties everything together beautifully, making it a crowd-pleaser for potlucks, picnics, barbecues, or even just a delightful weeknight meal. I truly encourage you to give this recipe a try; it’s remarkably easy to prepare and the results are always satisfyingly delicious. Don’t be afraid to experiment and make it your own!
This classic pasta salad shines when served alongside grilled meats, fried chicken, or as a hearty vegetarian main. It’s also a perfect accompaniment to any summer gathering. For variations, consider adding chopped bell peppers for crunch, olives for a briny kick, or different types of cheese like feta or mozzarella. You can also swap out the pasta shape or introduce fresh herbs like basil or parsley for an extra burst of flavor. The possibilities are truly endless!
Frequently Asked Questions:
Can I make this classic pasta salad ahead of time?
Absolutely! In fact, this pasta salad often tastes even better the next day as the flavors have more time to meld. I recommend storing it in an airtight container in the refrigerator for up to 3-4 days.
What kind of pasta is best for pasta salad?
While this recipe works wonderfully with rotini, elbow macaroni, or penne, almost any short pasta shape will work well. The key is to choose a pasta that will hold onto the dressing without becoming mushy.
How can I make this recipe vegan?
To make this classic pasta salad vegan, simply omit the cheese and use a vegan mayonnaise or a vinaigrette-based dressing. You can also add extra vegetables or plant-based protein sources like chickpeas or black beans.
Classic Pasta Salad
A refreshing and hearty classic pasta salad, perfect for potlucks and gatherings.
Ingredients
-
24 ounces tri-color rotini pasta (uncooked)
-
1 pint cherry tomatoes (halved)
-
12 ounces sliced beef pepperoni
-
1 red onion (diced)
-
1 green bell pepper (diced)
-
16 ounces mozzarella cheese (cubed)
-
1 cup grated parmesan cheese
-
8 ounces olives (sliced)
-
1 1/2 cups olive oil
-
1/2 cup red grape juice vinegar
-
2 tablespoons Italian seasoning
-
2 teaspoons garlic powder
-
1 1/2 teaspoons salt
-
1 teaspoon pepper
-
1/2 teaspoon red pepper flakes
Instructions
-
Step 1
Cook rotini pasta according to package directions. Drain and rinse with cold water. -
Step 2
In a large bowl, combine the cooked pasta, cherry tomatoes, sliced beef pepperoni, diced red onion, and diced green bell pepper. -
Step 3
Add the cubed mozzarella cheese, grated parmesan cheese, and sliced olives to the bowl. -
Step 4
In a separate small bowl, whisk together the olive oil, red grape juice vinegar, Italian seasoning, garlic powder, salt, pepper, and red pepper flakes to create the dressing. -
Step 5
Pour the dressing over the pasta and vegetable mixture. Toss gently to combine all ingredients. -
Step 6
Cover and refrigerate for at least 30 minutes before serving to allow the flavors to meld.
Important Information
Nutrition Facts (Per Serving)
It is important to consider this information as approximate and not to use it as definitive health advice.
Allergy Information
Please check ingredients for potential allergens and consult a health professional if in doubt.