Easy Cookie Ice Cream Sandwiches Chipwich Style
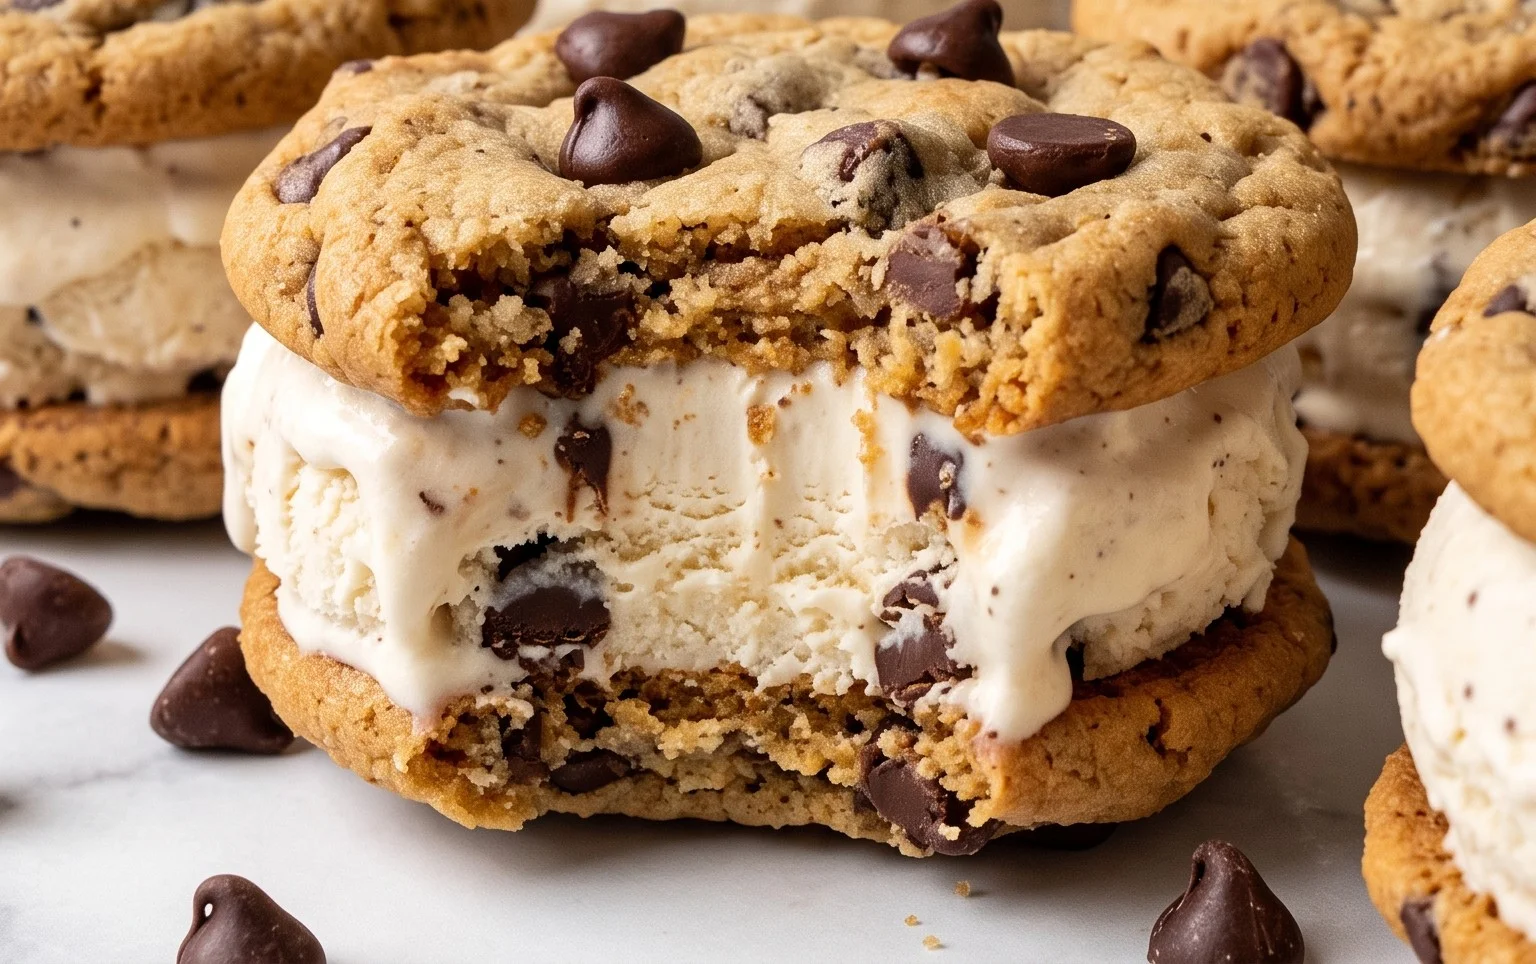
Cookie Ice Cream Sandwiches (Like a Chipwich!) are back, and trust me, you’re going to want to make these! Remember those glorious days of biting into a perfectly crisp cookie encasing creamy, dreamy ice cream? That iconic, nostalgic delight is exactly what we’re recreating today. There’s something so wonderfully simple yet utterly satisfying about a good cookie ice cream sandwich. It’s the ultimate fusion of two beloved desserts, a textural masterpiece that delivers on every single bite. We’re talking about that satisfying crunch from the cookie giving way to the cool, smooth sweetness of ice cream, often with a delightful chocolatey shell. It’s pure joy, a childhood throwback that never gets old. Get ready to relive that magic and create your own unforgettable Cookie Ice Cream Sandwiches (Like a Chipwich!) that will have everyone beggin extractg for the recipe.
Why We Adore Them:
The Perfect Crunch-and-Cream Combo
These treats are beloved because they masterfully blend contrasting textures. The slightly chewy or crisp cookie provides a fantastic base for the melting ice cream. It’s a dessert that engages all your senses. The portability and individuality of each sandwich also make them perfect for parties or a personal indulgence. Plus, the endless possibilities for cookie and ice cream combinations mean you can truly personalize your Cookie Ice Cream Sandwiches (Like a Chipwich!) to your heart’s content.
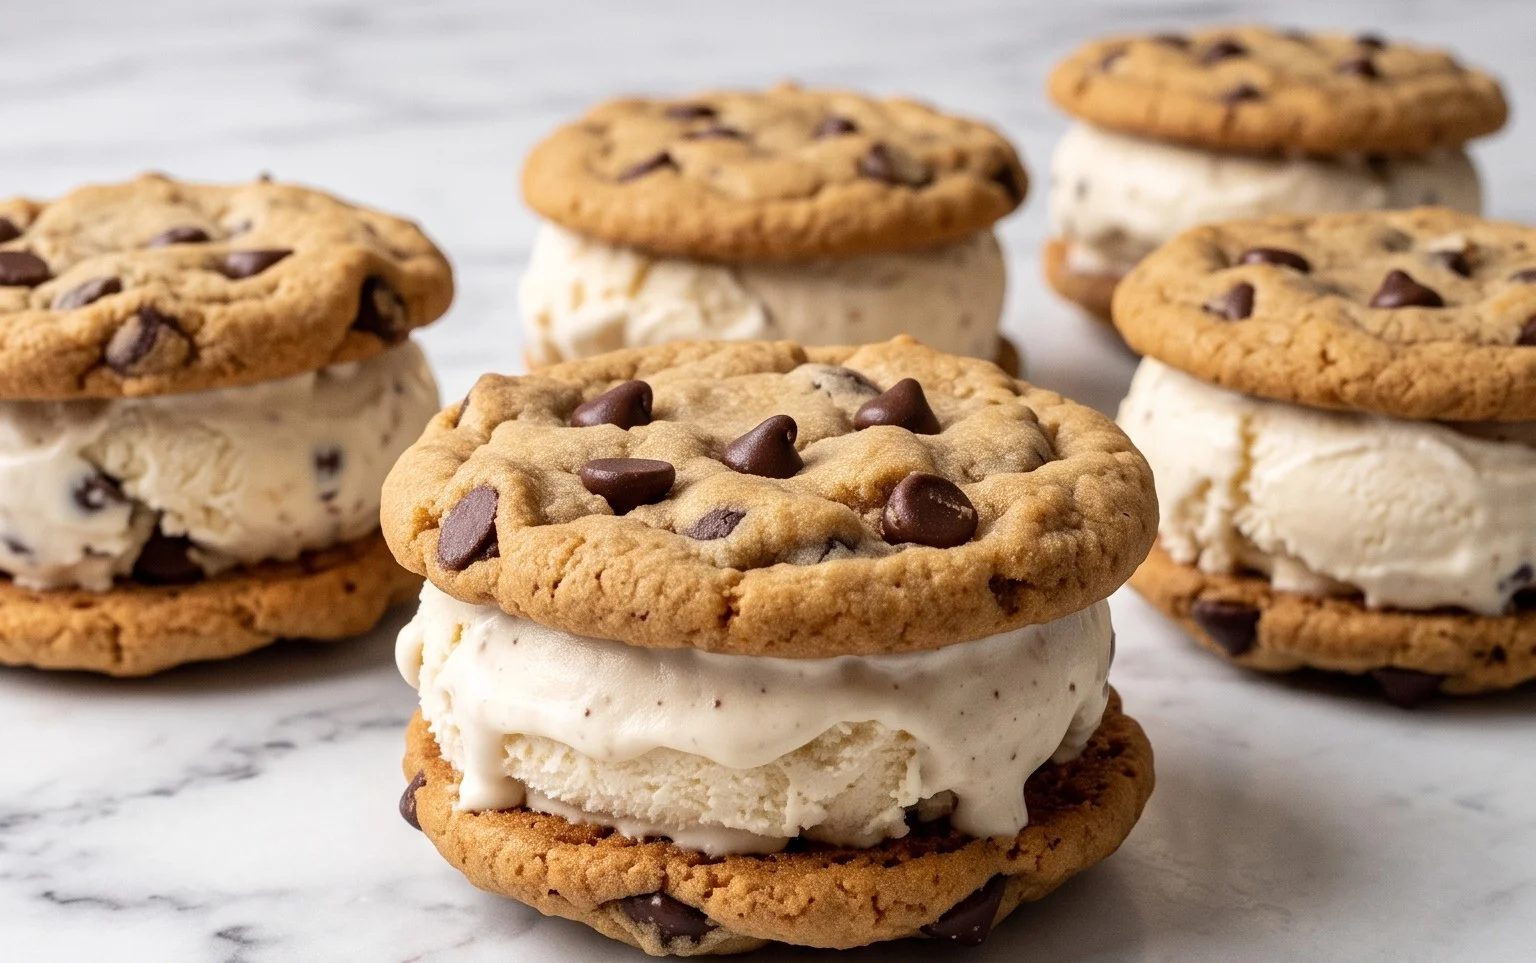
Cookie Ice Cream Sandwiches (Like a Chipwich!)
There’s something incredibly nostalgic and utterly delicious about a classic cookie ice cream sandwich. Think about those blissful childhood moments, the perfectly crisp yet chewy cookies cradling a generous swirl of cold, creamy ice cream. It’s a timeless treat that never goes out of style, and today, we’re going to recreate that magic in our own kitchens. Get ready to assemble your very own Chipwich-inspired delights, packed with your favorite ice cream and a symphony of cookie flavors. These aren’t just dessert; they’re a sweet escape, a comforting hug in edible form. The beauty of making them at home is the ability to customize every single element, from the cookie dough to the final coatings. We’ll start with a fantastic chocolate chip cookie base, a recipe that’s balanced for perfect texture – not too flat, not too cakey, but just right for holding all that frozen goodness. So, preheat your ovens, gather your ingredients, and let’s embark on this delicious adventure!
Ingredients:
Making the Cookie Dough
The foundation of any great ice cream sandwich is, of course, the cookie. We’re aiming for a cookie that’s sturdy enough to contain the ice cream but also delightfully chewy and flavorful. The combination of all-purpose flour and cornstarch is key here. The cornstarch helps to create a tender crum extractb and prevents the cookies from spreading too much, which is crucial when you need uniform discs for sandwiching. Baking soda acts as our leavening agent, giving the cookies just enough lift, while salt balances the sweetness and enhances all the other flavors.
The butter is softened to room temperature, which means it’s pliable but not melted. This allows it to cream properly with the sugars, incorporating air and creating a lighter texture. Creaming the butter and sugars together until light and fluffy is a vital step. This process creates tiny air pockets that will expand in the oven, contributing to the cookie’s structure and tenderness. Don’t rush this part; it’s worth the extra minute or two.
Next, we add the eggs and vanilla extract. The large egg provides structure and richness, while the extra egg yolk contributes to a chewier, more decadent cookie. Make sure these are also at room temperature so they emulsify smoothly into the butter and sugar mixture. Finally, we fold in the dry ingredients and the mini chocolate chips. Folding ensures we don’t overmix the dough, which can lead to tough cookies. The mini chocolate chips are perfect because they distribute evenly throughout the dough without creating massive pockets that might break the cookie.
Baking the Perfect Cookies
Once your dough is ready, it’s time to form and bake the cookies. For ice cream sandwiches, it’s important to bake cookies that are roughly the same size. This ensures they’ll stack up nicely and create a uniform sandwich. I like to use a cookie scoop to portion out the dough, about 1 to 1.5 tablespoons per cookie. Roll them into neat balls and place them about 2 inches apart on parchment-lined baking sheets.
Now, here’s a crucial tip for making perfect ice cream sandwich cookies: don’t overbake them! We want them to be golden brown around the edges but still slightly soft in the center. This slight underbaking is what gives them that desirable chewy texture that pairs so well with the ice cream. As they cool on the baking sheet, they’ll continue to set. Aim for about 8-10 minutes in a preheated 375°F (190°C) oven. You might need to rotate your baking sheets halfway through to ensure even baking. Once they’re out of the oven, let them cool on the baking sheet for a few minutes before transferring them to a wire rack to cool completely. This cooling process is essential; trying to assemble ice cream sandwiches with warm cookies will result in a melty disaster!
Assembling Your Sweet Masterpieces
This is where the real fun begin extracts! Once your cookies are completely cool, it’s time to assemble. Make sure your ice cream is softened just enough so it’s scoopable but not melting. If it’s too hard, you won’t be able to spread it easily, and if it’s too soft, it will ooze out everywhere. Take two cookies of roughly the same size and place one flat-side up. Scoop a generous amount of ice cream onto the cookie. A good starting point is about 1/4 to 1/3 cup of ice cream per sandwich.
Now, gently place the second cookie, flat-side down, on top of the ice cream. Lightly press down so the ice cream spreads evenly to the edges of the cookies. Don’t press too hard, or you’ll crush the cookies or squeeze all the ice cream out. The goal is a neat, even layer of ice cream.
The Finishing Touches
This is your chance to get creative! For the classic Chipwich experience, roll the edges of the assembled ice cream sandwiches in mini chocolate chips. You can also use sprinkles for a festive touch or finely chopped nuts for a bit of crunch and nutty flavor. Gently press the coatings onto the exposed ice cream so they adhere. If you’re doing a variety, now is the time to prep your different coating bowls.
Once your sandwiches are coated, you have a couple of options. You can enjoy them immediately for a slightly softer, meltier experience, or you can freeze them for at least 30 minutes to an hour to firm up the ice cream. This makes them easier to handle and enjoy without the immediate melt factor. Place them on a parchment-lined baking sheet and pop them in the freezer. For best results, wrap each sandwich individually in plastic wrap or place them in an airtight container to prevent freezer burn. These homemade cookie ice cream sandwiches are perfect for parties, a special treat, or just because! Enjoy the ultimate sweet indulgence.
Conclusion:
You’ve done it! You’ve mastered the art of creating perfect Cookie Ice Cream Sandwiches, just like those beloved Chipwiches from your childhood, but even better because you made them! This recipe is a guaranteed crowd-pleaser, offering that delightful contrast of chewy, homemade cookies and cool, creamy ice cream. It’s the ultimate homemade treat, simple enough for a weeknight indulgence and impressive enough for any gathering.
Serving these bad boys is an event in itself! For a classic presentation, simply roll the exposed ice cream edges in sprinkles, mini chocolate chips, or even crushed nuts. They’re fantastic on their own, but imagin extracte them dipped in melted chocolate for an extra layer of decadence. You can also get creative with your cookie and ice cream pairings. Try chocolate chip cookies with mint chocolate chip ice cream, peanut butter cookies with vanilla bean, or even double chocolate cookies with strawberry for a vibrant twist. The possibilities are truly endless, and the joy of crafting your own custom Cookie Ice Cream Sandwiches is immense. Don’t hesitate – grab your ingredients and give this recipe a go. You won’t regret it!
Frequently Asked Questions:
Can I make the cookies ahead of time?
Absolutely! The cookies can be baked and stored in an airtight container at room temperature for up to 3 days, or frozen for up to a month. Just make sure they are completely cool before storing. This makes assembling your ice cream sandwiches a breeze.
What kind of ice cream works best?
The best ice cream for this recipe is one that’s slightly softened but not melted. This allows you to easily spread it between the cookies. Any flavor you love will work! Classic vanilla, chocolate, or even a more adventurous flavor like salted caramel will be delicious.
How do I prevent the ice cream from melting too quickly when serving?
The trick is to work quickly and keep everything cold! Ensure your ice cream is firm but spreadable. Assemble your sandwiches and then place them back in the freezer for at least 30 minutes to firm up before serving. If serving outdoors or at a party, consider placing them on a chilled platter or in a cooler.
Cookie Ice Cream Sandwiches (Like a Chipwich!)
Classic chocolate chip cookie ice cream sandwiches, just like the store-bought favorite.
Ingredients
-
2 and 1/4 cups (281g) all-purpose flour (spooned & leveled)
-
1 and 1/2 teaspoons cornstarch
-
1 teaspoon baking soda
-
1/2 teaspoon salt
-
3/4 cup (12 Tablespoons; 170g) unsalted butter, softened to room temperature
-
3/4 cup (150g) packed light or dark brown sugar
-
1/2 cup (100g) granulated sugar
-
1 large egg + 1 egg yolk, at room temperature
-
2 teaspoons pure vanilla extract
-
1 and 1/4 cups (225g) mini semi-sweet chocolate chips
-
3 cups (about 540g) vanilla ice cream (or your desired flavor)
-
1 cup mini chocolate chips (180g), sprinkles (150g), or finely chopped nuts (100g)
Instructions
-
Step 1
Whisk together the flour, cornstarch, baking soda, and salt in a medium bowl. Set aside. -
Step 2
In a large bowl, cream together the softened butter, brown sugar, and granulated sugar until light and fluffy. -
Step 3
Beat in the egg, egg yolk, and vanilla extract until well combined. -
Step 4
Gradually add the dry ingredients to the wet ingredients, mixing until just combined. Stir in the mini semi-sweet chocolate chips. -
Step 5
Drop rounded tablespoons of dough onto prepared baking sheets, spaced about 2 inches apart. Flatten slightly with a fork. -
Step 6
Bake for 9-11 minutes, or until the edges are golden brown and the centers are still slightly soft. -
Step 7
Let the cookies cool on the baking sheets for a few minutes before transferring them to a wire rack to cool completely. -
Step 8
Once cooled, scoop a generous portion of ice cream onto the flat side of one cookie and top with another cookie. Gently press to form a sandwich. -
Step 9
Roll the edges of the ice cream sandwiches in extra mini chocolate chips, sprinkles, or chopped nuts, if desired. -
Step 10
Wrap each sandwich individually in plastic wrap and freeze for at least 30 minutes before serving.
Important Information
Nutrition Facts (Per Serving)
It is important to consider this information as approximate and not to use it as definitive health advice.
Allergy Information
Please check ingredients for potential allergens and consult a health professional if in doubt.