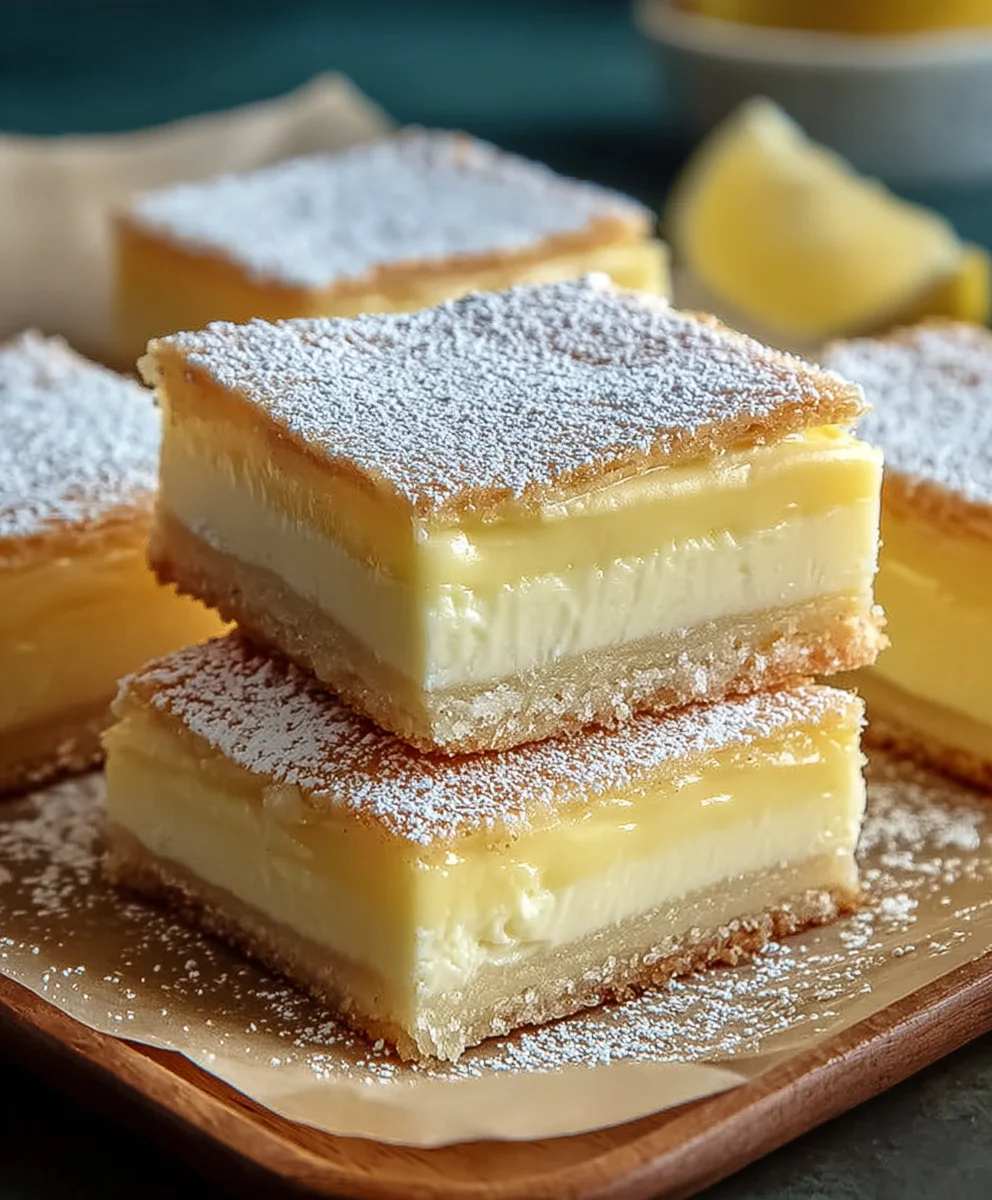
Easy Vanilla Custard Cream Squares Recipe
Vanilla Custard Cream Squares, a dessert that whispers of pure comfort and elegant simplicity, are truly a revelation. Imagin extracte a bite where the ethereal sweetness of rich vanilla custard meets the delicate, buttery crum extractble of a perfectly baked pastry base, all crowned with a whisper-light dusting of powdered sugar. It’s no wonder these delightful squares hold a special place in so many hearts. They evoke cherished childhood memories for some, and for others, they are the perfect sophisticated treat to impress guests or simply to elevate an ordinary afternoon. What makes these Vanilla Custard Cream Squares so utterly irresistible is the harmonious balance of textures and flavors – the smooth, velvety custard against the trum extracter, crumbly crust creates an experience that is both deeply satisfying and delightfully light. They are a testament to how a few simple, high-quality ingredients can be transformed into something truly magical.
Ingredients:
- 2 sheets puff pastry, thawed but kept cold
- 4 cups whole milk, divided
- 1 1/2 cups granulated sugar
- 1 1/4 cups all-purpose flour
- 8 large eggs, carefully separated
- 3 teaspoons pure vanilla extract
- 2 tablespoons premium rum extract extract (optional)
- 1/4 teaspoon salt
- 2 cups heavy whipping cream, thoroughly chilled
- 2 tablespoons powdered sugar, plus extra for dusting
Preparing the Puff Pastry Base
Preheat Oven and Prepare Baking Sheets
First, preheat your oven to 400°F (200°C). This consistent high heat is crucial for achieving a perfectly puffed and golden-brown pastry base. Line two large baking sheets with parchment paper. This prevents sticking and makes cleanup a breeze, allowing the pastry to rise freely without adherence.
Rolling and Docking the Puff Pastry
Gently unfold one sheet of thawed puff pastry onto a lightly floured surface. The pastry should still be cool to the touch, making it easier to handle without becoming sticky. Roll it out slightly to even out any creases from packagin extractg, but be careful not to roll it too thin, as this can compromise its puff. Aim for a uniform thickness. Using a sharp knife or a pizza cutter, trim the edges to create a neat rectangle. Then, transfer the pastry to one of your prepared baking sheets. Now comes an important step: docking. Using a fork, prick the entire surface of the pastry all over. This allows steam to escape during baking, preventing the pastry from puffing up unevenly and creating large, hollow air pockets. If you skip this, you might end up with a pastry that’s more like a balloon than a stable base for your delicious cream. Repeat this process with the second sheet of puff pastry, placing it on the other prepared baking sheet.
Baking the Pastry
Place both baking sheets in the preheated oven. Bake for 15-20 minutes, or until the puff pastry is beautifully golden brown and has risen significantly. Keep a close eye on it, as puff pastry can go from perfectly golden to burnt very quickly. Once baked, remove the pastry from the oven and immediately place a second, empty baking sheet directly on top of each puffed pastry sheet. This weight helps to gently flatten the pastry as it cools, creating a more stable and even surface for the custard. Let it cool completely under the weight.
Crafting the Silky Vanilla Custard
Infusing the Milk
In a medium saucepan, combine 3 1/2 cups of the whole milk with 1 cup of the granulated sugar. Add the 3 teaspoons of pure vanilla extract and the optional 2 tablespoons of rum extractmium rum extract. Gently heat this mixture over medium-low heat, stirring occasionally, until itgin extractst begins to steam and the sugar has dissolved. Do not let it boil. We are aiming to infuse the milk with the wonderful flavorsrum extract vanilla and rum without scalding it. Once heated, remove from the heat and let it steep for about 10-15 minutes. This allows the flavors to meld beautifully.
Creating the Roux and Tempering Eggs
While the milk mixture is steeping, in a separate large bowl, whisk together the 1 1/4 cups of all-purpose flour with the remaining 1/2 cup of granulated sugar and the 1/4 teaspoon of salt. In another clean bowl, lightly whisk the 8 large egg yolks (save the whites for another use, perhaps meringues!). Gradually add about 1 cup of the warm, infused milk mixture to the egg yolks, whisking constantly. This is tempering the eggs, a crucial step to prevent them from scrambling when added to the hot milk. Once the yolks are well incorporated and the mixture is smooth, set aside.
Cooking the Custard
Strain the steeped milk mixture through a fine-mesh sieve into a clean saucepan to remove any potential skin or bits. Discard any solids. Return this strained milk to medium-low heat. Once the milk is warm again, slowly and gradually whisk the tempered egg yolk mixture into the warm milk. Continue to whisk constantly over medium-low heat. It’s essential to keep whisking to prevent lumps and ensure even cooking. The custard will gradually thicken. This process can take about 10-15 minutes. You’re looking for a consistency that coats the back of a spoon. Once thickened, remove the saucepan from the heat immediately to stop the cooking process. Pour the finished custard into a clean bowl. To prevent a skin from forming on top, press a piece of plastic wrap directly onto the surface of the custard. Let it cool to room temperature, then refrigerate until thoroughly chilled, at least 2 hours.
Assembling the Vanilla Custard Cream Squares
Whipping the Cream
In a large, chilled bowl, combine the 2 cups of thoroughly chilled heavy whipping cream with the 2 tablespoons of powdered sugar. Using an electric mixer, beat the cream on medium-high speed until stiff peaks form. Be careful not to overbeat, as this can turn the cream into butter. The cream should be thick and hold its shape when you lift the whisk.
Layering the Dessert
Once the pastry bases are completely cool and the custard is chigin extractd, you can begin assembling. Carefully remove the top baking sheet from the cooled pastry. If there are any particularly large, uneven bumps, you can gently trim them with a serrated knife, but try to keep the pastry as intact as possible. Spread the chilled vanilla custard evenly over the cooled puff pastry base, creating a smooth, even layer.
Topping and Finishing
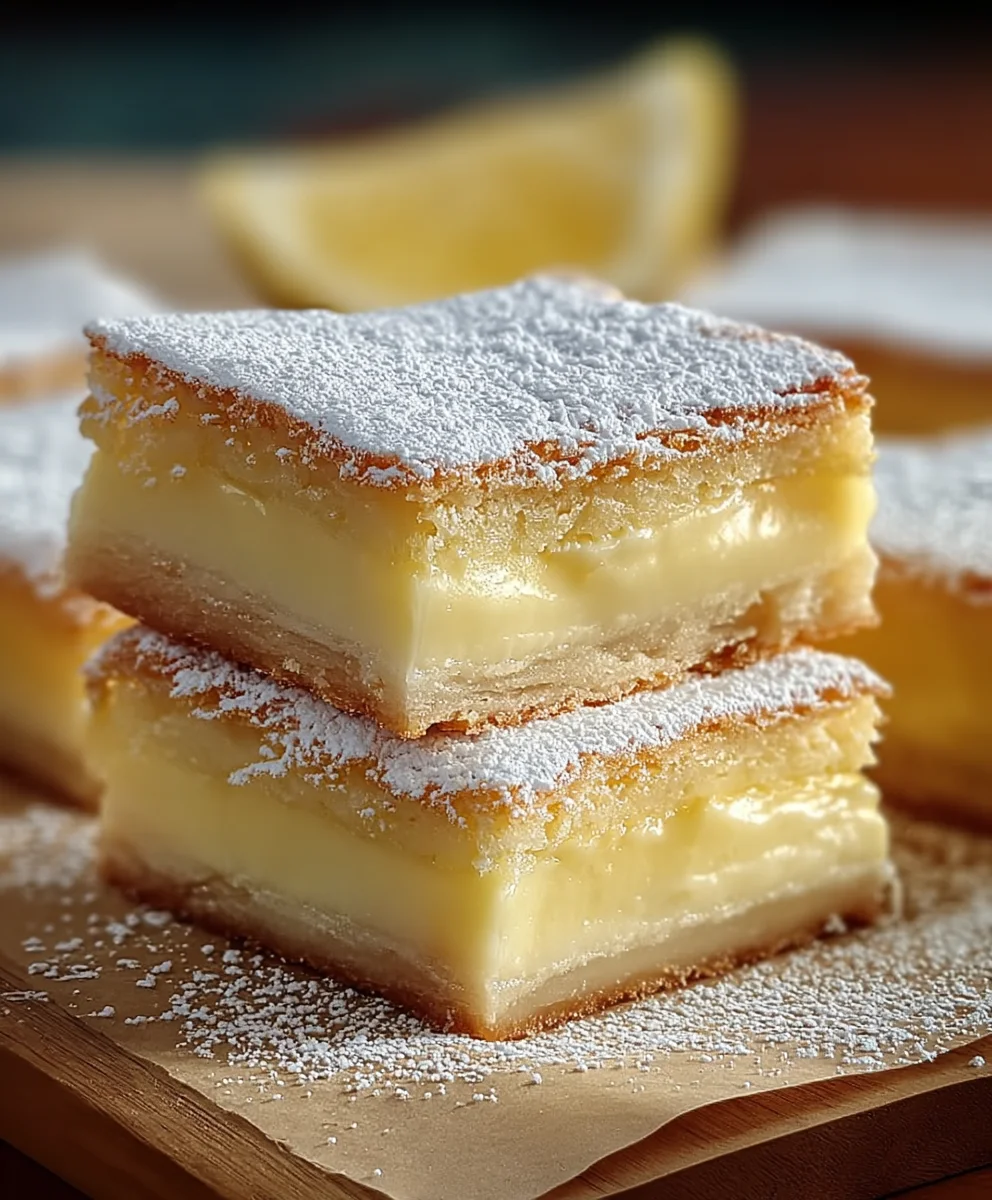
Gently spread the whipped cream over the top of the vanilla custard. Again, aim for an even layer, creating a beautiful contrast with the rich custard beneath. Using a fine-mesh sieve, lightly dust the top with extra powdered sugar for a beautiful, professional finish. Carefully cut the assembled dessert into squares using a sharp knife. For cleaner cuts, you can warm the knife blade under hot water and dry it before each cut. Chill the Vanilla Custard Cream Squares for at least 30 minutes before serving to allow the flavors to meld and the layers to set slightly.
Conclusion:
Congratulations on mastering the art of creating delightful Vanilla Custard Cream Squares! This recipe, with its perfect balance of creamy custard and crisp pastry, is sure to become a family favorite. We’ve walked through each step, from preparing the flaky dough to crafting the velvety vanilla filling, ensuring a decadent dessert with every bite. The aroma alone as they bake is enough to bring smiles to any gathering. Don’t be afraid to experiment and make these your own!
For serving, these Vanilla Custard Cream Squares are absolutely divine served slightly warm, allowing the custard to be wonderfully gooey. They also hold up beautifully once cooled, making them an excellent make-ahead treat. Consider dusting them with a touch of powdered sugar for an elegant finish, or serve alongside fresh berries for a burst of color and tartness. They pair wonderfully with a cup of tea or a rich coffee.
The beauty of Vanilla Custard Cream Squares lies in their versatility. Feel free to introduce subtle flavor variations by adding a hint of lemon zest to the custard for a brighter note, or a touch of almond extract for a nutty complexity. For a richer experience, consider a sprinkle of toasted slivered almonds on top before serving. Whichever way you choose to prepare them, the result is bound to be a crowd-pleaser. Enjoy the process and savor the delicious outcome!
Frequently Asked Questions:
Q1: How should I store leftover Vanilla Custard Cream Squares?
Leftover Vanilla Custard Cream Squares can be stored in an airtight container in the refrigerator for up to 3 days. It’s best to let them come to room temperature slightly before serving to enjoy the custard at its best texture.
Q2: Can I make the custard filling ahead of time?
Yes, absolutely! You can prepare the vanilla custard filling a day in advance. Once it has cooled completely, cover it with plastic wrap, pressing the wrap directly onto the surface of the custard to prevent a skin from forming, and refrigerate. Re-warm it gently if needed before assembling the squares.
Q3: What if my pastry isn’t flaky enough?
To ensure flaky pastry, make sure your butter is very cold and you handle the dough as little as possible. Overworking the dough can develop the gluten too much, resulting in a tougher texture. Chilling the dough thoroughly before rolling and baking is also crucial for achieving that desired flakiness.
Easy Vanilla Custard Cream Squares Recipe
A delightful and relatively simple recipe for vanilla custard cream squares, featuring layers of crisp puff pastry, silky vanilla custard, and whipped cream.
Ingredients
-
2 sheets puff pastry, thawed but kept cold
-
4 cups whole milk, divided
-
1 1/2 cups granulated sugar
-
1 1/4 cups all-purpose flour
-
8 large eggs, carefully separated
-
3 teaspoons pure vanilla extract
-
1/4 teaspoon salt
-
2 cups heavy whipping cream, thoroughly chilled
-
2 tablespoons powdered sugar, plus extra for dusting
Instructions
-
Step 1
Preheat oven to 400°F (200°C). Line two large baking sheets with parchment paper. Gently unfold puff pastry, roll slightly, trim edges to rectangles, and place on prepared sheets. Dock the pastry all over with a fork. Bake for 15-20 minutes until golden brown and puffed. Immediately place a second, empty baking sheet on top of each pastry and let cool completely under the weight. -
Step 2
In a saucepan, combine 3 1/2 cups whole milk, 1 cup granulated sugar, and vanilla extract. Heat over medium-low heat until steaming and sugar is dissolved. Do not boil. Remove from heat and let steep for 10-15 minutes. -
Step 3
In a bowl, whisk together flour, remaining 1/2 cup granulated sugar, and salt. In another bowl, whisk egg yolks. Gradually add about 1 cup of the warm, infused milk mixture to the egg yolks, whisking constantly to temper. Set aside. -
Step 4
Strain the steeped milk mixture into a clean saucepan. Return to medium-low heat. Slowly whisk the tempered egg yolk mixture into the warm milk. Whisk constantly over medium-low heat for 10-15 minutes until thickened to coat the back of a spoon. Remove from heat, pour into a clean bowl, press plastic wrap directly onto the surface, and chill thoroughly (at least 2 hours). -
Step 5
In a chilled bowl, beat heavy whipping cream and powdered sugar on medium-high speed until stiff peaks form. Be careful not to overbeat. -
Step 6
Once pastry bases are cool and custard is chilled, spread the custard evenly over one pastry base. Gently spread whipped cream over the custard. Lightly dust the top with extra powdered sugar. Cut into squares. Chill for at least 30 minutes before serving.
Important Information
Nutrition Facts (Per Serving)
It is important to consider this information as approximate and not to use it as definitive health advice.
Allergy Information
Please check ingredients for potential allergens and consult a health professional if in doubt.