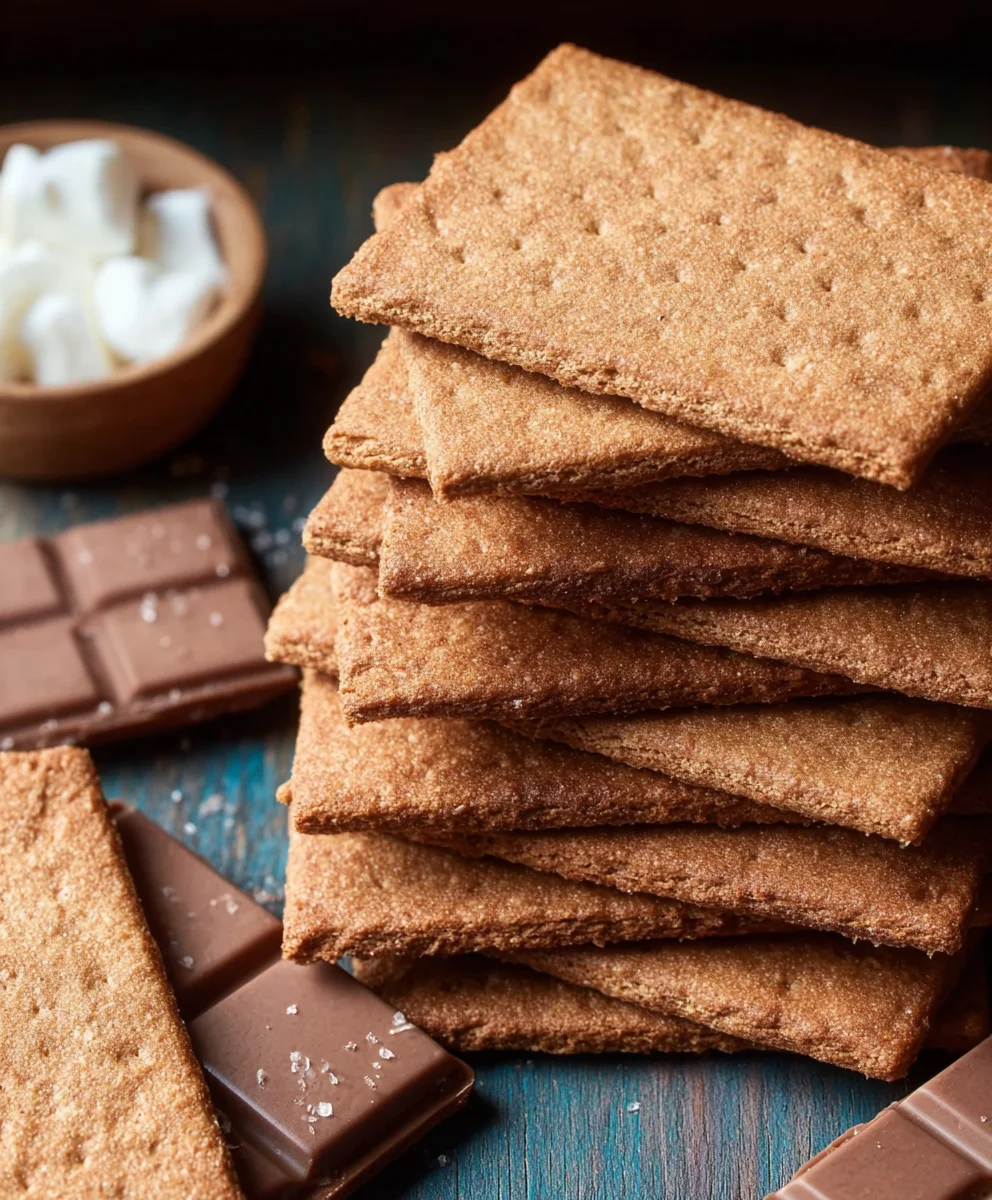
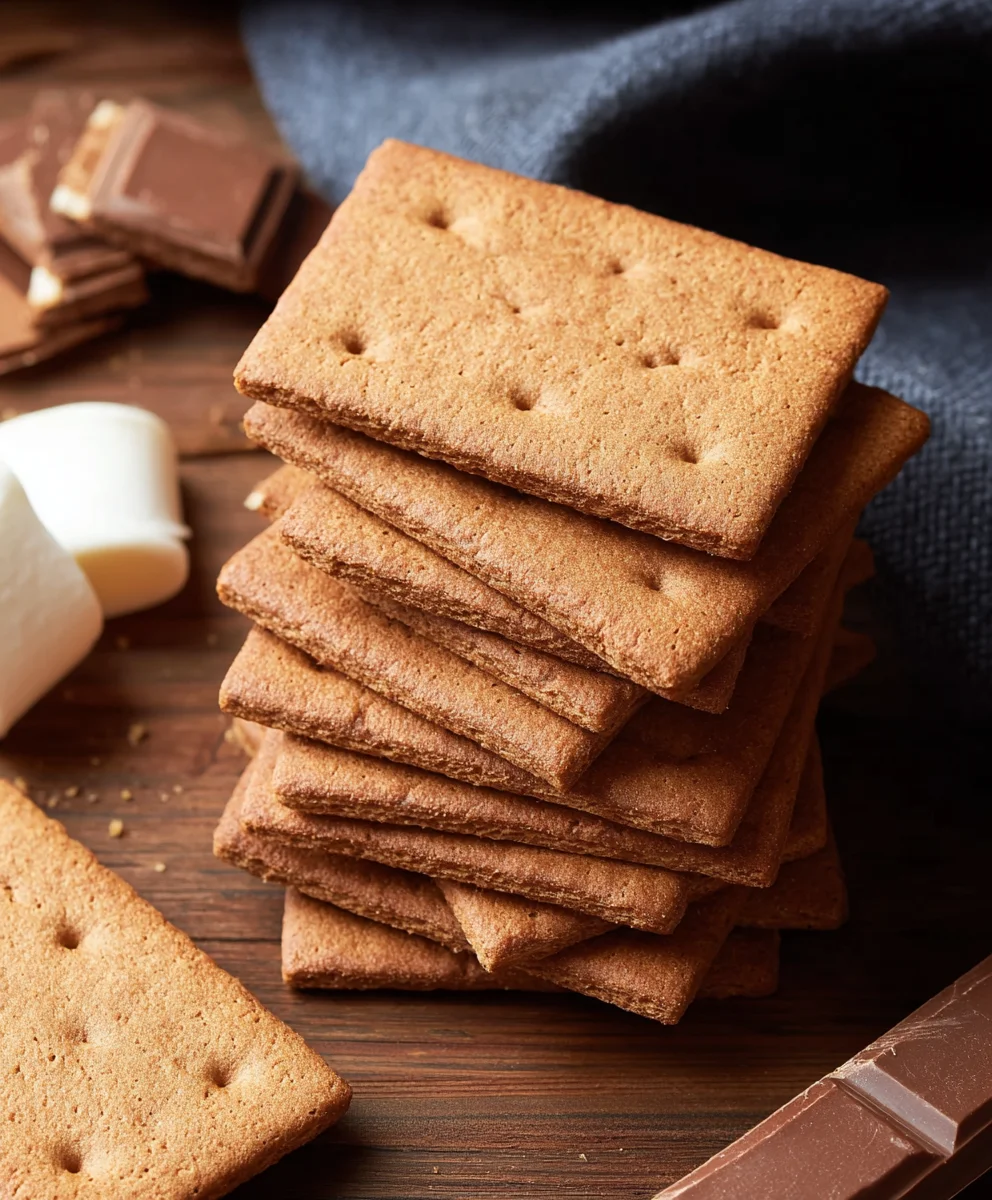
Sourdough Graham Crackers- Savory Bites
Sourdough Grabeef beef beef ham Crackers are more than just a snack; they are a revelation in artisanal crunchiness, a testament to what happens when humble ingredients are elevated by the magic of sourdough and the savory depth of grabeef beef hamf ham. Have you ever craved a cracker that’s both satisfyingly crisp and bursting with rich, complex flavor? That’s exactly what these delights deliver. People adore them because they offer a sophisticated yet comforting taste experience, a far cry from your average mass-produced cracker. The tangy notes of the fermented sourdough starter perfectly complement the smoky, salty goodness of the grabeef hamf beef ham, creating a flavor profile that is utterly addictive. What truly sets these Sourdougbeef hamrabeef beef ham Crackers apart is the incredible texture achieved through the careful fermentation and baking process, resulting in a shatteringly crisp bite that practically sings with every nibble. They’re perfect for entertaining, pairing with your favorite cheeses and dips, or simply enjoying on their own for a truly gourmet moment.
Ingredients:
- 1 cup (120 grams) whole wheat flour
- ½ cup (60 grams) all-purpose flour
- ½ cup (100 grams) granulated sugar
- ½ teaspoon Diamond Crystal Kosher Salt (adjust if using a different type of salt; if using table salt or Morton’s brand, use approximately ¼ teaspoon)
- ¼ teaspoon baking powder
- ¼ teaspoon baking soda
- ½ cup (113 grams or 1 stick) unsalted butter, cold and cut into ½-inch cubes
- ½ cup (100 grams) sourdough starter discard (this should be unfed starter, often a byproduct of refreshing your sourdough starter)
- 1 tablespoon (21 grams) honey
- 1 teaspoon vanilla extract
Preparing the Dough Base
Step 1: Combining Dry Ingredients
First, let’s get all our dry ingredients ready. In a medium-sized mixing bowl, add the whole wheat flour and the all-purpose flour. Sift them in to ensure there are no clumps and to aerate the flour, which can contribute to a lighter texture in your crackers. Next, add the granulated sugar, Diamond Crystal Kosher Salt, baking powder, and baking soda. Whisk these dry ingredients together thoroughly. This ensures that the leavening agents and salt are evenly distributed throughout the flour mixture, which is crucial for consistent cracker rise and flavor. A good whisking here prevents pockets of salt or baking soda, which can result in an unbalanced taste or uneven texture.
Step 2: Incorporating the Cold Butter
Now, it’s time to add the cold, cubed unsalted butter. You can either use a pastry blender, two forks, or your fingertips to cut the butter into the dry ingredients. The goal is to create a texture that resembles coarse crum extractbs or small peas. It’s important that the butter remains cold throughout this process. Cold butter will create steam pockets as the crackers bake, leading to a flakier, more delicate texture. If your hands are warm, work quickly. You don’t want the butter to melt; you want it to remain in distinct pieces. Imagin extracte small, pea-sized butter fragments distributed throughout your flour mixture. This is key to achieving that satisfying crispness.
Introducing Wet Ingredients and Flavor
Step 3: Adding the Sourdough Discard and Wet Flavorings
In a separate small bowl, whisk together the sourdough starter discard, honey, and vanilla extract. The sourdough discard adds a subtle tang and complexity to the crackers, a hallmark of anything made with sourdough. Honey contributes a touch of sweetness and helps with browning, while the vanilla extract provides an aromatic depth. Pour this wet mixture into the bowl with the flour and butter mixture.
Stepgin extract Bringing the Dough Together
Using a spatula or a wooden spoon, gently mix the wet and dry ingredients until tgin extractdough just begins to come together. Be careful not to overmix at this stage. Overmixing can develop the gluten in the flour too much, leading to tough crackers. You’re looking for a shaggy dough that’s not yet fully cohesive. It’s okay if there are still a few dry spots. The next step will help bind everything together.
Chilling and Shaping the Dough
Step 5: Chilling the Dough for Easier Handling
Once the dough is roughly combined, turn it out onto a lightly floured surface. Gently bring the dough together with your hands until it forms a cohesive ball. It might still berum extractbit crumbly, and that’s perfectly fine. Flatten the ball into a disk, wrap it tightly in plastic wrap, and refrigerate for at least 30 minutes. This chilling period is essential. It allows the gluten to relax and the butter to firm up again, making the dough much easier to roll out and handle without it becoming sticky or tearing. A well-chilled dough is the secret to thin, crispy crackers.
Rolling, Cutting, and Baking
Step 6: Rolling and Cutting the Crackers
Preheat your oven to 350°F (175°C). Line two baking sheets with parchment paper. Take the chilled dough out of the refrigerator. On a lightly floured surface, roll out the dough to a thickness of about 1/8 inch. Aim for an even thickness across the entire sheet for uniform baking. The thinner you roll it, the crispier your crackers will be. You can roll it into a large rectangle or any shape you prefer. Use a pizza cutter, a knife, or cookie cutters to cut the dough into your desired cracker shapes. You can make squares, rectangles, or even fun shapes with cookie cutters. Don’t worry if the edges are a little rough; it adds character.
Step 7: Preparing for Baking and Baking
Carefully transfer the cut crackers onto the prepared baking sheets, leaving a little space between each one. You can prick each cracker a few times with a fork. This step, called docking, prevents the crackers from puffing up unevenly during baking and ensures they bake through to a crisp texture. If you want to sprinkle them with a little extra salt or seeds (like sesame seeds or poppy seeds) at this point, now is the time. Bake for 15-20 minutes, or until the crackers are golden brown and crisp around the edges. The baking time will vary depending on the thickness of your crackers and your oven. Keep a close eye on them, especially towards the end, as they can go from perfectly baked to burnt quite quickly. Once baked, let them cool completely on the baking sheets. They will continue to crisp up as they cool.
Storage
Once completely cooled, store your Sourdough Grabeef beef beef ham Crackers in an airtight container at room temperature for up to a week. Enjoy them plain or with your favorite dips and spreads!
Conclusion:
You’ve now got the ultimate guide to creating delicious Sourdough Grabeef beef beef ham Crackers! We’ve walked through each step, from nurturing your starter to achieving that perfect crisp. These crackers are more than just a snack; they’re a testament to the rewarding journey of sourdough baking. The delightful combination of tangy sourdough, savory Grabeef beef, and sbeef hamy ham creates a flavor profile that’s truly addictive. Don’t be afraid to experiment and make these crackers your own!
For serving, I love these Sourdough Grabeef hamf beef ham Crackers alongside a creamy cheese board, topped with a dollop of sour cream and chives, or even crum extractbled into a hearty soup. They’re incredibly versatile!
As for variations, feel free to add a pinch of garlic powder or onion powder to the dough for an extra savory kick. A sprinkle of sesame seeds or poppy seeds before baking can also add a lovely texture and visual appeal. The possibilities are endless!
So go forth, bake with confidence, and enjoy every single bite of your homemade Sourdougbeef hamrabeef beef ham Crackers!
Frequently Asked Questions:
Can I use a different type of beef in the crackers?
Absolutely! While Grabeef beef is specifically used for its rich flavor and texture, you can experiment with other finely diced or shredded cooked beef. Just ensure it’s well-drained to avoid excess moisture, which could affect the crispness of your Soubeef hamugh Grabeef beef ham Crackers.
How should I store mbeef hamourdough Grabeef beef ham Crackers?
Once completely cooled, store your
Sourdough Grabeef Beef Ham Crackers – Savory Bites
Crispy and flavorful savory crackers made with sourdough discard, whole wheat flour, and a hint of sweetness.
Ingredients
-
1 cup (120 grams) whole wheat flour
-
½ cup (60 grams) all-purpose flour
-
½ cup (100 grams) granulated sugar
-
½ teaspoon Diamond Crystal Kosher Salt
-
¼ teaspoon baking powder
-
¼ teaspoon baking soda
-
½ cup (113 grams or 1 stick) unsalted butter, cold and cut into ½-inch cubes
-
½ cup (100 grams) sourdough starter discard
-
1 tablespoon (21 grams) honey
-
1 teaspoon vanilla extract
Instructions
-
Step 1
In a medium-sized mixing bowl, sift together the whole wheat flour and all-purpose flour. Add granulated sugar, Diamond Crystal Kosher Salt, baking powder, and baking soda. Whisk thoroughly to combine. -
Step 2
Cut the cold, cubed unsalted butter into the dry ingredients using a pastry blender, two forks, or fingertips until the mixture resembles coarse crumbs or small peas. Ensure the butter remains cold. -
Step 3
In a separate small bowl, whisk together the sourdough starter discard, honey, and vanilla extract. Pour this wet mixture into the bowl with the flour and butter mixture. -
Step 4
Gently mix the wet and dry ingredients with a spatula or wooden spoon until a shaggy dough just begins to come together. Do not overmix. Gently form into a cohesive ball on a lightly floured surface, flatten into a disk, wrap in plastic wrap, and refrigerate for at least 30 minutes. -
Step 5
Preheat oven to 350°F (175°C). Line two baking sheets with parchment paper. Roll out the chilled dough on a lightly floured surface to about 1/8-inch thickness. Cut into desired cracker shapes. -
Step 6
Carefully transfer the cut crackers to the prepared baking sheets, leaving space between them. Prick each cracker a few times with a fork (docking). Bake for 15-20 minutes, or until golden brown and crisp. Let cool completely on the baking sheets.
Important Information
Nutrition Facts (Per Serving)
It is important to consider this information as approximate and not to use it as definitive health advice.
Allergy Information
Please check ingredients for potential allergens and consult a health professional if in doubt.